my
myCoving Installation Cost
At a Glance
- The average cost of coving installation is around £340.
- The job will take approximately 1 to 3 days to complete.
- Simple calculator for you to quickly estimate coving costs.
- Typical costs for coving installations by type and size of room.
- How long this job takes and what drives prices you're quoted up.
- How to find a local coving installer using MyJobQuote.
Get free estimates
Are you a trade? Get more work today!
How much does it cost to install coving?
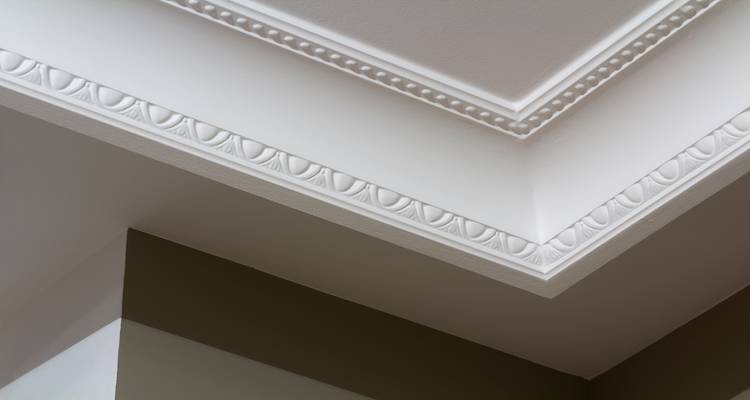
Coving is a stylish way to add character and a polished finish to any room.
Whether you go for lightweight modern coving or traditional decorative plaster, there’s pretty much an option to suit every home.
In this guide, we'll explore the cost of different types of coving, the process, as well as the price for professional installation.
If you want to add ceiling coving to your space, the best way to get started is by requesting a personalised quote tailored to your home and design preferences.
Are you ready for a quote?
If so, we have a wide range of local coving specialists ready to offer you a free quote!
On average, the cost to install coving typically lies anywhere between £250 and £450.
£340
Table of Contents
- How Much Does Coving Installation Cost?
- Factors That Impact Coving Installation Costs
- Additional Coving Installation Costs
- Labour Cost of Coving & Timescales
- What's Involved in Installing Coving?
- Building Regulations & Planning Permission for Coving Installation
- Checklist: Hiring Coving Installers in the UK
- FAQs
Coving Cost Calculator
How Much Does Coving Installation Cost?
The cost of installing coving depends on the type and style you choose — for example ceiling coving, Victorian-style coving, or a simpler modern profile — as well as the size of the room and the finish you want.
For most homeowners, the price of fitting coving falls between £250 and £450 per standard room, with an average cost of around £340.
If you want a simpler breakdown, here's what you can expect to pay if you're looking to buy coving:
- Lightweight Polyurethane Coving — From £130 to £300 per room. A budget friendly choice, easy to fit and ideal for smaller spaces.
- Standard Coving — Best suited to living rooms and bedrooms, this type of wall coving is priced between £100 and £300 for polystyrene coving and £180 to £500+ for standard plaster coving including labour and materials.
- Bespoke Plaster Coving — A premium option for an average-sized room will be priced around £1,000. Costs will vary depending on the design, detail, and room size.
Plaster coving is heavier than polyurethane or polystyrene alternatives, which means it takes longer to install and requires a more skilled tradesperson — typically a professional plasterer. It's particularly well suited to period properties, where it can be used to restore or replicate original architectural features.
Standard plaster coving runs from around £25 to £60 per metre supply and fit, while bespoke or fibrous plaster cornice can cost significantly more depending on the profile.
For a more detailed comparison, coving is often priced by the metre as well as per room. The table below gives a clearer idea of what to expect depending on the material you choose, with supply and fit averaging around £60 per metre across all types.
| Material | Supply Only (Per Metre) | Supply and Fit (Per Metre) |
|---|---|---|
| Polystyrene | £2–£10 | £5–£20 |
| Polyurethane | £5–£25 | £10–£40 |
| Plaster / Cornice | £15–£40 | £25–£60 |
| Wood / MDF | £5–£50 | £15–£65 |
Want a custom price?
Post your job
These prices for coving installation typically include materials, adhesive, cutting, fitting and finishing, but they won't include additional work such as painting, skirting replacement or plaster repairs.
If your ceiling or walls need preparation before fitting, this can also add to the total cost.
Would having various coving installed in my living room, kitchen and around the outside of my home add value to my home by any significant degree?
"Well, depending on the type of house it is, for example, if Victorian keeping or replacing ornate coving would have value, especially if it was broken or torn down, some new homes not so sure, as it would be more for decoration and hiding unsightly ceiling line, i.e. cracks."
Coving Installation Prices
| Type of Coving | Labour Cost | Supply Costs | Total Cost |
|---|---|---|---|
| Lightweight Polyurethane Coving | £90 to £130 | £40 to £80 | £130 to £210 |
| Coving for a regular-sized room | £150 to £250 | £100 to £200 | £250 to £450 |
| Bespoke Coving | £350 to £450 | £400 to £800 | £750 to £1,250 |
| Picture rails/dado rails | £160 to £220 | £80 to £140 | £240 to £360 |
| Wall Panelling | £250 to £300 | £200 to £250 | £450 to £550 |
Want a custom price?
Post your job
The main expense when fitting coving is the labour. While the material itself is relatively inexpensive, the skill and time required to cut, mitre and fix the coving neatly means most homeowners hire a professional plasterer or carpenter.
Factors That Impact Coving Installation Costs
Several factors influence the cost of coving installation. Understanding these will help you plan your project and budget more effectively.
Type and Material of Coving
The material and style you choose has a significant impact on both supply and labour costs.
Standard coving and cornice is available in polystyrene, polyurethane, plaster, and MDF. Polystyrene and polyurethane are the most affordable options and the quickest to install. Plaster coving and ornate cornice — the decorative style associated with Victorian and Edwardian properties — are heavier and more time-consuming to fit, which pushes up the overall price. Bespoke or fibrous plaster profiles cost the most, due to the skill and time involved.
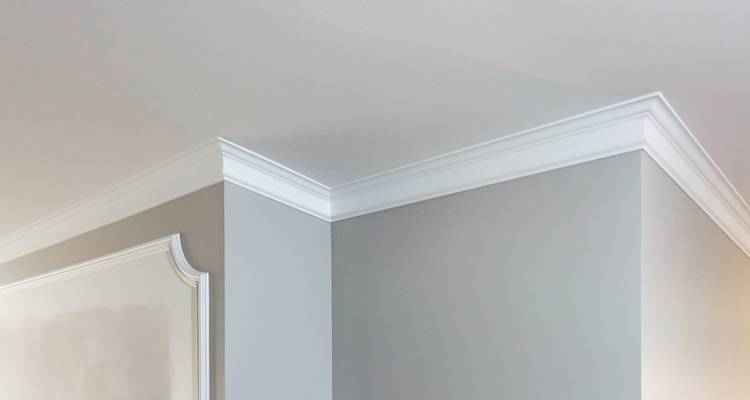
The style also matters — a plain, uniform profile is straightforward to cut and mitre, whereas highly decorative designs require more care and precision, increasing labour time. Polyurethane versions of ornate profiles offer a similar look to plaster at a lower price point, making them a practical alternative for period-style finishes.
Picture rails and dado rails are often fitted at the same time as coving. Bundling these jobs together can reduce the overall labour cost, as the same tradesperson can carry out all the work in a single visit.
Size of the Room
Larger rooms require more linear metres of coving, which increases both material costs and the time it takes to measure, cut, and fit. A small hallway or box room may only need a few metres of coving, while a large living room or open-plan space could require considerably more — with a proportionally higher total cost.
Complexity of Installation
Rooms with bay windows, alcoves, chimney breasts, or irregular angles require more intricate cutting and mitring. Each internal and external corner adds time to the job, as each piece must be carefully measured and cut at the correct angle to achieve a neat finish. Ornate or deep-profile coving is also more difficult to work with, adding to the overall labour time.
Ease of Access
Rooms that are straightforward to work in cost less. High ceilings, rooms with limited space to manoeuvre, or areas requiring staging and scaffolding all add to the time and overall cost of the job.
Location of Property
Labour costs vary across the UK. Prices are typically higher in London and the South East, and lower in Northern England, Scotland, and Northern Ireland.
Additional Coving Installation Costs
When having coving fitted, it's worth factoring in extra jobs that are often carried out at the same time.
Bundling these with your coving installation project, can save money on labour and ensure a consistent finish across your room.
Plastering
Some rooms might need a bit of plastering before coving is fitted, especially if the old coving has been ripped off or the top of the wall is flaky. For an average sized room, the cost of plastering an indoor wall adds around £200 to £300 to the budget. Does the ceiling itself need tidying before the new coving goes up? The cost to plaster a ceiling is worth factoring in, too.
Painting and Decorating
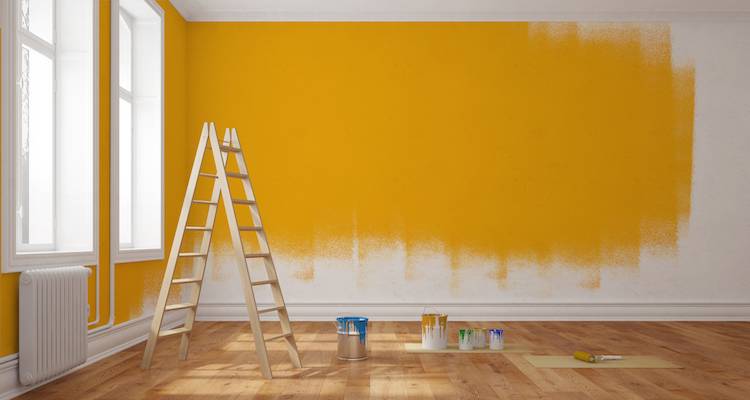
To have a standard bedroom painted with two coats of emulsion, the cost of painting a bedroom is around £300 to £500. Have wallpaper to tackle first? Wallpaper stripping can bump it up to £450 to £550 in total.
Replace Skirting Boards and Ceiling Architrave
New coving pairs well with fresh skirting boards and tidy door architraves. On average, the cost of replacing skirting boards and architraves lands around £200 to £300. Prices depend on the material, with MDF being the cheapest and hardwood the most expensive.
Want a clean, finished look? Once fitted, you can factor in the price of painting skirting boards.
Removing Old Coving
If you have existing coving that needs to come down before new coving can be fitted, this will add time and cost to the job. Removing old coving typically costs £150 to £350, depending on the amount and how well it is fixed.
Plaster coving that has been in place for decades can be particularly difficult to remove without damaging the surrounding plasterwork. In some cases, the wall or ceiling surface will need patching and skimming before new coving can go up, adding further to the overall cost. Always confirm with your tradesperson whether removal and any subsequent remedial work are included in the quote.
Coving Lighting
Modern homes often incorporate LED lighting strips into coving for a subtle, yet contemporary effect. The cost of LED coving installation varies from £300 to £600. The cost will also depend on the size of the room and whether the wiring needs an upgrade.
Labour Cost of Coving & Timescales
On average, coving labour costs range from £150 to £250 per day. Many tradespeople charge on a per room basis, which typically works out at £250 to £350 for a medium sized room including fitting and adhesive, but excluding painting.
Some fitters may also charge by the hour for smaller projects, with hourly rates between £20 and £40 depending on location and experience.
Plasterers are often hired for heavy plaster coving.
Carpenters or even a good handyman are often used for lightweight polyurethane or MDF mouldings.
Labour rates in London and the South East are generally 10% to 20% higher than in the North of England, Scotland or Wales.
As for the time required to fit coving, it depends on the size of the room, the design complexity and whether any additional preparation is needed. As a guide:
- Small room (e.g. box room or hallway) - Half a day to 1 day.
- Medium room (e.g. standard bedroom or lounge) - 1 to 2 days
- Large or irregular rooms with complex coving - 2 to 3 days
Additional work such as wall repairs, painting or installing LED lights for coving can add to the cost and timescale.
Plaster coving usually takes longer to install than lightweight coving because it's heavier and requires more precision.
Ask a Trade
Got a question that only a tradesperson can answer? We have thousands of trades ready to answer any question you may have.
Ask your question

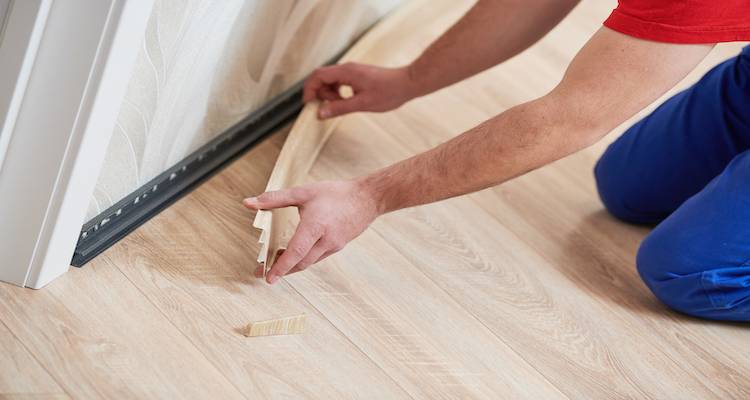
What's Involved in Installing Coving?
Thinking of fitting your own coving? It always looks easy… until you’re up a ladder trying to hold a strip in place with one hand while spreading adhesive with the other.
For small rooms or lightweight coving, it’s doable with a bit of patience and a steady hand. But if you’re working with plaster or ornate mouldings, it’s worth calling in a local specialist. They’ll get those joins neat and save you doing it twice.
Would you rather bypass the time-consuming task? Get free quotes from local fitters. They'll take care of the cutting, mitring, and clean-up for you.
Here’s what happens when a professional fits coving:
Before the Job
- Measuring Up — Your fitter starts by measuring the room and checking for any uneven spots or complex corners. This tells them how much coving and adhesive they’ll need for a clean, even line all the way around.
- Prepping the Space — Before anything goes up, they’ll scrape off loose paint or wallpaper, clear dust, and cover furniture to keep the room ship-shape. The smoother the surface, the stronger the bond.
During the Job
- Cutting and Fitting — Each piece is cut to size, at a 45° angle so the corners line up effortlessly. Adhesive goes on the back, it’s pressed firmly into place, and any extra glue is wiped away straight off for a crisp finish.
- Smoothing and Securing — Once the coving’s up, they’ll check every joint for gaps and fill them in neatly. Some fitters will use small pins, props or even tape to hold the coving in place while the adhesive goes off — it just helps keep the line straight.
After the Job
- Final Touches — When the adhesive’s dry, the fitter sands any rough edges and gives the coving a lick of paint so it blends with your ceiling. Pre-primed coving needs just one coat of matte paint to finish it off.
- Tidy-Up — The last step’s all about clean-up. Any stray dust, offcuts, or leftover adhesive are cleared away so your room’s left spotless — and looking sharper than before.
Building Regulations & Planning Permission for Coving Installation
There are no specific building regulations or planning permission rules that relate to installing coving. However, you should still make sure you install it in the correct manner and in a safe way also.
If you are undertaking additional work, then regulations or planning permission may apply. If in doubt, you should get in touch with your local council.
You don’t normally need planning permission or building control approval just to install coving, because it’s classed as internal decorative work. The only time it becomes a planning/building regs thing is if you’re doing other structural or renovation work at the same time — in that case, check with your local council.
Checklist: Hiring Coving Installers in the UK
Getting coving fitted neatly takes a steady hand and a good eye for detail. So, be sure to find someone who knows what they’re doing.
Here’s what to check before you hire:
- Do they have solid experience? You’ll want a fitter who’s handled the type of coving you’re after (lightweight polyurethane or heavy plaster). Two years’ experience or more is a good sign.
- Can you see samples of their work? Ask for before-and-after photos or check their MyJobQuote profile. Scroll through photos – they’ll tell you more than any sales pitch.
- What’s included in the quote? Make sure the price covers everything. Does it include adhesive, fitting, sanding, and clean-up? Some trades include painting. Others don’t. So confirm early on.
- Do they have reviews from other homeowners? Real feedback is gold. Look for consistent mentions of neat finishes, punctuality, and good communication.
- Will they see to any prep work? Ask if they’ll remove old coving or deal with uneven walls before fitting. A professional job always starts with a smooth base.
- Are they insured? Public liability insurance isn’t a legal must. That being said, it’s reassuring to know you’re covered if something goes wrong mid-job.
- Can they bundle jobs for a better price? Some fitters will give you a deal if you add extras — like replacing skirting boards or fitting wall panelling at the same time.
FAQs
Do I Need a Professional to Fit Coving, or Can I Do It Myself?
You can fit lightweight polyurethane or polystyrene coving yourself if you're comfortable with a tape measure, mitre box, and adhesive. It's a manageable DIY job for a patient homeowner, though cutting accurate mitres at corners takes practice.
Heavier plaster coving and ornate cornice are better left to a professional. The material is harder to handle, the cuts need to be precise, and any mistakes are difficult to disguise. A professional plasterer or carpenter will get the joints neat and save you from having to redo it.
Who Installs Coving?
The right tradesperson depends on the material you choose. For heavyweight plaster coving and ornate cornice, a professional plasterer is usually the best option — they have the experience to handle the material and achieve clean, tight joints. For lightweight polyurethane or MDF coving, a carpenter or skilled handyman is typically sufficient. Some general decorators will also fit coving as part of a wider refurbishment project, which can save on labour if other work is being carried out at the same time.
Is Coving Expensive?
Coving is not generally considered expensive, particularly for standard polyurethane or polystyrene options. A typical room costs between £250 and £450 supply and fit, with lightweight coving at the lower end and plaster coving pushing costs higher.
Bespoke plaster cornice is the most expensive option and can cost upwards of £1,000 for an average room, due to the material costs and the skill required to install it. For most homeowners, however, coving is an affordable way to add a polished finish to a room.
How Much Does Plaster Coving Cost?
Standard plaster coving typically costs between £250 and £600 for an average room supply and fit. Bespoke fibrous plaster cornice — the ornate style associated with Victorian and Edwardian properties — can cost £850 or more for a single room, depending on the profile and level of detail.
Plaster coving takes longer to install than lightweight alternatives and requires a professional plasterer, which is reflected in the higher labour cost.
Can Coving Be Fitted in Bathrooms and Kitchens?
Yes. Polyurethane and PVC coving are well suited to bathrooms and kitchens, as they can handle moisture and steam without warping or deteriorating. Plaster coving can work in well-ventilated rooms if it is properly sealed and painted, but is not recommended for bathrooms with poor extraction.
Does Coving Need Painting After It's Fitted?
In most cases, yes. Pre-primed coving only needs a coat of emulsion to blend with the ceiling, while bare plaster coving will need sealing first — otherwise it absorbs paint unevenly and looks patchy. A matte finish is generally the most popular choice, as it gives a clean and understated result.
If I Add Coving, Will It Increase My Home's Value?
It may do, particularly in period properties. Restoring or replicating original decorative coving or cornice can make a significant difference to how finished and characterful a home feels. In newer builds, coving is more of a cosmetic improvement than a value-booster, though it does add a polished look.
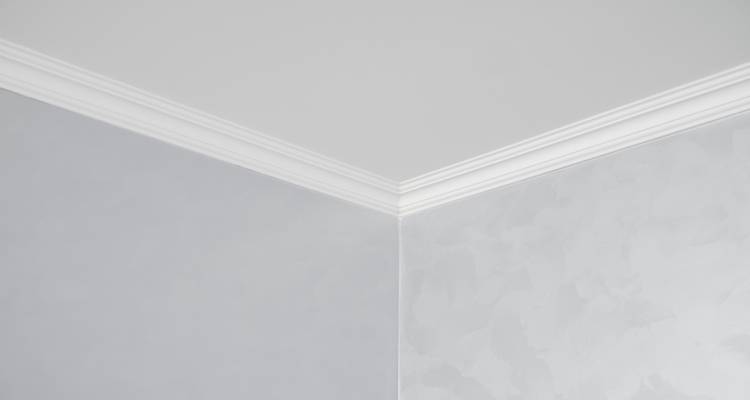
Can Coving Hide Cracks Where the Wall Meets the Ceiling?
Yes. Covering minor cracks and gaps at the ceiling line is one of the most practical reasons to fit coving. It gives a neat, finished appearance and conceals the movement that naturally occurs as a house settles. If cracks are large or recurring, however, it is worth investigating the underlying cause before covering them up.