my
myHow to Change a Toilet Seat
Here, you will find a step-by-step guide on how to change a toilet seat along with a list of the tools needed to change a toilet seat and any materials that you may need to complete the job. You will also benefit from numerous tips and advice to ensure you change your toilet seat safely and quickly.
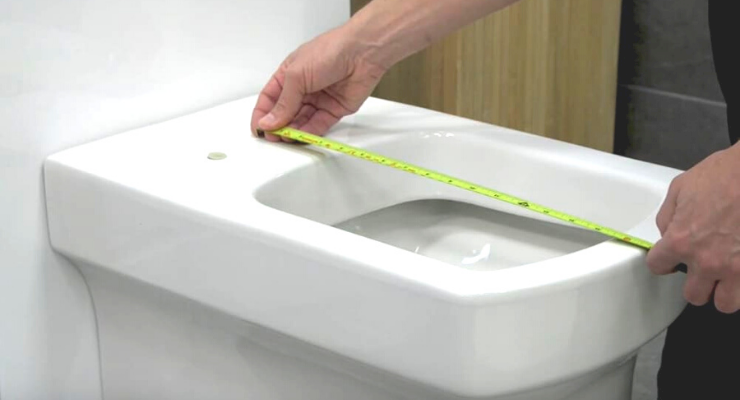
Table of Contents
What Tools Do I Need to Change a Toilet Seat?
To ensure you change a toilet seat properly, it is vital that you have the right tools before completing the job. For this task, you will only need a few basic tools. These are listed below:
- Tape measure
- Pencil
- Pliers/adjustable wrench
- Screwdriver
What Safety Equipment Do I Need to Change a Toilet Seat?
Fitting a toilet seat is a simple DIY project that won’t require any specific safety equipment.
However, for hygiene purposes it’s good practice to wear protective gloves, as toilet seats are well known to carry germs. You should also take the opportunity to clean the toilet before removing the old seat, and always remember to wash your hands thoroughly with soap or antibacterial hand wash afterwards.

What Materials Do I Need to Change a Toilet Seat?
When you change a toilet seat, most manufacturers supply all the necessary fixtures and fittings with the seat as standard. If they don’t, you’ll need to purchase bolts and plastic caps that fit your specific toilet seat model separately.
This ensures the seat fits the toilet safely and securely. The majority of standard UK domestic toilets follow a relatively similar setup. However, if you have a wall-hung, custom-made, or medical toilet system, you should check whether any additional materials or tools are required.
How to Prepare for Changing a Toilet Seat
So your toilet seat fits appropriately, it's important that you measure your toilet correctly as not all seats are the same size. This will ensure you purchase an appropriate model for the job.
Before you start to change your toilet seat, check all of the relevant parts are included. You will also need to remove the old seat and any fittings that are no longer required, as well as being a good idea to give the whole area another clean before fitting the new one.
How to Change a Toilet Seat Yourself — Step-by-Step Guide
Rather than having to hire someone to replace a toilet, you can simply change the seat like a professional by following this helpful guide:
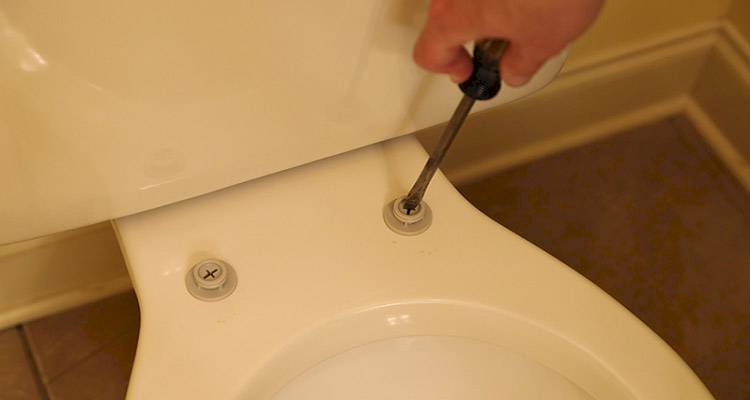
Step 1
The first thing you need to do is remove the old fixings from the existing toilet seat. This process will vary depending on the condition, accessibility, and age of the old toilet seat, as you may need to use pliers to grip and loosen the old fixtures.
Step 2
Once the fixtures have been loosened and removed, you can then lift away the old toilet seat. You should wear gloves to do this to avoid any contamination and germs being transferred onto other surfaces, including the new toilet seat.

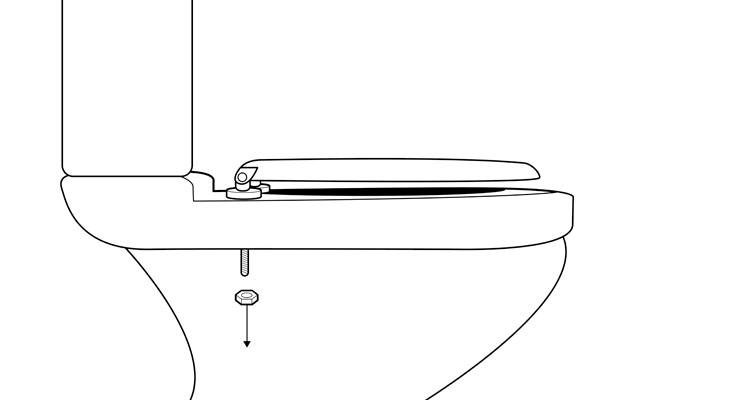
Step 3
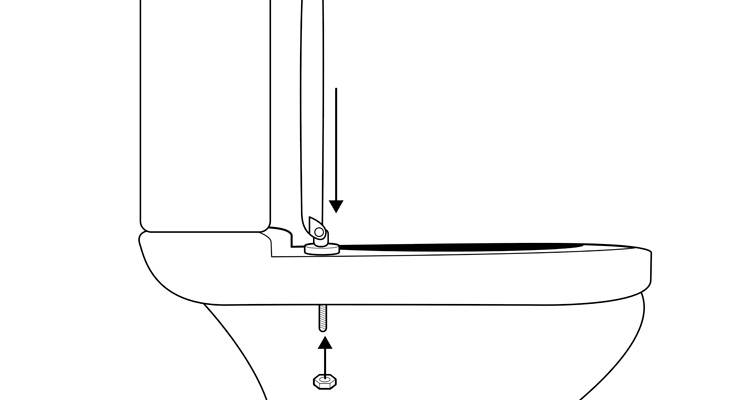
Once the old toilet seat has been removed, you should then add the new toilet seat fixtures to your toilet and screw them in loosely. When doing this, you need to make sure that you don’t fully tighten them as you may need to adjust them later.
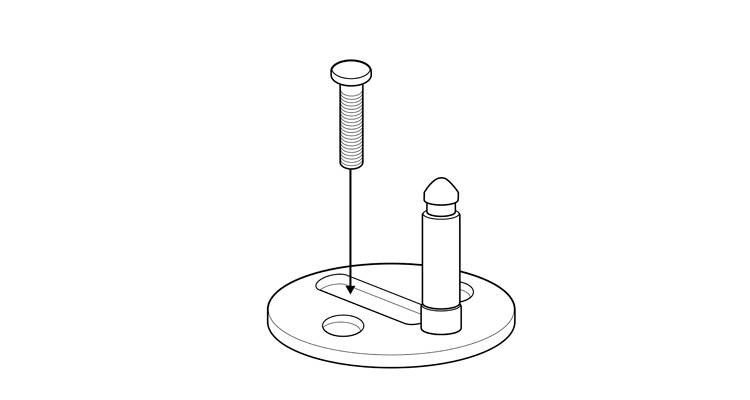
Step 4
Check the distance of the fixture pins and measure them up against the fittings on the new toilet seat. Once you’re sure they’re set to the right distance, tighten them up and insert the fixture covers. These will usually press on or screw on.

To be sure, it is essential that you check the manufacturer’s instructions before doing anything.
Step 5
Now you can fit your new toilet seat.
For traditional models, position the seat over the bowl and secure it by tightening the bolts underneath using a pair of pliers, adjustable wrench or the tool provided with the replacement seat.
If your toilet uses a top-fix or quick-release design, simply align the seat with the mounting pegs and press it into place, ensuring the pegs are fully inserted into the holes.
Be sure to follow the manufacturer’s instructions carefully, especially if you have a bespoke system or one designed for medical purposes, as installation methods can vary depending on the toilet model.
Step 6
Once fitted, check that the seat is straight and secure. Providing everything is in good working order, then you’re good to go!

Choosing a Toilet Seat
There are a wide range of toilet seats to choose from, including:
Standard Toilet Seats
As the most common options, standard toilet seats are available in traditional and contemporary styles to suit different bathrooms. They are also one of the easiest to install, making them the best option for a DIY toilet seat installation.
Wooden Toilet Seats
Toilet seats made from wood are often found in traditional bathrooms due to the natural finish they provide. Typically made from moulded, engineered or solid wood these are often widely available in either plain white or oak.
D-shaped Toilet Seats
Often used with contemporary toilets as they provide a sleek finish, D-shaped toilet seats offer an appearance which is rounded at the front and features a flat hinge edge to create a D-shape.
Family Toilet Seats
Featuring two different seats – one standard size for adults and an additional smaller seat, providing an ideal temporary solution when toilet training or living with smaller children.
Soft-Close Toilet Seats
With a slow-closing mechanism when closing the seat, a soft-close option offers a luxury feel as well as an added safety measure to prevent damage or trapped fingers.
Square Toilet Seats
Straight edges on each side of the seat, create more of a rectangular shape than square. These are generally used with contemporary style toilets, as they offer a unique and sleek design.
Quick-release Toilet Seats
These are designed so they can be easily removed for thorough cleaning, for easier maintenance. They come in variety of styles, so measure your toilet before buying to ensure a proper fit.