my
myHow to Tile a Bathroom Wall
This article demonstrates with images how to tile a bathroom wall. We discuss everything that you might want to know regarding the materials, maintenance and answer the most frequently asked questions.
Table of Contents
- Why Do I Need to Tile a Bathroom?
- What Tools Do I Need to Tile a Bathroom Wall?
- What Safety Equipment Do I Need to Tile a Bathroom Wall?
- What Materials Do I Need to Tile a Bathroom Wall?
- Preparing Walls for Tiling
- Tiling a Bathroom Wall Yourself ? Step-by-Step Guide
- How to Choose Bathroom Wall Tiles
- Bathroom Tile Repairs and Maintenance
- FAQs
Why Do I Need to Tile a Bathroom?
When it comes to designing and decorating your bathroom, tiling is often the most popular choice. It’s practical for the wet, humid environment, as tiles are easy to clean and help prevent fungi and algae growth, ensuring a more hygienic space.
Tiles also enhance the room's appearance, making it look more luxurious and spacious. With a lifespan of around 15 years or potentially more when properly maintained, tiling a bathroom is a perfect long-term investment for your home.
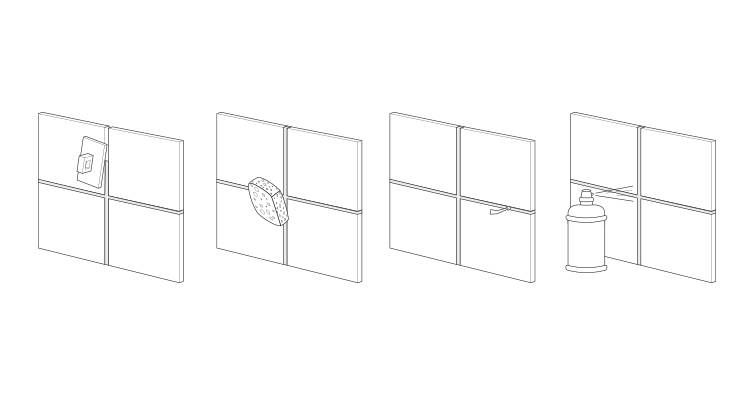
What Tools Do I Need to Tile a Bathroom Wall?
Before you learn how to tile your bathroom, it’s important that you spend your time gathering all the tools you’ll need for the job before embarking on your DIY adventure. You want the best results possible for your home, ensuring you have all the tools will not only give you a professional finish, but it will also make the process more organised and fluid.
You will need the following:
- Drill
- Pipe & cable detector
- Battens
- Trowel
- Adhesive spreader
- Wall tile spacers
- Grout spreader/floater
- Grout finishing tool (shaper)
- Tile scribe
- Mitre block
- Hacksaw
- Wooden supports
- Spirit level
- Tape measure
- Sponge
- Window scraper
- Metal ruler
- Cloth
- Pencil or pen
- Bucket
The above materials should be easy to source or hire from local DIY stores.
What Safety Equipment Do I Need to Tile a Bathroom Wall?
Tiling can be a messy task; it is essential to make sure you have the correct safety equipment before you start the project. You’ll be handling sharp tools and machinery, such as a tile scribe and hacksaw, safety should be a top priority, and extra precautions should be taken.
- Heavy Duty Gloves
- Eye Goggles
- Protective dust mask
When you are cutting tiles, please ensure you use protective eye wear such as goggles and also heavy-duty gloves as shards of glass could break and shatter. Upon mixing your adhesive, you will also need to be mindful to wear your dust mask and goggles to protect your face and avoid inhalation.
What Materials Do I Need to Tile a Bathroom Wall?
The following are also materials that you will require to install a professional looking tiled bathroom:
- Wall tiles
- Tile adhesive
- Grout
- Grout protector
- Tile trim
- Screws
- Water
There will be a huge range of tiles to suit your budget and your design needs, so shop around and research to see what suits.
Please ensure if you are using materials such as grout and adhesive from a previous DIY job that you check the expiry dates on the product before using.
Preparing Walls for Tiling
Before you start putting tile to wall and learn how to tile, you’ll need to ensure you correctly prepare the surface you intend to tile. Begin by sanding down the surface, clean it and then seal it.
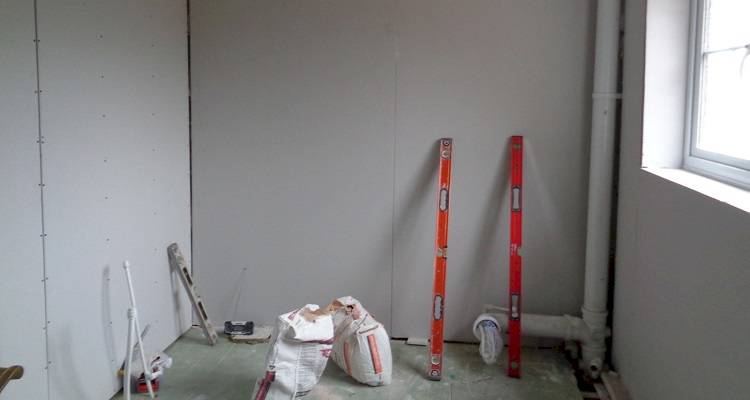
If the wall you intend to tile on is new, timber, ply or bare plaster, these surfaces are absorbent, so you will need to use PVA primer to avoid your adhesive being absorbed into the wall.
Be aware that if your tiles are natural stone or porcelain, these may need to be sealed with the appropriate sealing solution before and after grouting. This helps prevent moisture ingress and staining; please check the manufacturer’s guide before using.
Tiling a Bathroom Wall Yourself — Step-by-Step Guide
The below guide should give an insight into how to tile your own bathroom wall and what steps you should follow. All jobs are different but this step by step guide should help most homeowners attempting the job.
Step 1 - Prepare your bathroom wall
Measure the area of your wall and the size of your chosen tiles to calculate how many will be needed to tile your bathroom. Ensure the walls are sanded, cleaned, sealed and left to dry before starting.
To calculate: Wall area ÷ area of each tile = number of tiles you will need.
You should also allow an extra 10% for in the event of any damages and remember you will need to add gaps in between your tiles (2-3mm) for when you are re-grouting the bathroom. So remember to accommodate both of these points into your final calculations.
When it comes to tiling, the weight a wall surface can support may vary. Below is a guideline for the maximum weight each wall surface can typically hold per square meter:
- Plaster - 20 Kg
- Plasterboard direct (without plaster skim) - 32 Kg
- Plywood (WBP) - up to 30 Kg
- Tile Backing Boards - up to 50 Kg
You will also need to include the adhesive weight into this calculation; you can find this information on the adhesive package.
If you are using natural stone tiles, these might require sealant, so please check before you begin grouting. You can check this with your manufacturer.
Step 2 - How to arrange your bathroom tiles
You’ll want your tiles to be balanced and even when working out your design. If you are tiling a full wall, aim for a symmetrical pattern, and add the same length cut tiles on each edge of the wall.
To avoid smaller cut tiles, try to aim for as full as tile as possible when working out your tile design. This will give you the most aesthetically pleasing result. We will talk you through how to cut a bathroom wall tile shortly.
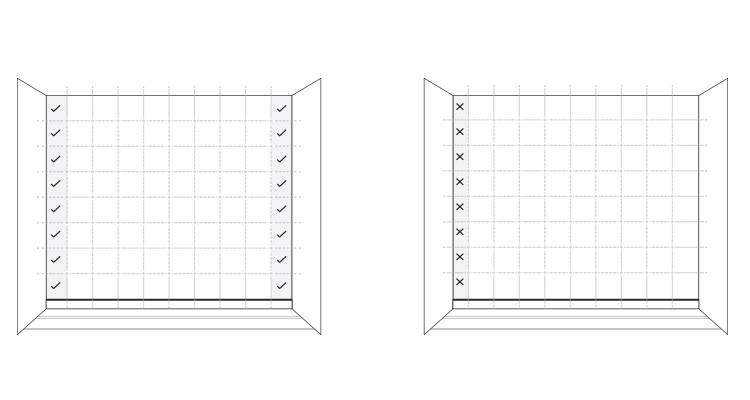
To create an even design, we advise you to create a ‘tile gauge’. To do this, simply get a wooden baton, or piece of wood, that’s over half the width of the wall you are tiling. Then place the tiles, with the spacers along the length and mark the points of the tiles along the bottom with a pencil.
Step 3 - Using your tile gauge
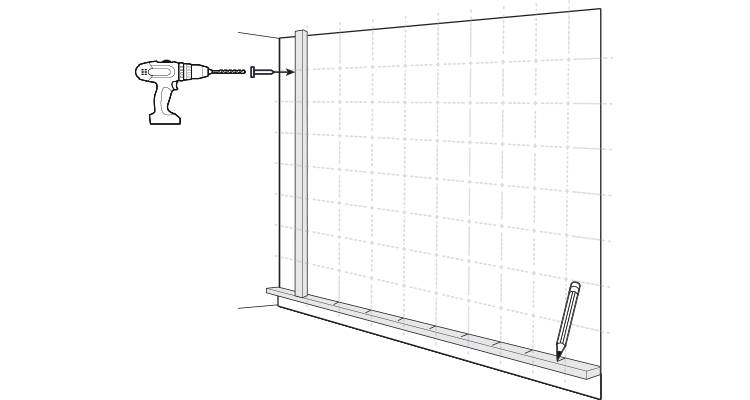
Measure the length of the wall, then mark the exact mid-point with a pencil. You can then use this point in correspondence with your wooden batten.
Slide the batten along the wall to see the gap at each end. If the gap is larger than half a tile, you can begin tiling there. If it’s smaller, shift your central mark by half a tile to ensure an even layout.
Next, mark the starting point of the first full tile near the skirting board, then use a spirit level to extend a vertical line. Repeat this process for the vertical axis by marking the midpoint and adjusting if necessary. Then, draw a horizontal line across the wall.
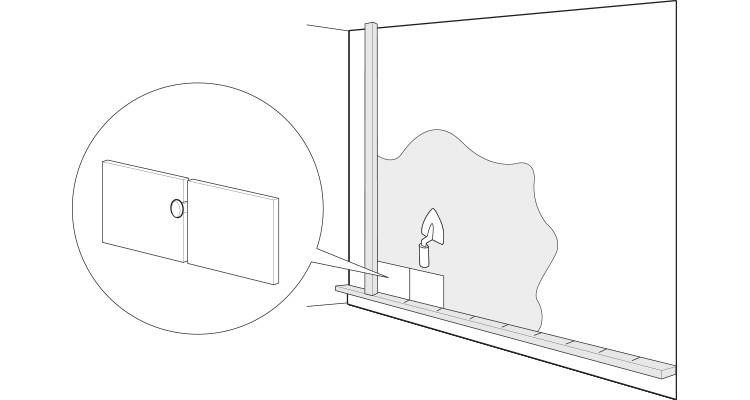
Finally, check for pipes using a detector and once the area is confirmed clear, secure your tile gauge to ensure it is placed precisely.
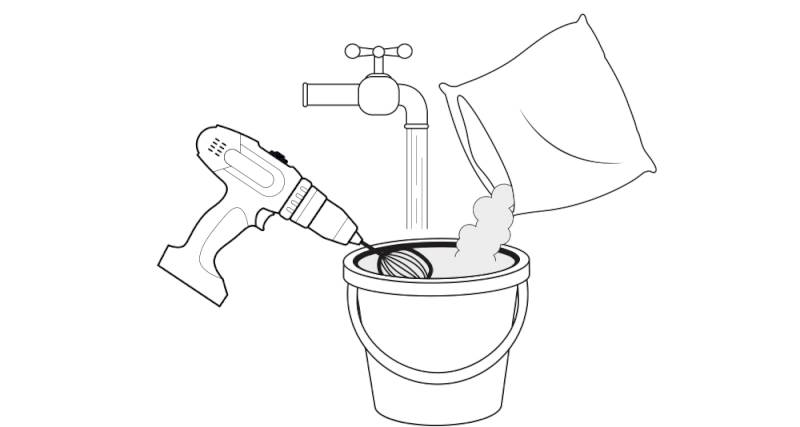
Step 4 - How to mix your tile adhesive
You can now start the process of installing wall tiles in the bathroom. Firstly, you need to prepare your adhesive. The type of adhesive you require will depend entirely on your wall surface type.
It’s important to stress that at this point, you follow the manufacturer’s instructions, then begin to prepare your mixture. You’ll need to take your drill with a mixing paddle, to create a thick paste, with no lumps.
Step 5 - How to tile a bathroom wall
Using a trowel and with your wood batons as a guide, start tiling your wall by applying enough adhesive to cover up to one square metre of the wall. Take the notched spreader and comb the adhesive across; this will ensure a full, even coverage.
Place your first tile along the batten. You will need to twist the tile back and forth slightly to really secure it to the adhesive. Then repeat the process, not forgetting to insert your spacers correctly to establish a consistent, even gap.
It's essential you are regularly checking that your tiles are level and flat, you can do this by using your spirit level. If they are not, you'll need to take the tile off and remove the adhesive with a trowel. Repeat the process, using the button as your guide, until the area is complete.
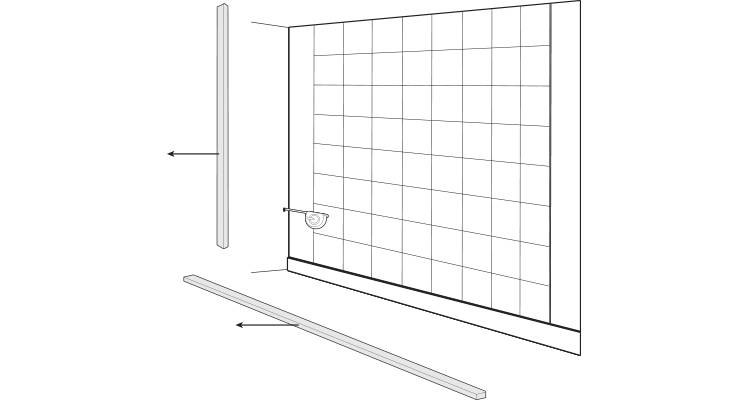
After tiling, remove excess adhesive from the tiles and grout lines using warm soapy water and a sponge. Let the adhesive dry as per the manufacturer's instructions, before removing the battens.
Step 6 - Preparing your tile edges
You need to measure the gap between the tile edge and the corner correctly. Make sure you allow for grout spacers into the calculation. For this stage, we are going to ask you to measure every gap because the wall might not be straight. Make a note of these numbers by writing them on each tile.
Step 7 - Cutting your bathroom tiles
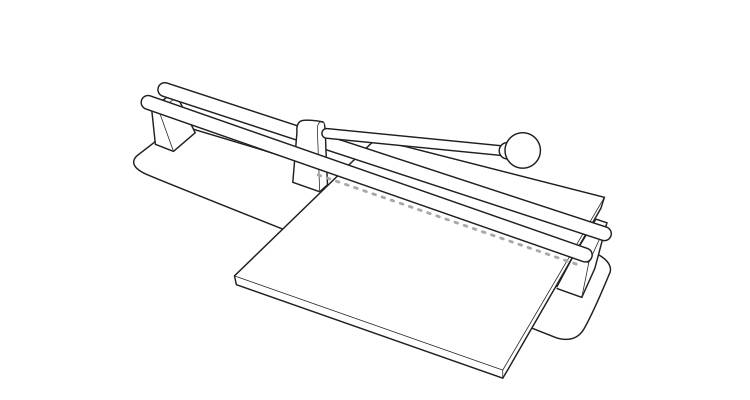
There are multiple ways to cut bathroom tiles, but we would recommend using a tile cutter, as this will give you accurate results. Firstly, you'll need to mark up the cutting point correctly on your tile, use a pen and metal ruler and draw a line down the tile to indicate the point of cutting.
If you don't have access to a tile cutter, we have another method you can try. Take your metal ruler and put it across the intersection area and mark it up, do this on the front of your tile. Take your tile scribe and score up and down the line to the full length of the tile. Otherwise, you risk your tile snapping.
You should then place your pencil directly underneath the scored area of the tile. Apply pressure on this area to allow a clean snap of the tile. Taking extra care as some shards of tile could eject out towards you.
Please ensure at all times when you are cutting tiles to wear the correct safety equipment, goggles for your eyes and protective gloves.
Step 8 - How to tile into the edges
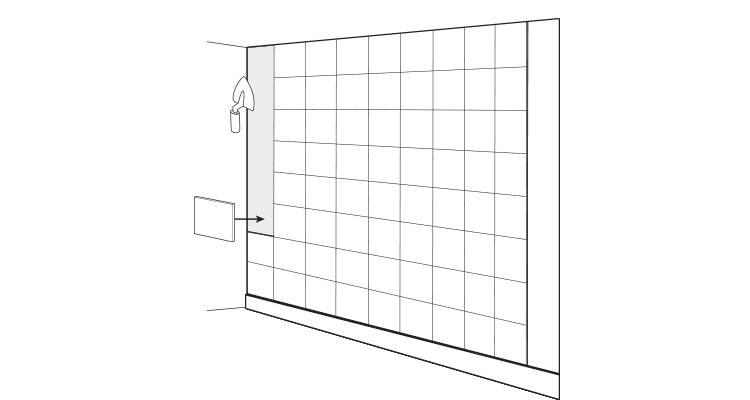
Before applying adhesive, we recommend you check your tiles against the spaces to ensure they fit correctly.
Begin applying the adhesive at the bottom of the wall, if this is too difficult to do with your spreader, then apply the adhesive directly to the back of the tile. Then press the tiles into position, as you did before. Continue to tile the remaining area, allowing room for your spacers to continue with your even gapping.
As before, wipe away any excess adhesive from the surface of the tiles using a soapy, damp sponge. If any adhesive hardens on your tiles, you could also try using a window scraper to gently remove the excess and being careful not to scratch your tiles. Follow your manufacturer's instructions on the correct setting time for your tiles.
Step 9 - How to grout tiles
Grouting is an important step when you need to tile a bathroom and due to being available in a selection of colours is also a way to compliment the design or pattern of your new tiling.
Before you begin, you should first decide whether you want to use powdered or ready mixed. If you choose to use powdered, then only mix up a small amount at a time, as the grout can dry quickly. Always refer to manufacturer’s guidelelines when mixing and remember to check the use the use by date.
Take a small amount of the mixture and apply to the tile using your spreader. Make sure you move it around to get it in the joints. Use large strokes, upwards and diagonally to ensure best results.
Continue with this technique to grout the whole wall. If you get any excess grout on your tiles, just be sure to use a warm, damp sponge as you go along and gently wipe. If by chance you remove too much grouting, use your finger to re-apply grout to the area.
You want to achieve a really professional finish; for this, you'll need a shaping tool (grout finishing tool). Use this over the grout, pull down over the jointing, it's vital you do this in a swift, continuous movement. Be prompt with this, as your grouting hardens quickly. Repeat this process between all of the grout jointing.
We now recommend you clean off your tiles, using a cloth to remove the powder substance from your grout. This will give you a professional-looking finish.
To really preserve the life of your grouting, we suggest investing in grout protector. Using this will protect your grout from elements such as water, dirt, oil, limescale and grease - although always check the label first.
Step 10 - Tiling around a window
Applying the same knowledge as in previous steps when tiling around the window area of your bathroom will ensure they are as equal and symmetrical as possible. Plan the placement of the tiles in the recess, matching up the grout lines so they correspond to those already in place on the wall.
Then you will need to measure the depth of the window recess using a tape measure. Please remember to only include the depth of the wall, and not the wall and the tile already in place, because you need to allow room for the trim edges later.
Measure each section where the new tiles will be placed, allowing space for grouting. Write down the correct measurements on your tile, draw a line, and cut the tile, just like before.
To cut the trim to size, you will need a mitre block, and hacksaw. Cut the ends at a 45-degree angle to allow for a neat join where the trims will intersect.
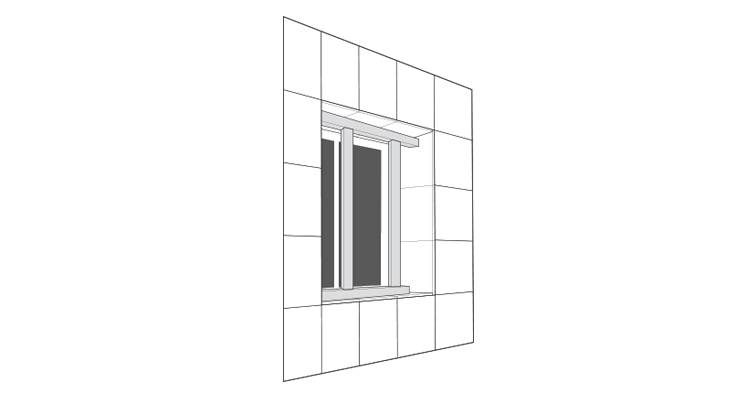
Starting at the bottom of the window apply the adhesive with the spreader, then place the trim along the edge. Then position the tiles accordingly, not forgetting to add spacers, reepeat the process until all tiles are correctly in place.
To stop the tiles from falling, cut wood to fit the window space, placing one horizontal beam and two vertical beams. Allow the adhesive to dry according to the manufacturer's instructions.
Once dried, grout the area using the same application technique as before. Then wipe down the area with a damp cloth and use a shaper for a neat finish. Finally, polish the tiles to remove any powder residue. Your bathroom should now be complete!
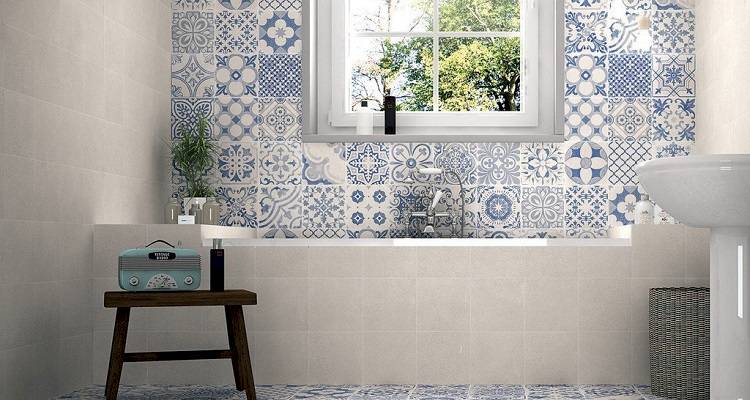
How to Choose Bathroom Wall Tiles
As stated before, choosing your tiles can be somewhat of a minefield as your options are really limitless. So, get ready to create your Pinterest boards and magazine cuttings at the ready for some much-needed tile design inspiration. You can choose from gloss, patterned, textured, the world is your oyster.
Let’s begin by looking at the most common tile materials you can choose from natural stone, ceramic, porcelain or glass. Real stone tiles or manmade tiles are usually the most common choice. If you choose to go with natural stone, these tiles generally have a bit more character. However, you should be aware that the care requirements are higher, and you will need to keep painting the sealant around your tiles.
If you are thinking about getting manmade tiles, then these are perfect if you are looking to revamp your bathroom on a budget, they also require minimal upkeep. We will go into further detail later on how to maintain your bathroom tiles.
If you are looking to create a spacious bathroom, we recommend using light colour ways or stone colour tile to enhance the space. Don’t be afraid to get creative, patterned tiles seem to be highly fashionable at the minute, and this could make for a real feature of your bathroom.
We recommend getting some samples and checking out your local tile shops for more information and inspiration; it really does depend on your budget and style.
Bathroom Tile Repairs and Maintenance
After investing much time, money and effort into revamping your bathroom interior, it’s now time to invest in maintaining the upkeep of your tiles and grout.
You should have already sprayed your grout with a protector spray, so we recommend doing this every so often, this will extend the life and also keep up your grout appearance. As we stated before if you choose natural tiles, these will need regulated maintenance checks, so please ensure you follow the manufacturer's recommendations for further advice.
When it comes to cleaning your tiles, it’s highly important that you avoid products that are designed to ‘prevent limescale’ or products that contain any ‘acidic chemicals’. Using these can cause lasting damage to the tile surface. Before using any product, we advise you check it is suitable for the material of your tile.
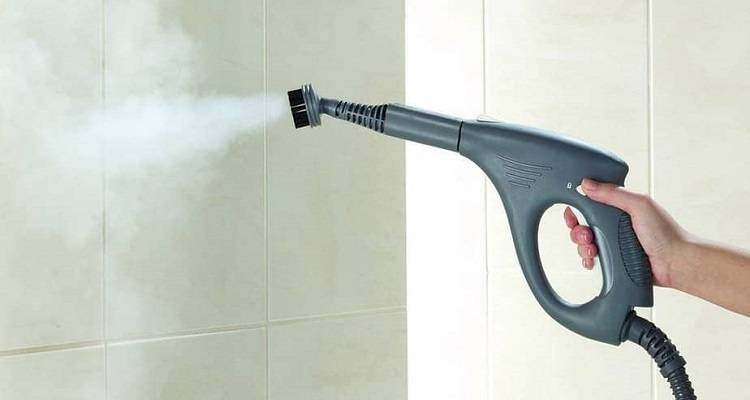
If correctly sealed you have no need to worry about water or steam from your bathroom damaging your tiles because most tiles are glazed, which actually gives them waterproof qualities.
The nature of tiles means the risk of tiles becoming brittle or cracking. Common types of repair issues you might face are chipping, cracking or scratching. In most cases, you should try and repair these. You’ll remember we mentioned adding 10% extra to your total tile calculation earlier? Well, this is where your spare materials will come in handy, although you do risk slight colour variation.
Should one crack, this is how to remove a bathroom tile:
- You need to remove the grout from around the area of the damaged tile. To do this, you will need a hammer and metal chisel. Do this gently and firmly as you will need to be careful not to damage any further tiles.
- Take a slightly bigger chisel and hammer the tile; make sure this is angled away from you. We advise you to do this working from the centre to the edges.
- Once all the pieces of tile are removed, you need to remove the old layer of adhesive. Scrape this off with a solid blade, avoid chipping the surface beneath.
- Now, as before, mix your adhesive and apply a small amount to your space using a trowel. Be careful to avoid applying adhesive near the edges as this will seep out when the replacement tile is applied. Don’t forget to add your grout spacers between the tile.
- Let the tile dry for the appropriate time, then grout.
You’ll also need to ensure you learn how to clean your bathroom grout correctly. The easiest way to do this is with vinegar and water, take equal amounts of both and add the mixture to a bottle with a spray top. Spray this solution between your tiles then use a spare toothbrush to scrub the grout. You can also use vinegar to remove dried and wanted paint from the surface of your tiles.