my
myHow to Install Underfloor Heating
If you want to install underfloor heating to warm up your home, look no further.
This guide will help you understand how to install underfloor heating, what tools and materials you may need, and how to keep safe during installation.
Let's dive in.
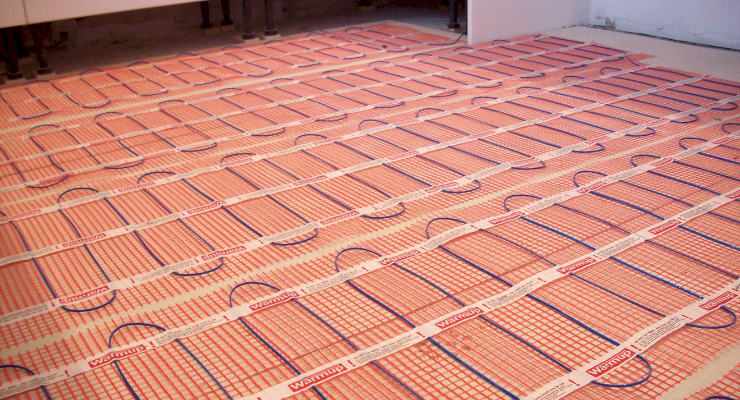
Table of Contents
- What Tools Do I Need to Install Underfloor Heating?
- What Safety Equipment Do I Need to Install Underfloor Heating?
- What Materials Do I Need to Install Underfloor Heating?
- How to Prepare for Installing Underfloor Heating
- How to Install an Electric Underfloor Heating System
- How to Install a Wet Underfloor Heating System
- FAQs
What Tools Do I Need to Install Underfloor Heating?
Before installing underfloor heating, you must ensure you have the right tools first.
Here's what you'll need:
- Pencil or pen
- Scissors
- Cable puller
- Stanley knife
- Plastic trowel
- Saw
- Drill or screwdriver
What Safety Equipment Do I Need to Install Underfloor Heating?
You won't need specialist safety equipment to install underfloor heating, but some general safety gear is advised:
- Safety gloves
- Safety goggles
- Knee pads
An underfloor heating installation is quite a big job, so it can be beneficial to have someone else on board to help you during the process.
If you've never installed underfloor heating before, it's best to hire a professional to ensure your home and family’s safety. Even if you do the job yourself, you'll need a qualified heating engineer or electrician to check and certify your work for compliance.
What Materials Do I Need to Install Underfloor Heating?
The type of materials you need for an underfloor heating installation will depend on the type of system you're having installed - wet (water) or dry (electric).
Dry Underfloor Heating
Dry or electric underfloor heating consists of electric mats laid over the sub-base and connected to the electric supply.
This is ideal for use in single rooms, as it tends to be more expensive than a wet system, although it is cheaper to install as the installation tends to be easier.
For this type of installation, you'll need the following materials:
- Insulation board
- Plastering tape
- Screws
- Underfloor heating mat
- Levelling compound
- Thermostat and sensor
Wet Underfloor Heating
A wet system or water underfloor heating is installed using heating pipes which are connected to underfloor circuits, which power up the system.
This is best suited to entire home renovations and large spaces, as energy bills tend to be lower. However, it does take longer to install and is more expensive than dry underfloor heating.
Wet underfloor heating requires the following materials:
- Damp-proof membrane
- Pipework sheets
- Aluminium spreader plates
- Plastic piping
- Floorboards
- Adhesive
- Manifold
How to Prepare for Installing Underfloor Heating
To prepare your floor for underfloor heating, you need to ensure that you:
- Remove anything from the floor, including tiles, carpet, plaster, and anything else that may be covering the base.
- Brush away any dust, dirt, or debris that may be sitting on the floor base, so that you have a nice, clean surface to start work on.
- Check the condition of the subfloor to ensure it's in good condition. If not, you may need to hire a professional to come and make any repairs, or they may have to install a brand new sub-base.
How to Install an Electric Underfloor Heating System
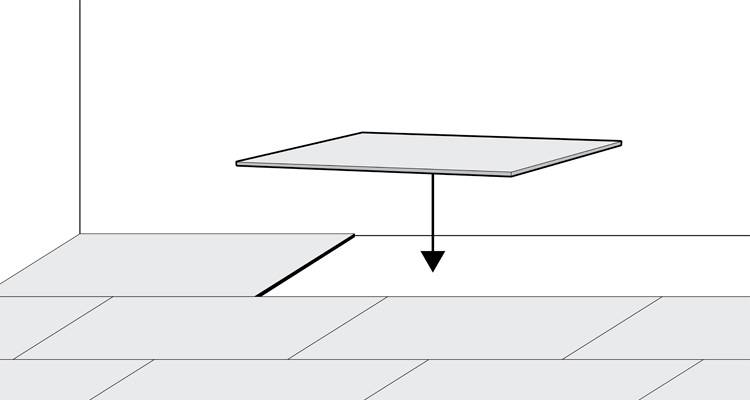
Step 1
Once the sub-base has been checked, you should lay down insulation boards in a checkerboard pattern and cut the boards so that they fit perfectly in the room.
Step 2
After the insulation boards are installed, you can then seal the joints with some plastering tape.
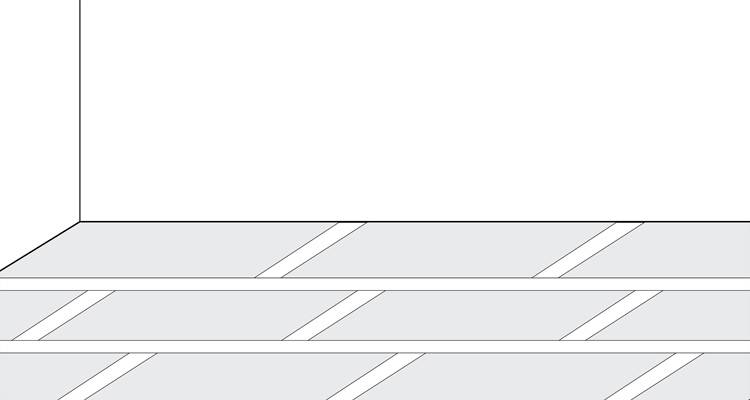
Step 3
Once the joints are sealed, you will then need to screw the boards into place, according to the manufacturer’s instructions.

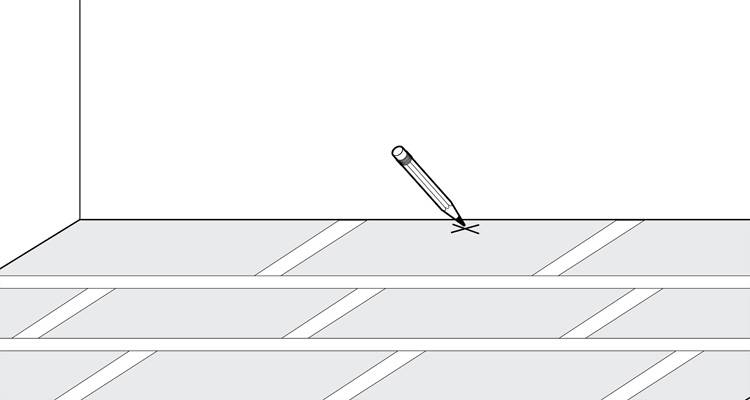
Step 4
You will then need to mark out where the fittings are going to go.
Step 5
Once you’re sure of your layout, it's time to start fitting the underfloor heating. Some important things to remember are that the cables can’t touch, they can’t cross, and you can’t cut the cable, so you need to make sure you get a cable that fits the room.
Step 6
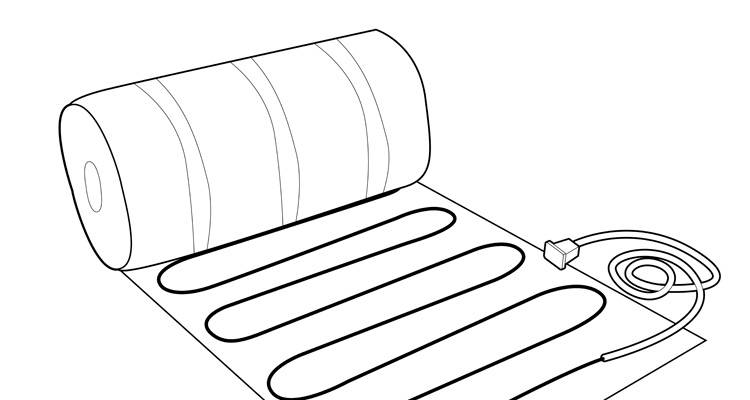
The next step involves opening up the heating mat and beginning to lay it, starting at the point where the controller is going to be.
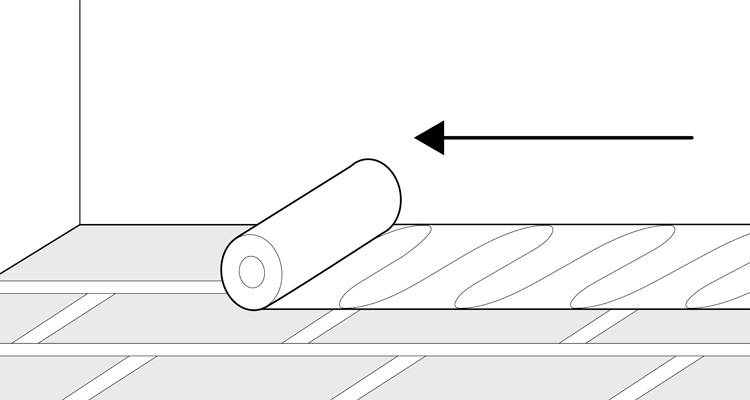
Step 7
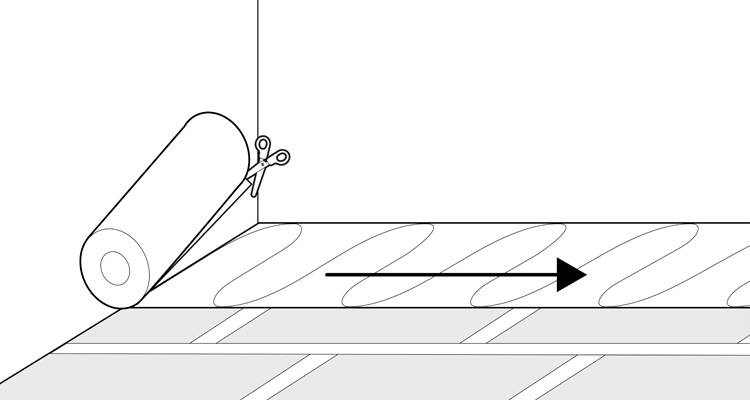
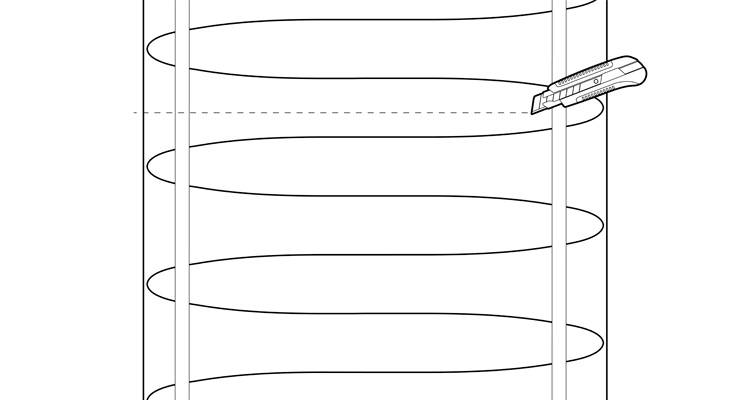
You should then start at the edge and roll it out. Once you reach the other wall, you want to then cut the mesh up to the wire.
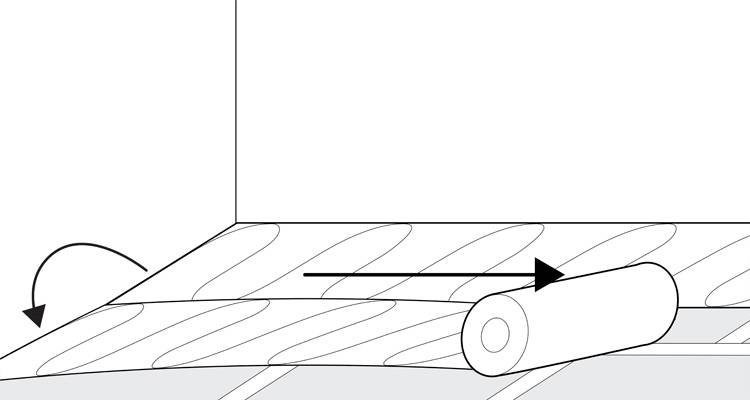
Step 8
You can then turn your roll around and start rolling again in the opposite direction. For more difficult areas, you can remove the heating element from the mesh and work it around any obstacles.
Step 9
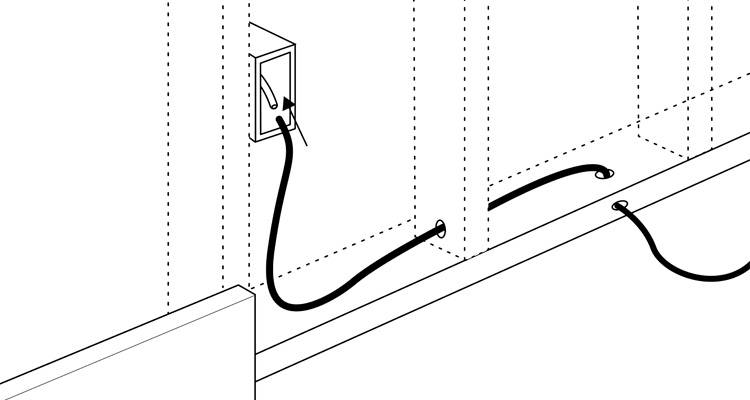
Once all the floor heating has been laid, the power lead needs to be fed up into the controller position. A qualified electrician must complete this step and connect it to the mains supply.
Step 10
Once done, you need to create a channel in the insulation boards so that the cable sits flat. You can do this by using a Stanley knife and creating a groove in the insulation boards where the wires can lie flat.
Step 11
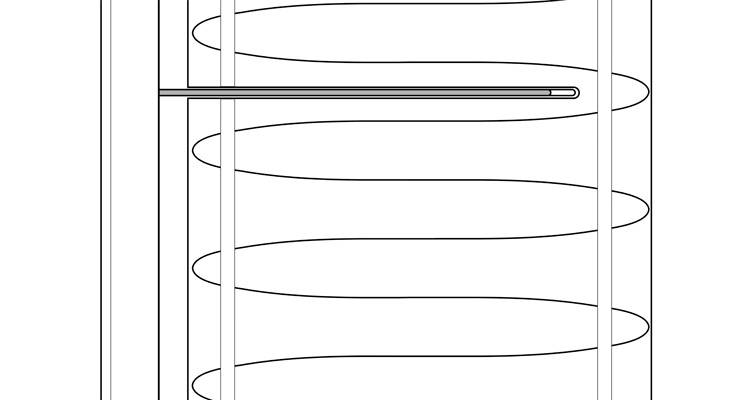
The floor probe needs to then be fitted in a conduit between two heating cables to ensure accurate readings.
Step 12
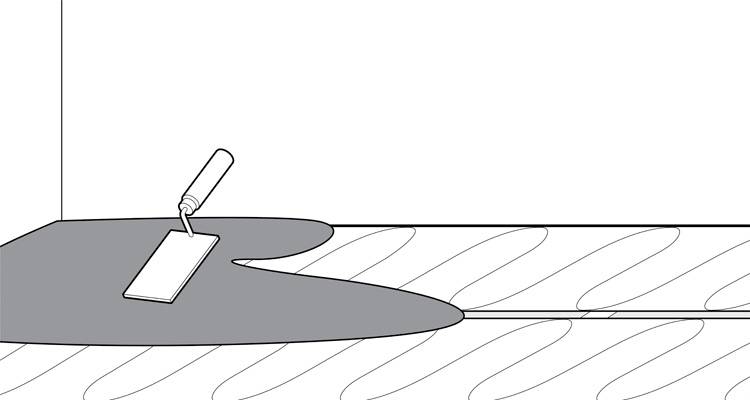
It’s now time to add the levelling compound. Pour it onto the floor and spread it out evenly using a plastic trowel. Check the manufacturer's instructions on the recommended depth.
Step 13
Once the levelling compound is dry, you can then install your flooring over the top.

The steps below explain how to install wet underfloor heating (water underfloor heating):
How to Install a Wet Underfloor Heating System
Step 1
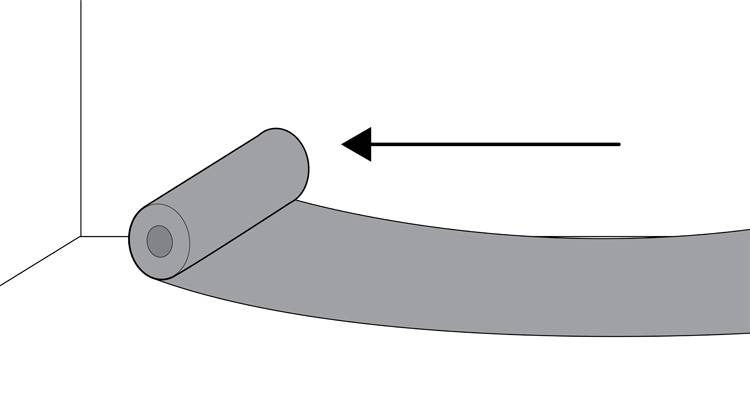
Begin by rolling a damp-proof membrane out across the entire surface of the floor.
Step 2
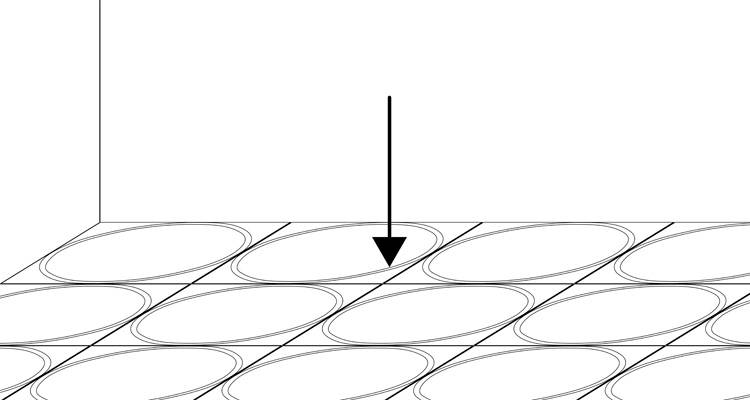
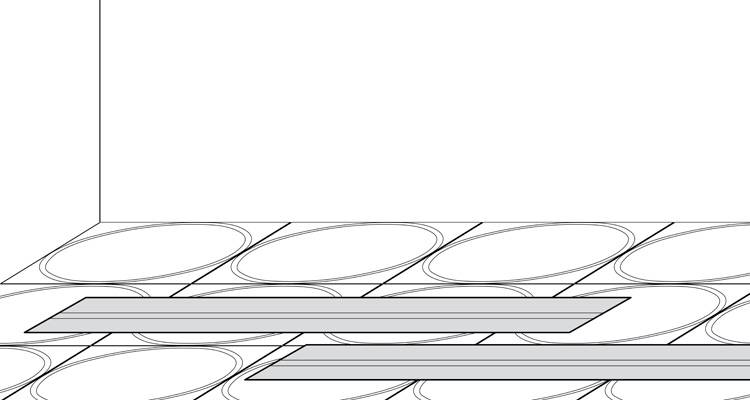
Once the membrane is in place, you can then lay out your pipework sheets on top of the damp-proof membrane. Cut them to size so that they fit across the entire length of the floor.
Step 3
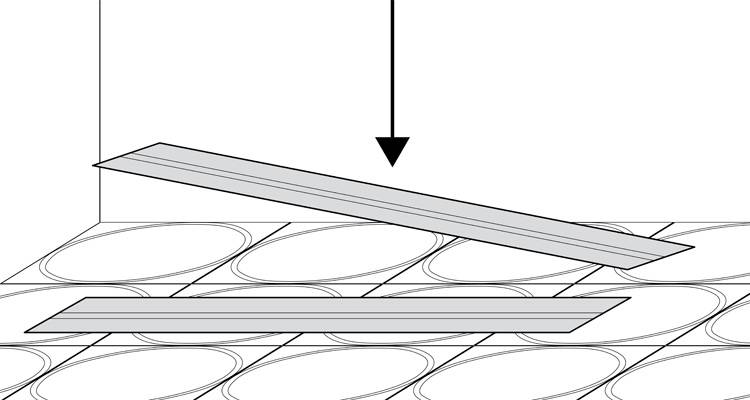
You should then insert aluminium spreader plates into the pipework sheets. They should slot easily into the gaps on the sheet, and they will help to hold them together while you finish laying out the pipework sheets.
Step 4
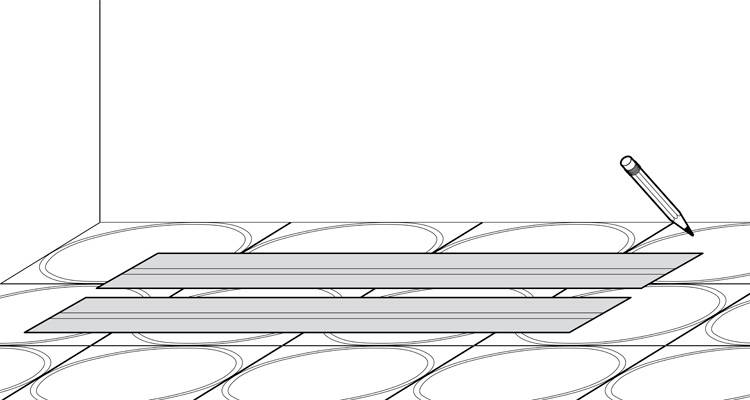
You can then mark out the route that the pipes are going to travel, being sure to avoid routing them under any appliances. Mark this out with a pen or pencil.
Step 5
You can then re-lay your spreader plates according to your route markings.
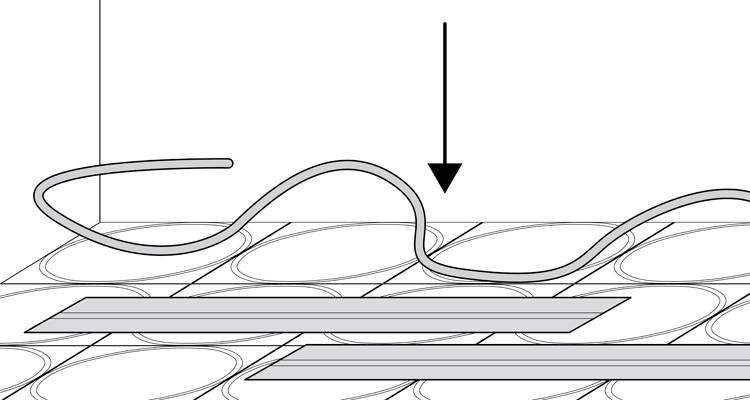
Step 6
The next step involves installing plastic piping through the grooves according to your route markings. The pipes should be connected to the manifold only by a qualified installer.
Step 7
Once you’ve installed all of the pipes, cover with floorboards or a layer of screed, depending on the system type.
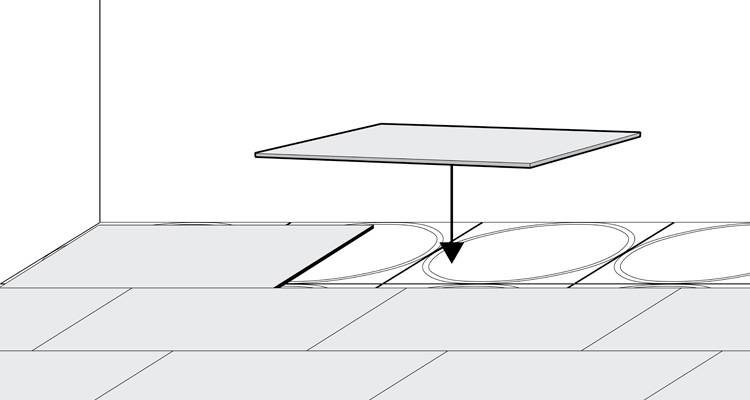
Step 8
Once you’ve laid all of the boards down, you can then add flooring on top of this as you wish.