my
myHow to Build a Shed
In this article, we demonstrate with images how to build a shed. We explain everything that you might want to know regarding the materials, maintenance and answer the most frequently asked questions.
Not sure about building a shed DIY?
Request a quote from one of our tradespeople instead.
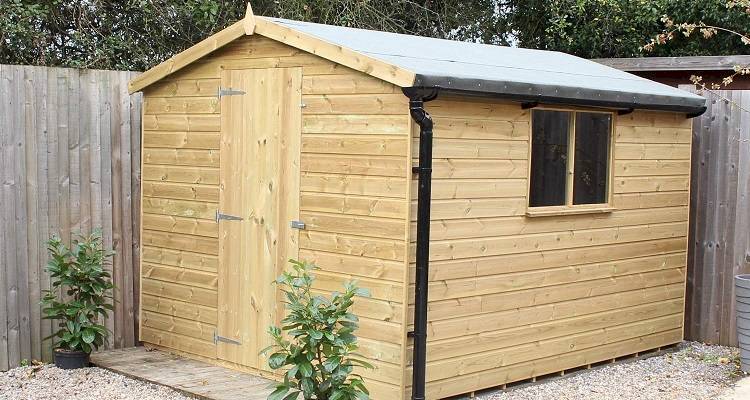
Table of Contents
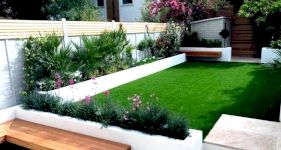
Do I Need a Shed?
If you're thinking about whether or not to build a shed, there are a number of reasons why it's a good idea.
Whether you are looking somewhere to keep your tools safe, a workshop, play area for your children, or even just as a storage area, a garden shed can be a practical investment for your property. It can also help kick-start a new hobby or allow you to continue with current interests.
What Tools Do I Need to Build a Shed?
Having the correct tools is essential if you plan on building a professional-looking shed, with the best possible and professional finish. A workman is nothing without his tools; we recommend you gather the following together:
- Power Drill
- Shed and fixings
- Clamps
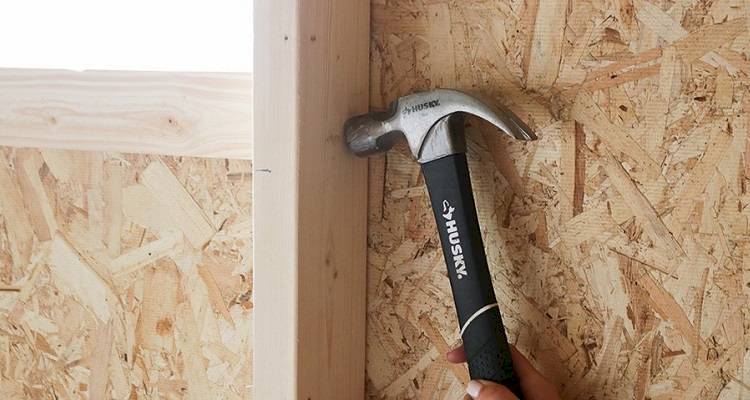
- Hammer
- Ladder
- Hand tamper or wacker plate
- Shovel, spade, rake and trowel
- Spirit level
- Stanley knife
- 90-degree builder's square
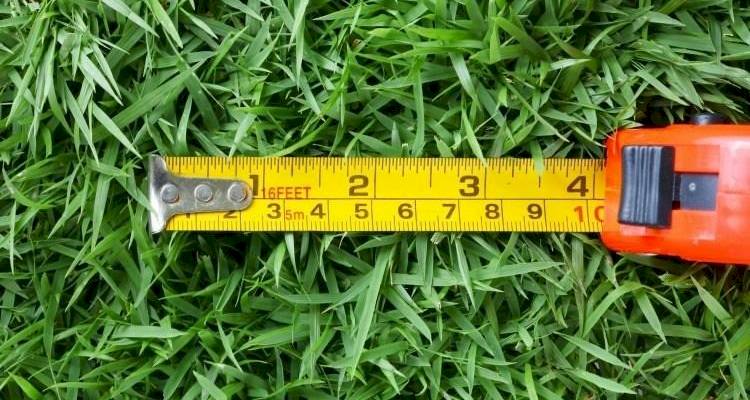
- Tape measure
If you are planning to add insulation, then you’ll also need shed felt and a sealant gun. A pen or pencil often comes in handy with markings, plus string, wooden pegs, and a rubber mallet can help outline the shed area.
What Safety Equipment Do I Need to Build a Shed?
It is always good to have standard safety equipment, especially during projects such as building a garden shed due to the type of work involved. It's also best to ask someone for assistance, as there's a lot of heavy lifting involved.
- Heavy Duty Gloves
- Safety Goggles
- Protective clothing
- Step Ladder
What Materials Do I Need to Build a Shed?
You’ve got the tools, so now it’s time to collate the materials needed to embark on your building project. Make sure you have the following:
- Concrete slabs
- Shed base
- Gable ends
- Roof panels
- Shed felt
- Side panels
- Hardcore (10mm to dust)
- Clear sealant
- Screws & Nails
Preparing to Build Your Shed
Before building your shed, choose a dry, level area with enough support for the shed’s weight, and avoid areas that may collect water as this can cause damp issues at a later date. Measure the space and use pegs and string to mark out the correct dimensions.
Remove any turf within the marked area ready to prepare the ground. You will need to allow enough depth for 50mm of hardcore, 100mm of sub-base, 20mm of dry sand and cement mix, as well as approximately 30mm for any concrete slabs.
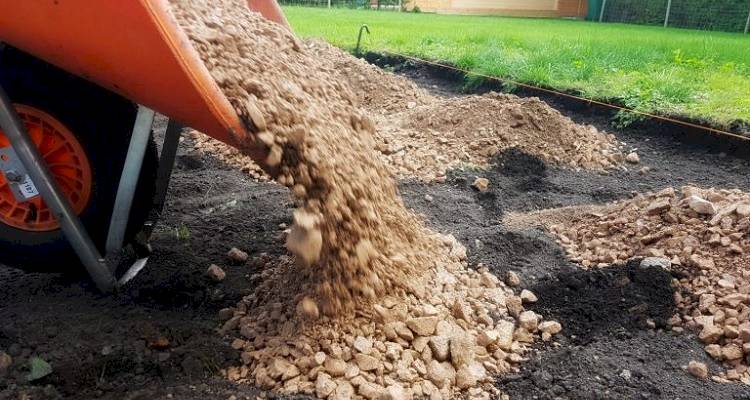
Fill the area with hardcore, raking it for consistency and compact it using a hand tamper or wacker plate. Add the dry sand and cement mix on top and spread evenly to create a smooth surface - ensure the area is level by checking with a spirit level.
Lay your concrete slabs with small, even gaps between them, remembering to check they are level as you go. Finish the base by filling in any joints with a sand-and-cement mixture, brushing away any excess.
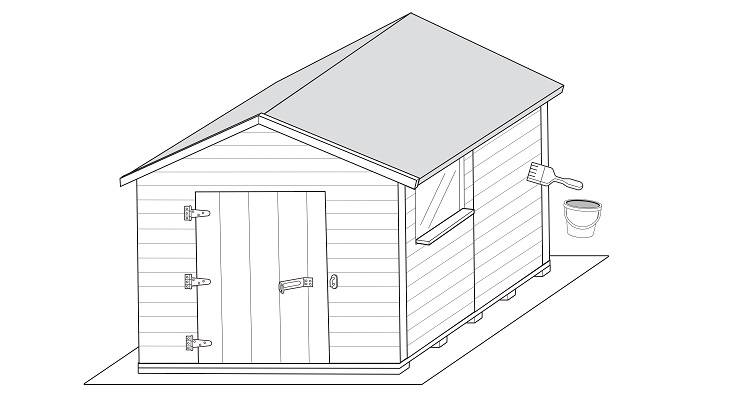
How to Build a Shed Yourself — Step by Step Guide
Now your shed base has been established building your wooden garden shed should be fairly straightforward to erect and assemble. Follow our 12 easy steps to help build your own shed safely and securely, although as they can differ in design, if you are building from a kit always make sure to follow manufacturer’s instructions for best results.
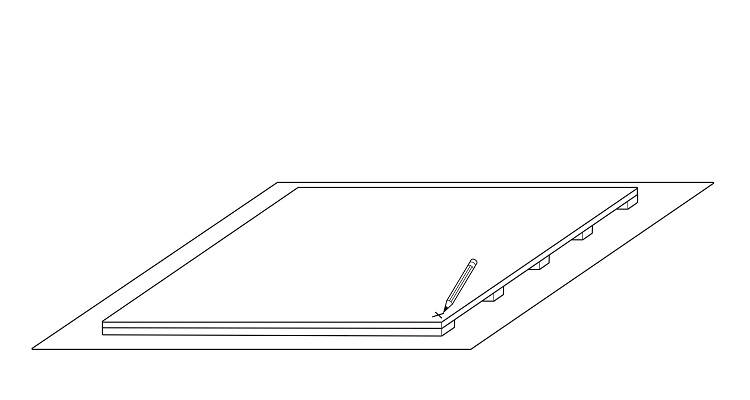
Step 1
Take your wooden shed base and lie this directly on your concrete base. You’ll need to mark with a pencil where your floor bearers are; you can then use these markings as a reference to know where to screw the side panels down.
Step 2
Stand the gable end upright with a side panel and have someone hold them in place. Pre-drill three holes (top, middle, bottom) and screw the panels together to prevent the wood from splitting. Repeat with the other side panel to form a solid base. You don't need to attach to the base at this stage, although if you are using a kit, manufacturer instructions may differ.
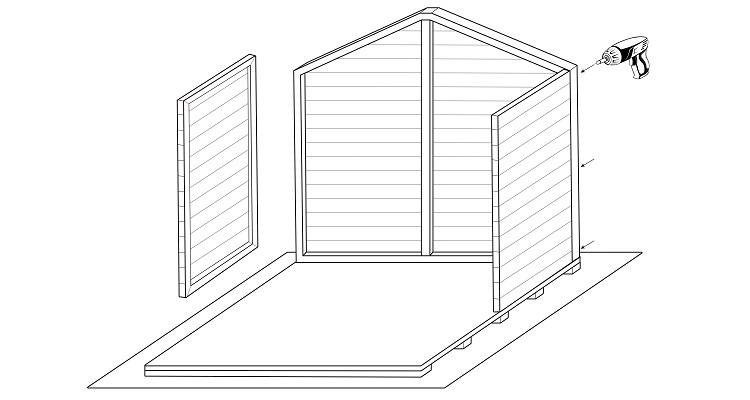
Step 3
Next take your side panels, you want to make sure these are perfectly aligned with one another, to do this accurately you’ll need to use a clamp, using this to hold both sides together before screwing in with your drill, again make sure to spread these evenly. Do the same with the window panel of your shed.
Step 4
We mentioned marking the floor of the shed to show where the bearers run across the floor. This is the section you will fix the sides to the base of the shed. Like we did with the side panel, we advise you pre-drill the holes first before adding screws. Please make sure you check the overhang of the panels to the base, ensuring this is tight to the base. Don’t screw to the base at this point as you will need to wait till all the panels and gables are screwed together at the sides.
Step 5
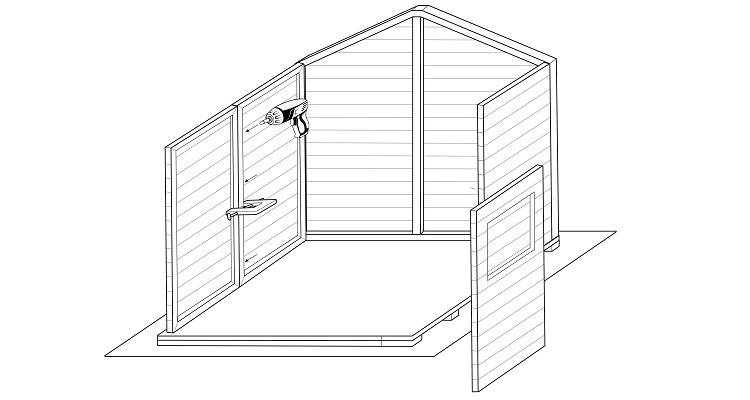
It’s now time to take your front gable, continue as before and screw the sides to the adjoining panels. You are now able to screw down to the base of the shed, using the pre-made drill holes created previously.

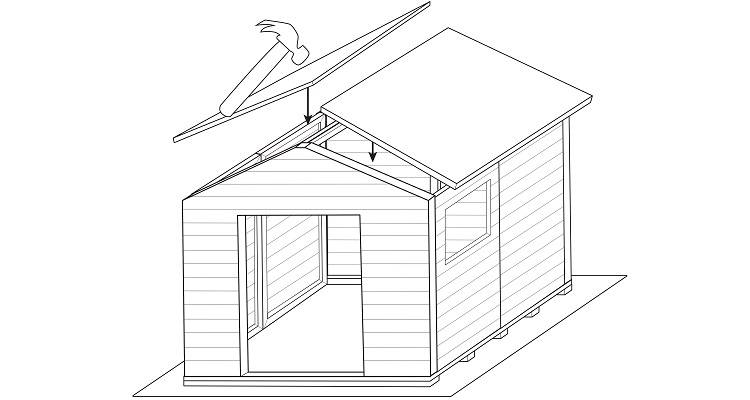
Step 6
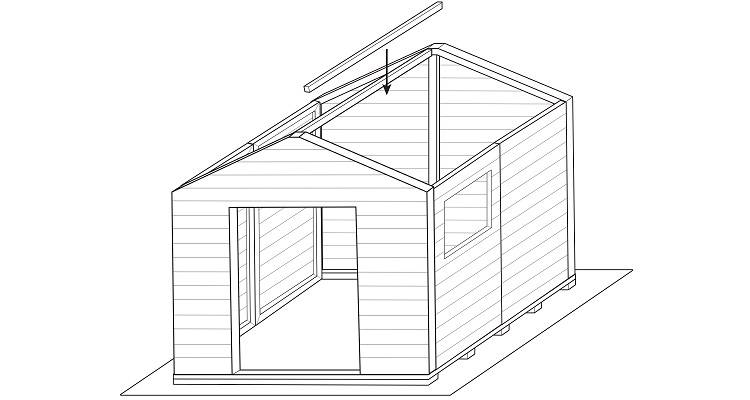
After all that’s secure it’s time to get your roof rails, these will go across the top of the shed, which will allow you to connect your roof panels. Notice, there should already be a pre-cut area in the gables for you to slot these into. After these are in place, screw both of the wooden rails together which will create the support you need for your roof.
Step 7
You should now be ready for the roof panels. With your two extra roof rails, you will need to attach each one (on the longest side) of each roof panel. Match the roof rail up to the edge of the roof panel and nail these together. This will then allow you for something to connect the felt to later on in the process. Repeat the same on the other side. You can now slot the two panels into place to create your roof structure.
The roof rails you have just attached to the panel should be left on the sloping edge of the shed. The panels are now ready to be nailed, make sure they are nice and square, and the two panels meet without crossing over each other, then nail down. You’ll need to be more generous with screws here as you don’t want your roof coming off. As always, make sure you are following the manufacturer's instructions.
Step 8
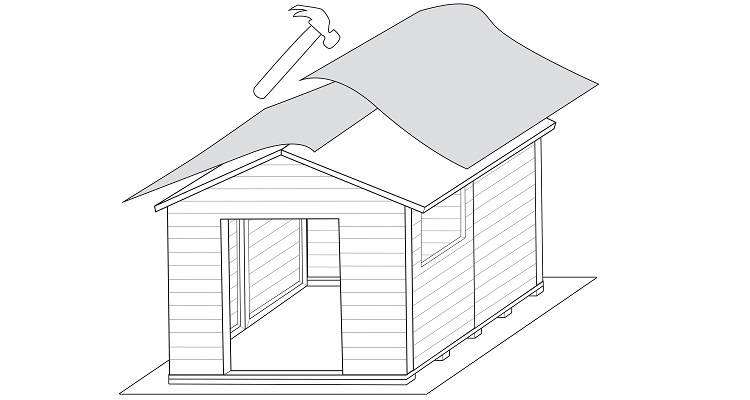
Place the roofing felt the right way up with the mineral-textured side facing outwards. Position it at the roof edge near the beam, it's often recommended to nail it underneath the beam to help keep the felt tight, although some manufacturer's may advise differently. Next, pull the felt up towards the centre of the roof and repeat on the other side. Leave an overlap in place for waterproofing and nail the felt down, starting from the middle and working outwards.
Step 9
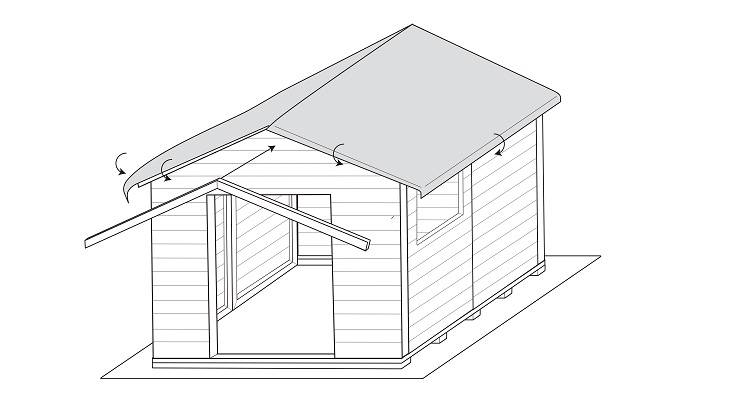
You should now be left with an even overhang of felt on both sides of the shed. Again, do not attempt to cut this off. Simply fold the excess felt, your wooden fascias will ensure the excess is hidden. Take your fascias and make sure you nail this to your wooden support beams, one at the outer edge, and one in the centre. You can then repeat this on the other side of the shed.
There should also be some finishing strips in your pack, which do as they say on the packet and add those finishing touches to your shed to keep it looking tidy. There should be one for each corner of the outer edges of your shed (where the panels join), and also one of each panel in the middle. We advise you nail these on now before continuing.
Step 10
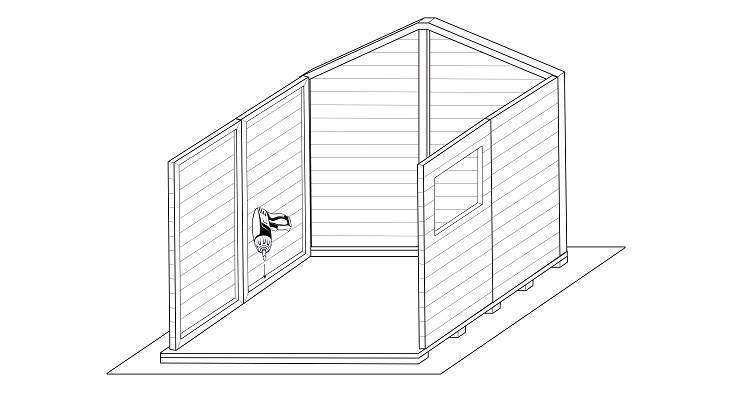
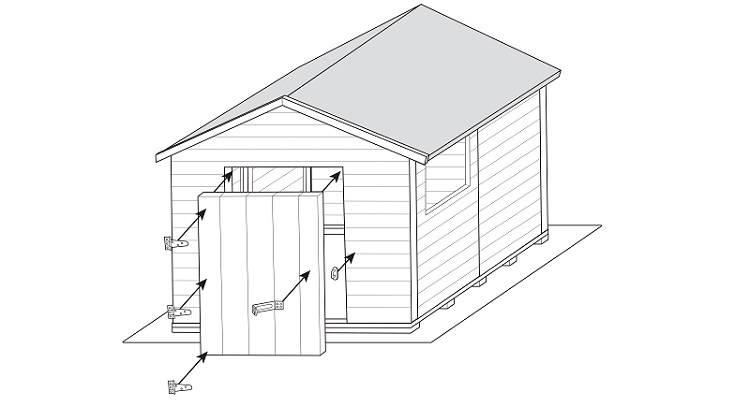
Now your shed needs a door, so it’s time to grab your T hinges, there should be three, which match the three cross rails on the other side. Make sure you place these in line with the wooden rail. This should be easy as you should already see where they have been attached, making it easier for you to place your hinges more accurately. Then begin in screw these into place on the door.
After this, you are now ready to put the door into position, ensuring you leave a nice even gap around the sides. Screw the hinge onto the frame of the shed. Double-check the shed door opens and shut easily; you don’t want to mess this part up. Take extra care.
To ensure your shed is fully secure, you’ll need to fit your hasp and staple. It’s really important that when you screw this down, the fold covers the screws; otherwise a burglar will have a really easy time opening your shed. This should also overlap to the door and the wall panel to allow it to fit the staple correctly, you can then add your lock.
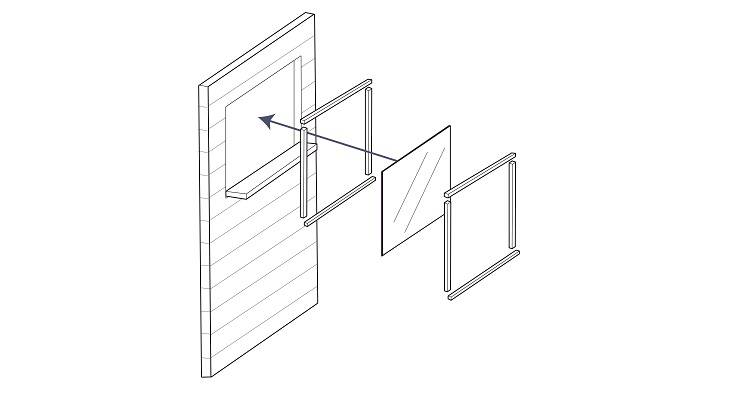
Step 11
Next create the window rebate by nailing the two shorter sides onto the longer pieces, and add a bead of clear silicone, you will also need to add the window ledge so water can run off. Set the pane in place, then use the remaining rebate pieces to secure it. Pre-drill and screw them into place carefully to avoid breaking the glass. Modern shed kits often make this easier with pre-cut frames and plastic or acrylic panes instead of glass.
Step 12
Your shed is now built and complete, all that’s left to do is coat the wood with wood preserver. This will help protect your shed from weathering and prolong the life of your structure. Coat the wood with preserver (both inside and out), taking the appropriate safety precautions to protect your skin and to prevent inhaling any dust or fumes. Aim to complete this step within 7 days of erecting your shed to ensure the best results.