my
myHow to Tile Around a Toilet
Cutting and placing tiles to fit perfectly around the base of a toilet needs careful planning and precision. To get the best results read our detailed step by step guide that covers everything, including tools, you need to know on how to tile around a toilet.
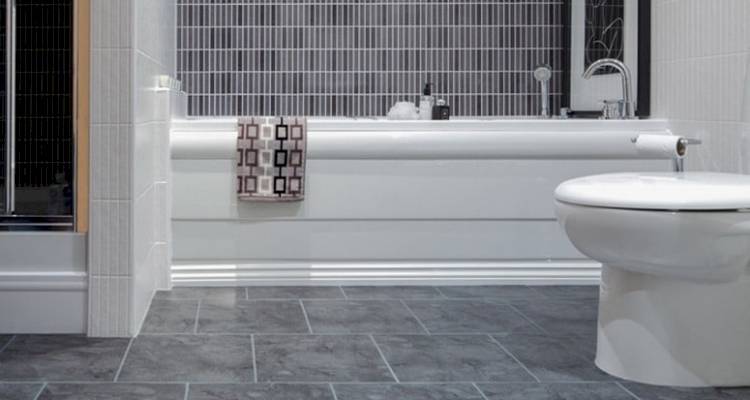
Table of Contents
What Tools Do I Need to Tile Around a Toilet?
Below is a list of the tools that you will need to tile around a toilet:
- Tile scribe
- Tile nipper
- Tile file or fine sandpaper
- Adhesive spreader
- Masking tape
- Cloth
- Pencil or pen
- Scissors
- Paper
What Safety Equipment Do I Need to Tile Around a Toilet?
Below is a list of the recommended safety equipment that you will need when tiling around a toilet:
- Safety goggles or glasses
- Dust mask
- Protective gloves
What Materials Do I Need to Tile Around a Toilet?
Below is a list of the materials that you will need to tile around a toilet:
- Floor tiles
- Tile adhesive
- Grout
How to Prepare for Tiling Around a Toilet
To prepare for tiling around a toilet, you want to ensure that you have already tiled the rest of the room. The toilet and any other obstacles should be the last things you tile around as these are the most difficult.
Before you start tiling around the toilet, you should wait for the rest of the tiles to dry so that you can step on them without them moving around at all.
When tiling a bathroom the best way to tile around a toilet is to create an accurate paper template, so you have something to work off and know how the tiles will need to be cut. We will go over how to do this and provide more information in our step-by-step guide on 'how to tile a bathroom floor around a toilet' below.
How to Tile Around a Toilet Yourself
Below is a step-by-step guide on how to cut tiles around a toilet. If you decide to hire a professional tiler, they may go about the project slightly differently due to their prior experience.
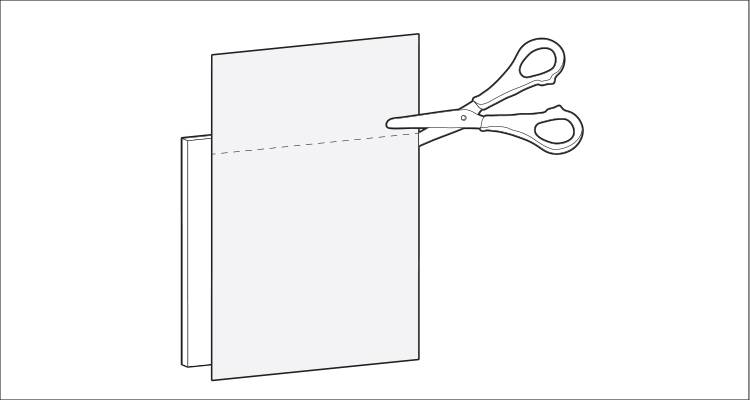
Step 1
Cut a piece of paper to the same size as your uncut tiles ready to use as a template.
Step 2
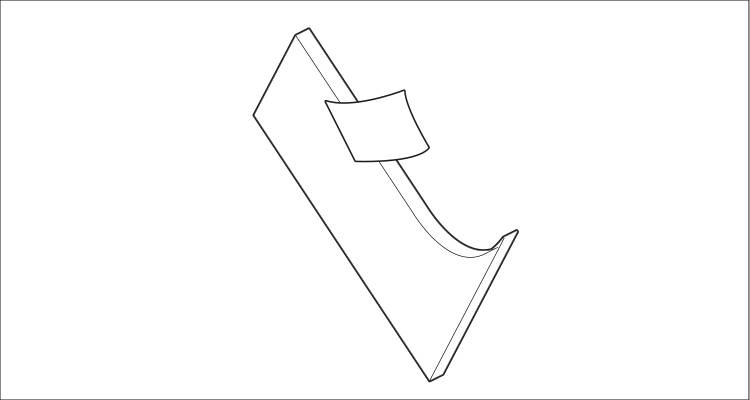
Using your paper template, cut several slits in the paper (around 5-10mm wide) so they are slightly longer than the overlap around the toilet base. This will allow the paper to bend around the shape of the toilet, providing an accurate template to use on your actual tiles.

Step 3
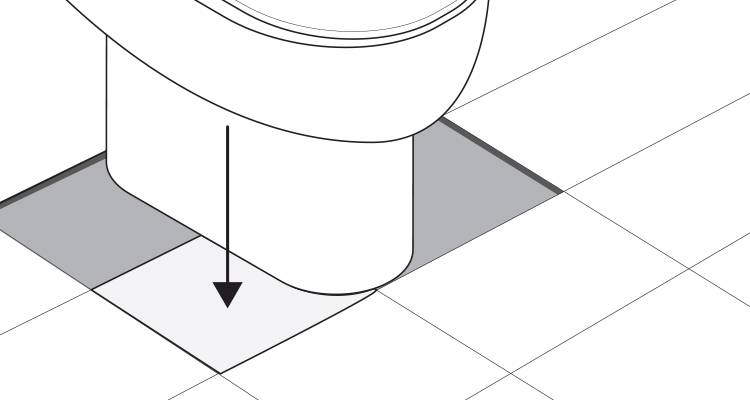
Place the paper tile into position next to your existing tiles with the cut slits next to the toilet, leave enough space for the grout gap.
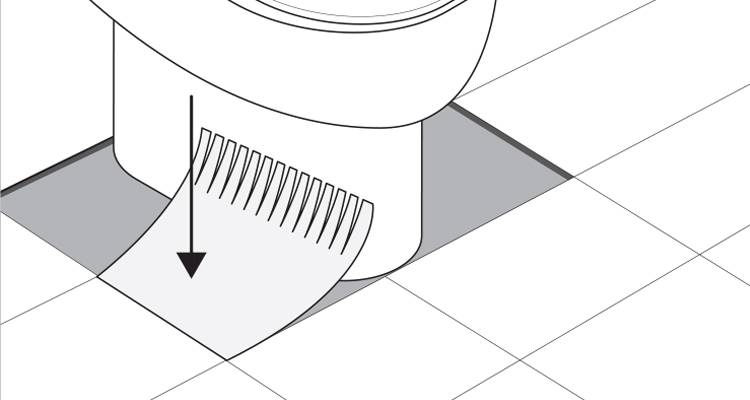
Step 4
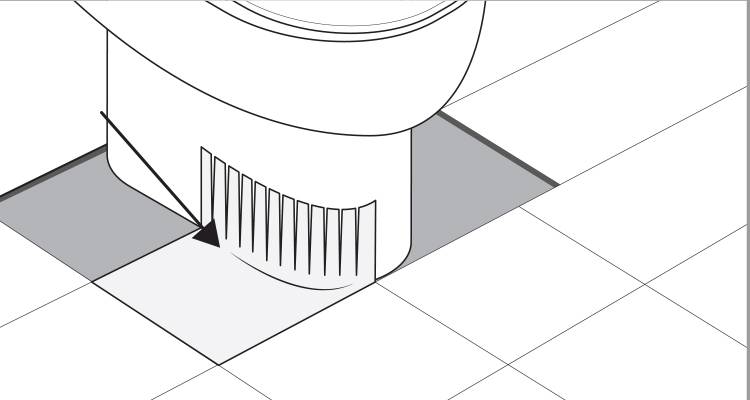
Carefully fold back each strip of the paper, pressing them against the obstructing toilet.
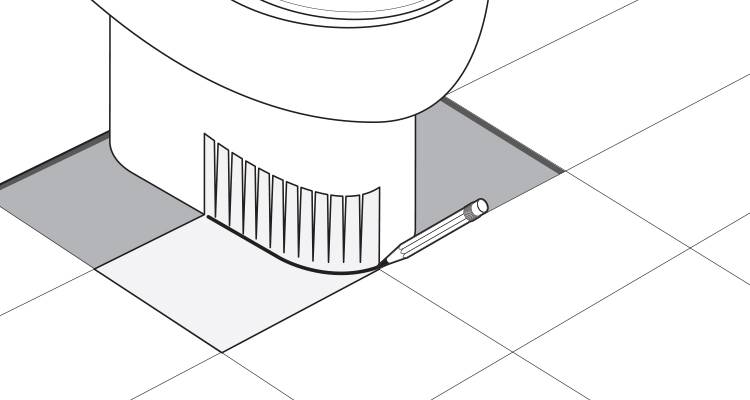
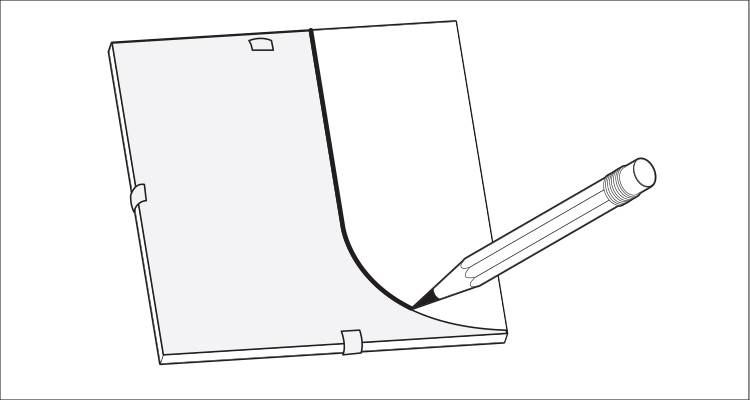
Step 5
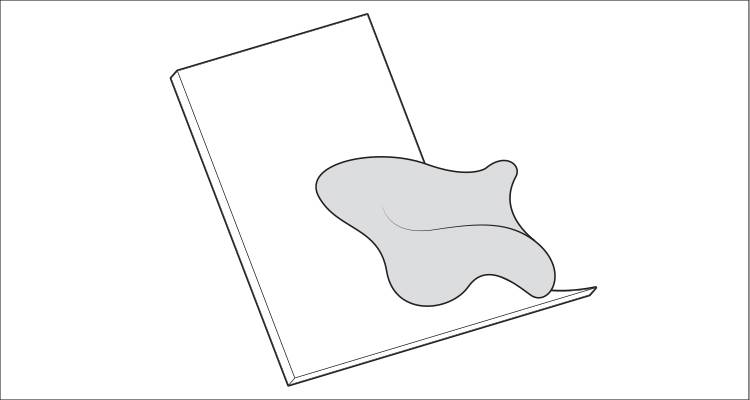
Then, draw a line with a pen or pencil on the paper template along the shape of the toilet base.
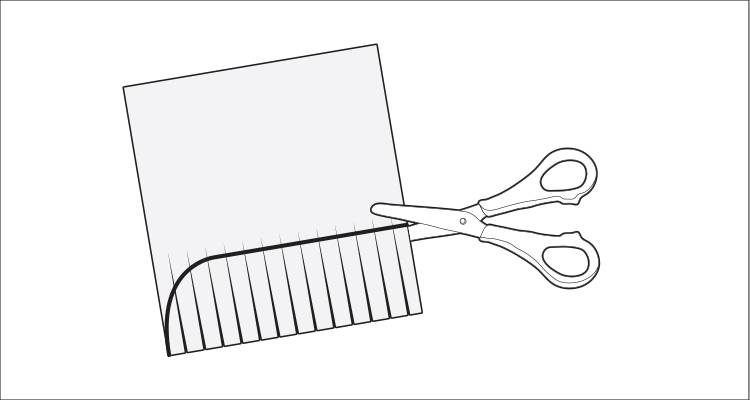
Step 6
Remove the paper tile and cut along the line using scissors.
Step 7
Place the paper tile back into position and check again that the position is exactly right.
Step 8
Then, secure the paper to a new tile using tape and mark along the edge of your template using a pencil or pen.
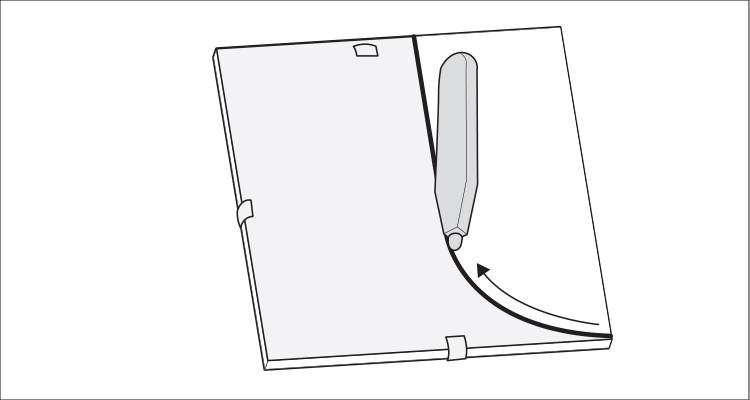
Step 9
Scratch over the marked line using a tile scribe to mark the tile and help create a clean cut.
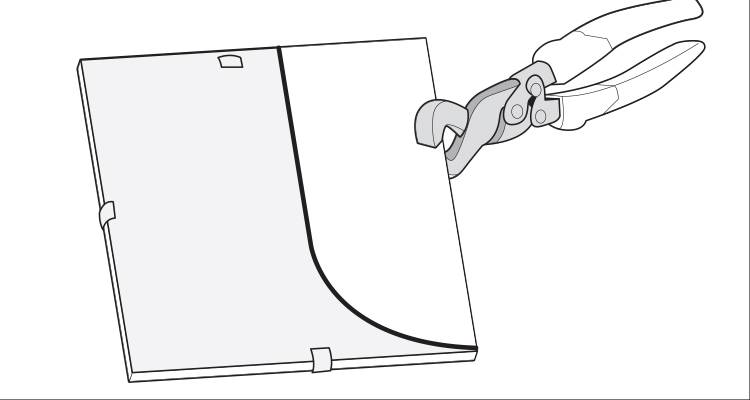
Step 10
Then, use a tile nipper to take small chunks off the tile to shape it accordingly. Keep chipping away until you reach the marked line, this should then make it the right shape to fit around your toilet.
Step 11
Once you've finished cutting your tile to the right shape and size, use a tile file or very fine sandpaper along the edges to ensure a smooth cut.
Step 12
Then, wipe the tile down with a wet cloth to eliminate any dust or remaining splinters.
Step 13
Now, check that the tile fits snugly against the toilet.
Step 14
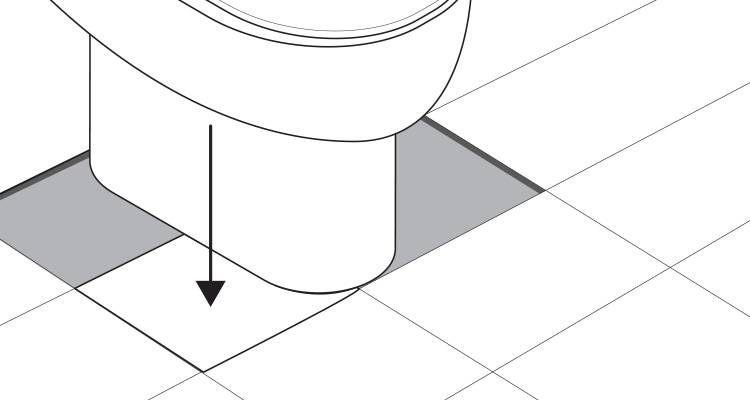
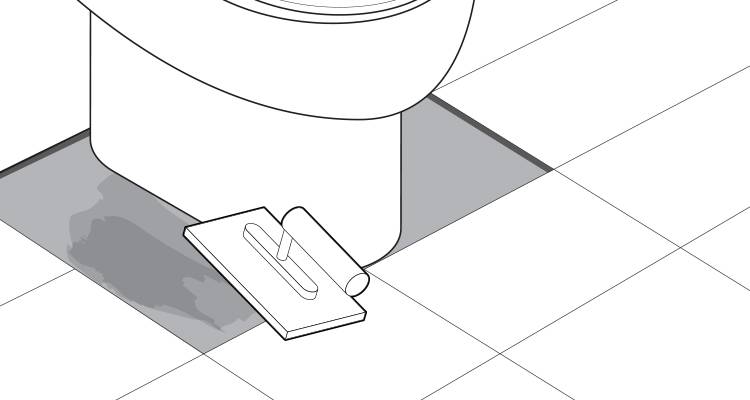
Once you're happy with the fit of the tile, apply adhesive and press it into the gap.
Step 15
Repeat these steps for all of the tiles around the toilet and once they have fully set (usually within 24 hours) you can begin grouting, ensuring you follow the manufacturer's instructions.
Tile Types
Below is a list of the most popular tile types for tiling around your toilet:
Ceramic Tiles
Ceramic tiles come in a range of colours, sizes, shapes, and finishes. These are strong tiles that are easy to maintain and are cost-effective.
Pros
- ✔ Durable
- ✔ Cost-effective
- ✔ Extensive range of colours and styles
Cons
- ✖ Not as impervious to water as porcelain tiles
Vinyl Tiles
These are the most common type of tile used in bathrooms as they are easy to install, eco-friendly, and a synthetic material less prone to cracks or breakages. They are also low in cost compared to other tiles and come in a range of colours and styles.
Pros
- ✔ Cheap to buy
- ✔ Resilient
- ✔ Easy to install
- ✔ Come in a range of colours and styles
- ✔ Eco-friendly
Cons
- ✖ Not as beautiful as some other types of tiles
Marble Tiles
Marble tiles are traditional and sophisticated, and they come in a range of sizes and styles. They add an interesting range of textured colour to the bathroom.
Pros
- ✔ Very beautiful type of tile
Cons
- ✖ Expensive
- ✖ Can become scratched or stained
Granite Tiles
Granite tiles are very attractive and versatile. They also come in a range of colours and styles, and providing they sealed correctly are resistant to moisture and stains.
Pros
- ✔ Strong and durable
- ✔ Aesthetically pleasing
Cons
- ✖ Can be slippery
- ✖ Expensive
Porcelain Tiles
Porcelain is hard, durable, moisture-resistant, and less susceptible to scratches than other tile types. They come in a number of different colours and styles to suit your taste.
Pros
- ✔ Very durable
- ✔ Lots of colour options
- ✔ Aesthetically pleasing
- ✔ Very water-resistant
Cons
- ✖ Expensive
Tile Maintenance
There are several ways in which you can easily maintain your floor tiles and keep them looking and performing their best. Below is a list of things that you can do to keep on top of maintaining your tiles:
- Remove excess dirt regularly
- Do routine deep floor cleans
- Re-grout your tiles periodically
- Re-seal grout lines to prevent dirt and moisture build-up
- Avoid walking on the tiles with shoes on
- Repair or replace damaged floor tiles as soon as possible
It is recommended to clean your bathroom floor tiles at least once a week. However, the frequency may vary depending on the bathroom's usage, the type of tile, and how your tiles respond to moisture.
How to Remove Tiles
Below is a step-by-step guide on how to remove floor tiles, although be cautious during this process so that you don't cause any damage to the subloor:
- Break apart the first few tiles using a chisel and hammer
- Remove these broken pieces and place them in a bucket.
- Inspect the underneath of the floor and make sure there is no damage to the underneath.
- Use a pry bar to pull up the pieces of tile that aren't easily removed.
- Once you've got your starting point up, continue to remove the tiles across the whole length of the floor using a long-handled floor scraper.
- Once all the tiles have been removed, inspect the floor underneath. You may need to remove underlayment or floor tile adhesive.
- Once everything has been removed, all that needs to be done now is the clean-up. Clean the area thoroughly and dispose of all of the old tiles.
- Your floor is now ready to be re-tiled or re-done however you please.