my
myHow to Silicone a Bath
If you are looking for advice on how to silicone a bath, this article has everything you need to know to complete the job correctly on a DIY basis. This covers the necessary tools, materials, and safety equipment you need for a safe and quick application. You will also find a complete step by step guide on how to apply bath silicone like a professional.
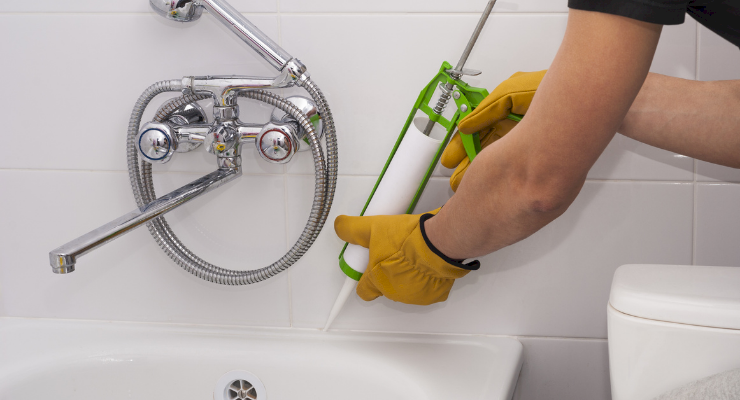
Table of Contents
What Tools Do I Need to Silicone a Bath?
Before you can apply silicone to your bath, you need to make sure you have the right tools to complete the job properly. Below is a list of the tools that you will need to apply silicone to a bathtub:
- Utility knife
- Silicone applicator
- Caulking gun
What Safety Equipment Do I Need to Silicone a Bath?
Applying silicone to a bath is a relatively straightforward job, even if you don't have much DIY experience and there's no need for any specific safety equipment.
However, just to be safe, you may wish to use protective gloves and safety glasses to avoid getting any on your skin or eye area. While silicone is generally non-toxic, sufficient ventilation is still advisable as some sealants can release fumes during the curing process.
What Materials Do I Need to Silicone a Bath?
One of the main things you need to consider when applying silicone to a bath is you need to make sure you have the right products for the job. The materials needed are listed below:
- Towel
- Silicone bath sealant
- Masking tape
- Cleaning solvent (optional)
How to Prepare to Silicone a Bath
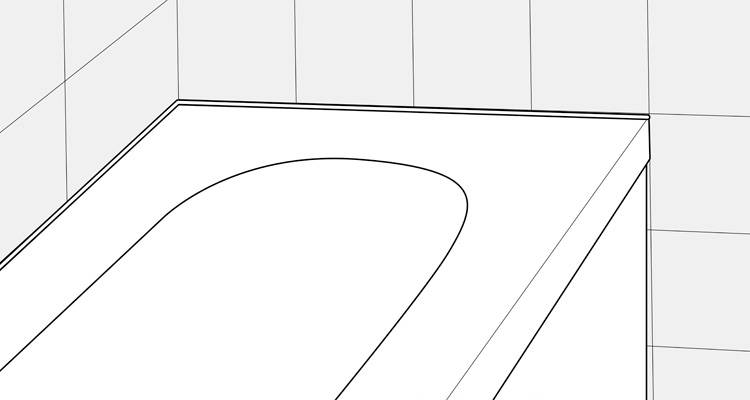
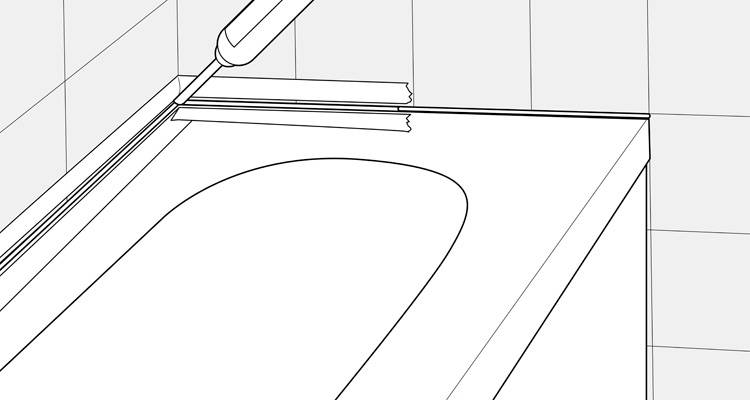
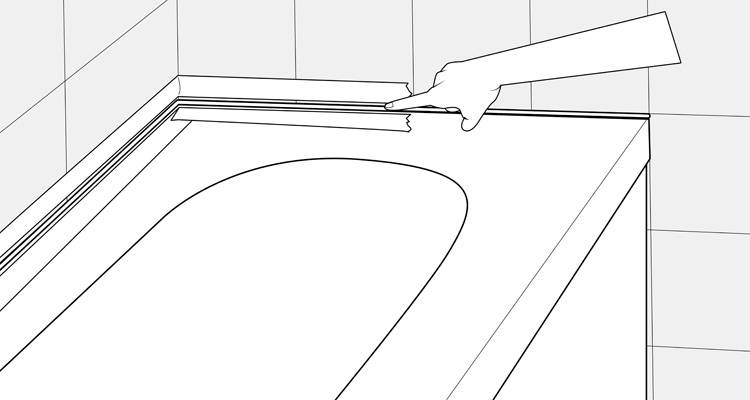
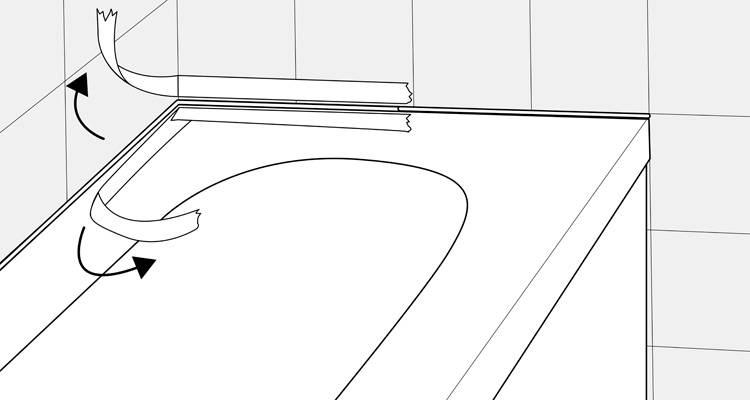
It is essential that you prepare the area before you go ahead and silicone your bath. To do this, you must first remove the old silicone. Follow the steps below to safely and correctly remove silicone from your bath:
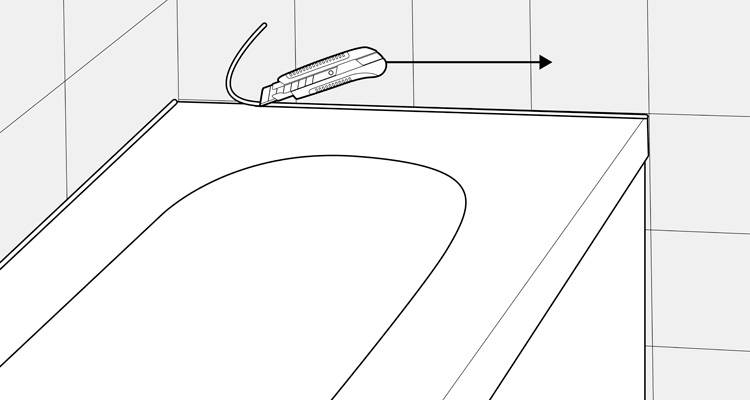
- Use a utility knife to carefully cut along the top and bottom of the existing silicone. Be careful not to scratch your bathtub during this process, as this could result in costly bathroom repairs or even lead to installing a new bath altogether.
- The majority of the silicone should then be loose enough to peel away by hand, although use the knife to remove any patches that are left. Repeat this process across any areas where silicone is to be applied.
- Use a scrubbing brush to clean the surface, removing any marks or stubborn residue. For stubborn areas, you should add acetone to a scouring brush to use on the bath and tiles to ensure the area is clear of any remaining silicone.
- Wipe the area thoroughly with a towel and ensure the bath is completely dry before applying new silicone. Thorough drying is essential to prevent mould and ensure adhesion.
How to Silicone a Bath Yourself — Step-by-Step Guide
When choosing a bath sealant, the best kinds are those that offer long-lasting protection against the growth of mould and water damage. As to the process of applying bath sealant, the following guide provides help to complete the job quickly and correctly:
Step 1
Before you apply the sealant, you need to cut the end of the silicone applicator off to an appropriate size to match the gap you’re dealing with.
Step 2
Once you have cut the sealant to the exact measurements, the next step involves lining up the application area. To get a good straight line, you need to apply some tape to the areas that you don’t want silicone on.
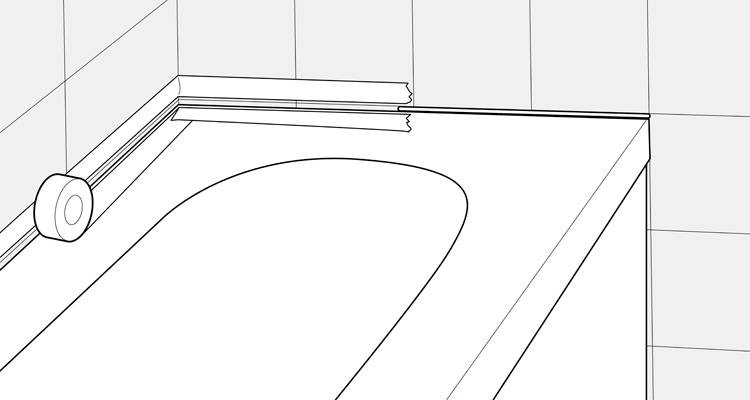
Apply this to the tub surface and to the bottom of the tile. This will also help to protect your tiles from staining or damage.
Step 3
If you are using a silicone gun, you need to unscrew the applicator end in order to cut open the end of the silicone tube. Once this is complete, you should then replace the applicator and cut it open, making sure you make an angled cut with your utility knife. To apply the silicone, you need to get as close as possible to the bath’s edge to ensure precise placement.
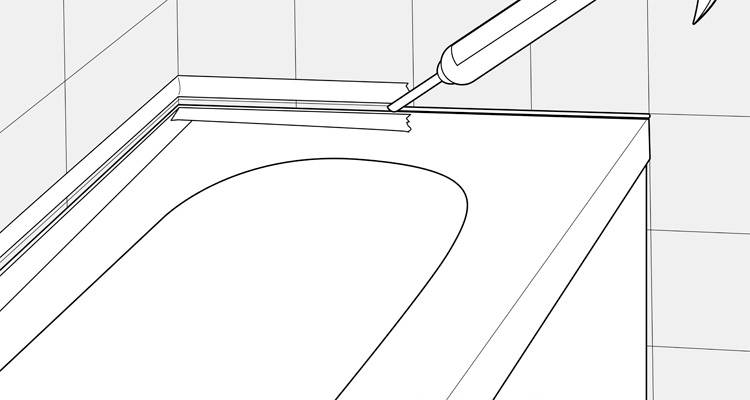
You should then press the caulking gun trigger and run the silicone gun along the line in a slow and smooth motion, starting from the furthest corner. This will ensure that you do not touch the silicone. When doing this, make sure that the silicone fills the gap between the tile and the bathtub.
Step 4
Once you have covered the entire circumference of the bath, you should then smooth out the silicone at an angle with a silicone applicator, a wet rounded tool or you can even use your finger.
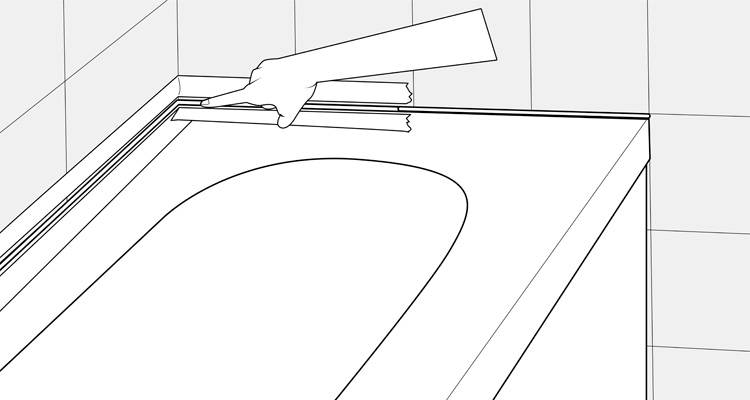
If using your finger, you should wet it a little and rub it along the line to ensure it is pushed into the gap and is even. This allows you to see how much more sealant needs to be added. This is especially important if you have a shower bath, as the sealant will shed the water back into the tub.
Step 5
After smoothing down the sealant, you should inspect the silicone and fill in any areas that aren’t even or where any gaps appear. This step will work much better with a caulking gun as it will offer complete precision.
Step 6
Once you are satisfied with the above step, you should then take the sealant applicator or a wet finger and run it over the newly added silicone to ensure it is pressed down fully and is even.
Step 7
The silicone should then be checked once again to ensure that it is even and that there are no gaps.

Step 8
Once you’re pleased with the finish, you can then carefully remove the tape around the bath. Make sure you pull the tape at an angle away from the silicone to avoid smearing it, as this can be a messy and time-consuming job.
Step 9
Inspect the silicone again and see if any areas need to be touched up. You can run your finger along with any parts that seem uneven to even them out.

Step 10
Once you’re happy with the result, you should then leave your silicone to dry for 24 hours. However, fast-curing products are also available, so it's always best to check manufacturer guidelines.