my
myHow to Lay Decking
Are you thinking about installing DIY garden decking at your home but wondering where to start? This article will go over everything you need to know about how to lay a garden deck, along with a list of all the tools and materials that you'll need to complete the job.

Table of Contents
What Tools Do I Need to Install Garden Decking?
Below is a list of the tools you'll need for fitting a garden deck:
- 3-4mm drill bit
- 7mm masonry drill bit
- 6mm countersink drill bit
- Jigsaw
- Circular saw
- Hand saw
- Spirit level
- Drill
- Tape measure
- Work bench
- Set square
- Sandpaper
- Hammer
- Pencil
What Safety Equipment Do I Need to Install Garden Decking?
Below is a list of recommended safety equipment for laying garden decking:
- Safety gloves
- Safety glasses
- Safety mask
What Materials Do I Need to Lay Garden Decking?
These are the materials that you'll need for installing wooden decking in your garden:
- Deck boards
- Exterior grade joists
- 64mm decking screws
- 100mm timber drive screws
- 150mm timber drive screws
- 100mm coach screws
- 7mm wall plugs
- Flat square washers
- Joist hanger
- 30mm screws
- Adjustable decking risers
- Preservative
How to Prepare for a Garden Decking Installation
Planning is very important when it comes to laying garden decking. Below is a list of things you'll need to do to prepare for installing your new garden decking:
- Decide on the location for your new decking, taking into consideration whether you're after being out in the sun or shade and consider how the position impacts on your privacy.
- Plan your deck on paper, make the plans to scale as this will help ensure accuracy when ordering decking boards and can reduce the amount of cutting and wastage.
- If you are building your decking next to a house, keep it at least 150mm below the damp proof course and avoid covering air bricks.
- For decking over a lawn, dig out a depth of 50mm and cover it with landscaping fabric, adding gravel to the fabric to hold it in place (preventing further weed growth).
- Order the appropriate number of decking boards and joists for the size of your desired decking area.
Once all of the above steps have been completed, see our below guide on how to install garden decking within your home.
How to Lay Decking Yourself — Step-by-Step Guide
Below you will find an in-depth guide on how to build a raised deck. Please note that steps 1-11 only apply if you are building your raised decking up against your home.
Step 1
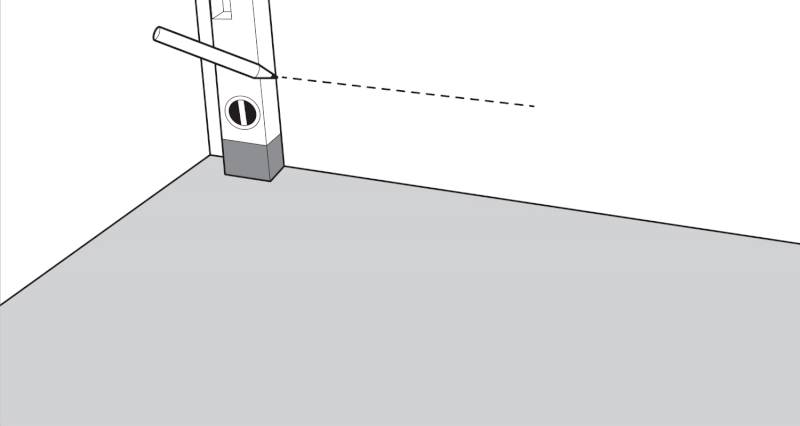
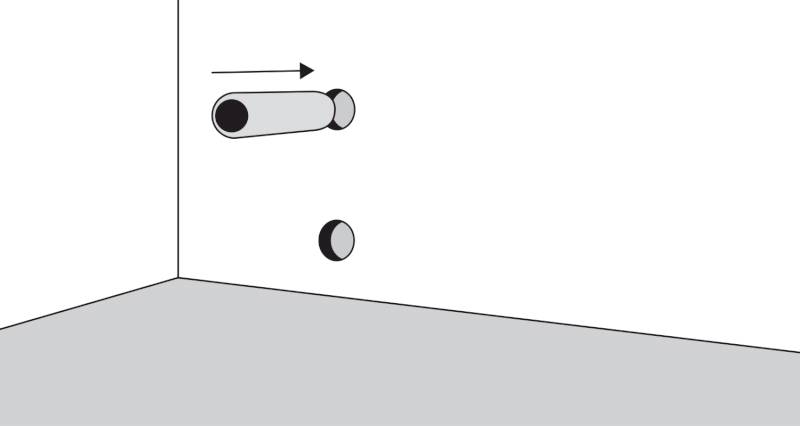
If your decking is being built next to a house, then the first thing you will need to do is attach the wall plate to the wall. To do this, start by marking a vertical line where the end of your joist will be placed. This will mark the corner of your decking.
Step 2
If you need to deck around a step or a sill, then take an offcut of deck board and hold it up to the lowest part of the sill and draw a line underneath.
Then, use a spirit level and draw a line 10mm lower than the first line to allow for expansion. This line will be your guideline for attaching your wall plate to the wall.
Step 3
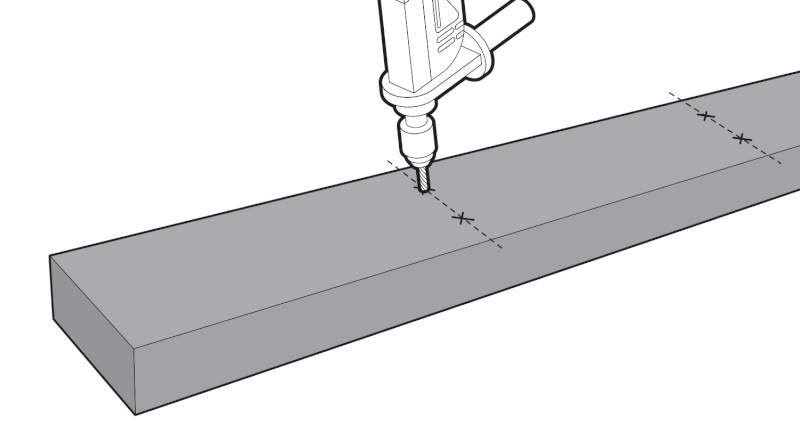
Cut your joist to the required length. At one end, measure 100 mm in and mark the spot with a pencil. Use a set square to draw a straight vertical line from this mark.
From the top of the line, measure 50 mm down, and from the bottom, measure 50 mm up, then mark both these points. This is to indicate where to drill pilot holes. Repeat this process at 60 mm intervals along the length of the wall plate.
When you reach the other end of the wood, measure and mark out another 100mm section.
Using an 8mm wood drill bit, drill pilot holes at each of the marked points.
Step 4
Once this is done, treat all the holes and cut ends of wood with two coats of preservative, leave to dry between coats. This helps ensure the timber remains structurally sound for as long as possible.
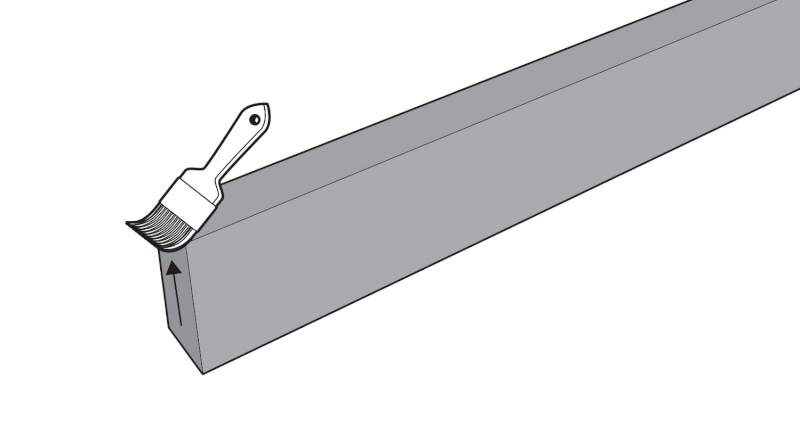
Repeat this for all holes and cut ends throughout the decking build. Be sure to follow the manufacturer's instructions when you apply it.
Step 5
Put the wall plate into position in line with your guidelines on the wall. Use packers to support the plank while you check that it is level. Before attaching the wall plate to the house, double-check that the deck board fits beneath the sill.
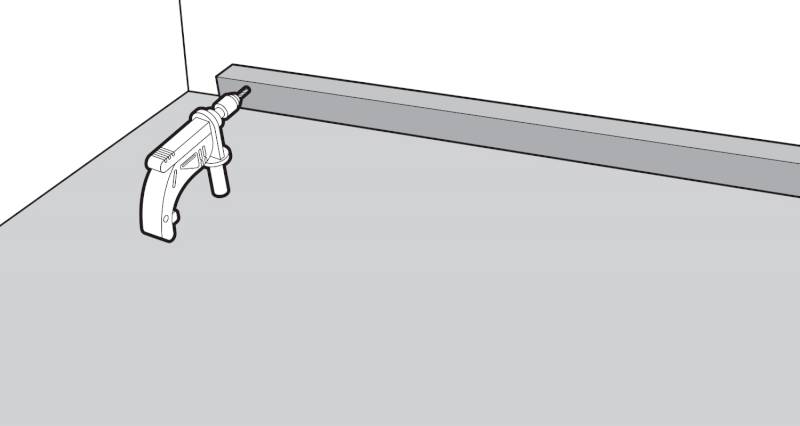
Once the positioning of the wall plate is correct, drill guide holes into the wall using a 7mm masonry drill bit. It's best to ask someone to hold the wood in place while you drill the holes.
Step 6
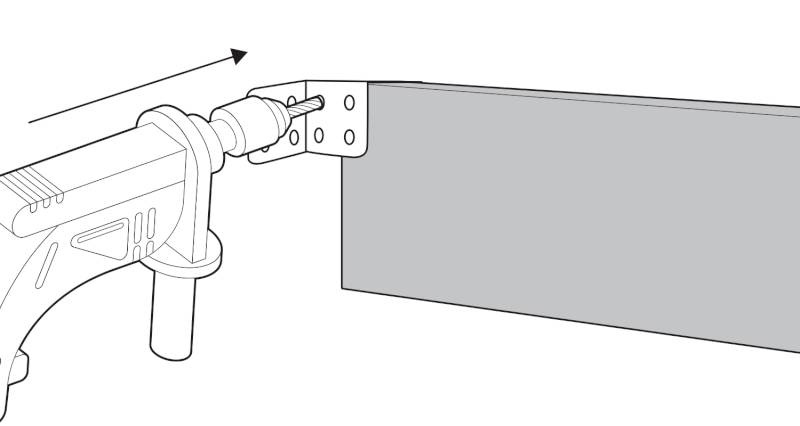
Once you've made all the guide holes, pull the wall plate away and drill the complete holes using the guide holes to keep them aligned. Put the wall plate back into position, ensuring it lines up with the corner marks. Insert 130mm screws through the wall plate and hang washers on the ends to maintain a 10mm gap between the wall and the wall plate, preventing water from being trapped.
You should then hand tighten the screws into the wall plugs before using a drill and driver bit to secure them in place. Once your wall plate is in position, you can then build the outer frame of your decking.
Step 7
Use decking bearers to create the frame for your decking. If your desired decking area is longer than the lengths of the bearer, you will need to join two bearers together.
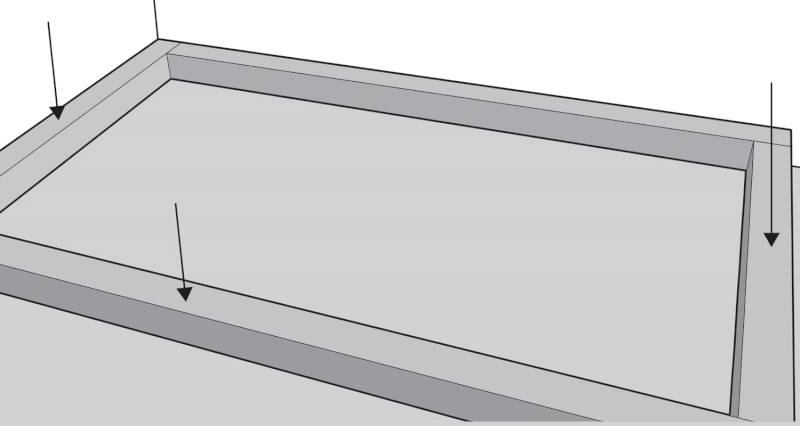
To do this, measure out and cut the two lengths of bearer that you need to reach the required length. Then, measure out a 600mm section and saw this piece. Place the two sections of bearing into your workbench, secure it with clamps, and secure the smaller cut off against the joints' centre.
Drill eight pilot holes into both pieces at regular intervals using a 5mm drill bit. Then, secure them together with 100mm screws.
Step 8
Once your bearers have been laid in place, you want to ensure they are level before securing them together. Use spacers, timber, or paving stones at 500mm intervals and then check the level. Before you fix them together, you should also ensure all of the corners are square using a set square.
Mark and drill pilot holes in the corners before using two external grade 150mm screws to join the frame at each corner. Once you have done this, double-check that it is level and make small adjustments if needed.
Step 9
To figure out how many internal bearers you'll need, you should start by measuring 400mm from the centre of the external bearer and draw a mark. Then, measure from the mark you made and for timber joists repeat this at 400mm intervals until you reach the other side of the bearer. If, however, you are using composite decking then allow 300–350mm for spacing as composite boards flex more than regular timber.
Once you know how many internal joists you need, you can then measure and cut them accordingly. If you're extending your joists, then you will need to repeat the same process as before. However, you will need to add an extra piece on both sides of the joist rather than just one side.
Step 10
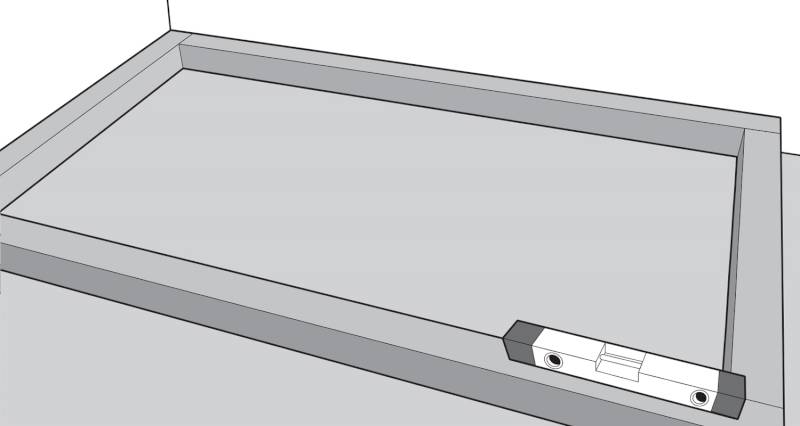
Once the joists are prepared, attach your joist hangers. Secure each joist in your workbench and fix the joist hanger using 30mm exterior screws.
Place the joist in position on the frame, aligning the centre with the 400mm spacer marks and ensuring the top is flush with the exterior frame. Use packers to hold it in place if needed.
Use a set square to extend the 400mm guide marker down onto the frame. Measure 40mm from the top and bottom, drill pilot holes into the joist using an 8mm drill bit, countersink them, and secure with 100mm external grade screws.
Repeat the above step for the rest of the joists, making sure the top is flush with the frame before securing.
Step 11
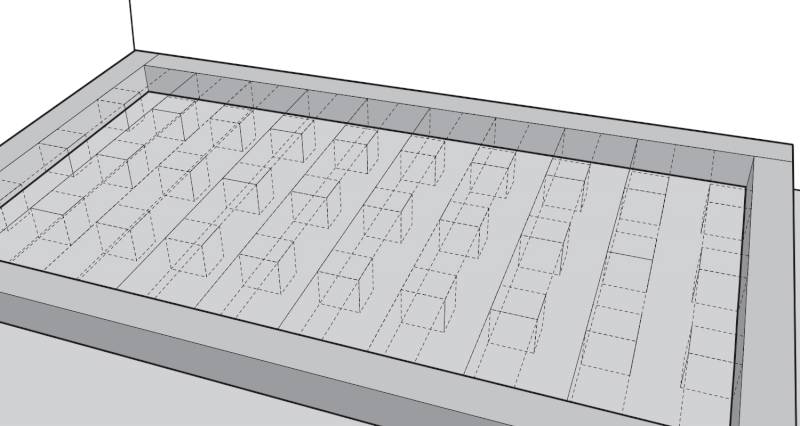
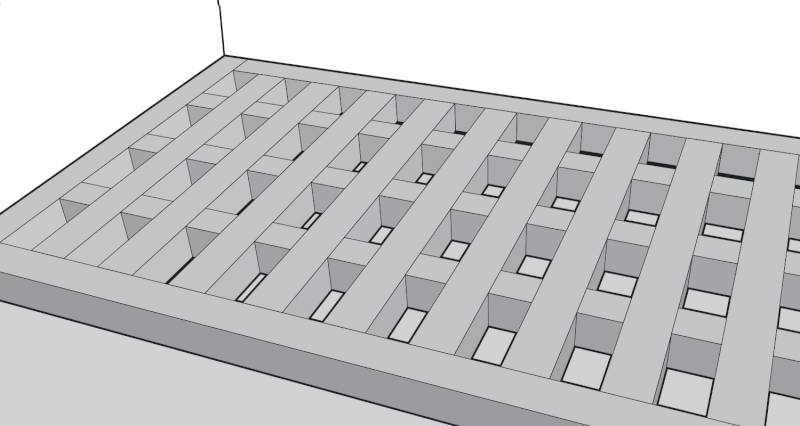
Measure and prepare your noggins so that the distance between them does not exceed 1200mm. Stagger them to avoid skewed screws.
Position each noggin and add packers if necessary. Draw a line at the centre of the noggin on both joining joists, mark 40mm from the top and bottom, and drill pilot holes. Secure each noggin with 100mm external screws.
Once all of the noggins are in place, do your final levelling and ensure the joists are all supported at 500mm intervals. Your frame is now ready, and you can begin laying your deck boards on top of it.
Step 12
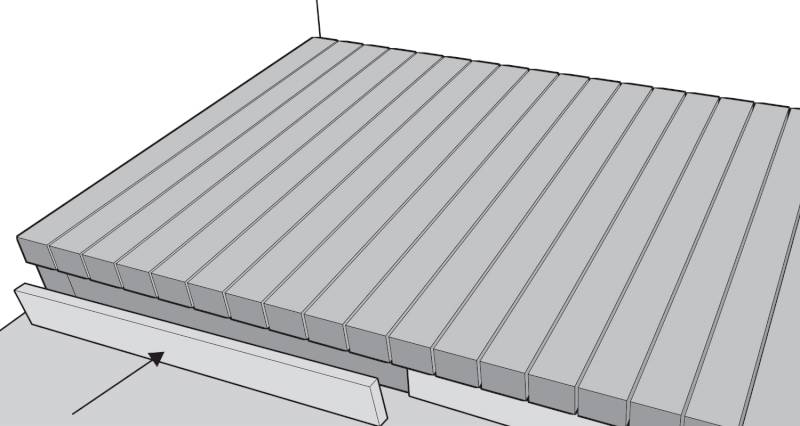
If the deck boards fit perfectly on your decking without having to trim any down, then start laying them by the house (if your decking is against a house). If you need to cut any boards lengthways, you should do so either with a hand saw or a circular saw.

Now, fix a 64mm decking screw into the second groove, securing the deck board to the joist beneath. Repeat this process at the opposite end. This will ensure your board is straight.
Step 13
Once the above step is complete, you can now fix the rest of the screws and boards. Make sure to keep the spaces even between adjacent boards. As timber expands and contracts with the changes in weather, you should include a gap of around 5-8mm between each of the boards.

Use a spacer to ensure the gap between each of the boards is equal all the way along the decking. If you are laying a board next to your house, ensure you leave 10mm between the decking and the house to allow for expansion.
Step 14
If you're adding fascia boards to your decking, you will need to allow an overhang. It's a good idea to pre-drill all fixing points with a 2mm bit to prevent the boards from splitting.
You will need to measure and cut all of the pieces you'll need. Mark the wood with a line at 50mm from each end. Then, measure out and mark lines at 600mm intervals.
Place small offcuts or packers underneath the fascia to level it as you put it in place. Then, pre-drill guide holes from the second groove in on each side. Finally, secure the fascias with 64mm decking screws. Once all of your fascias are installed, your decking is now complete.