my
myHow to Install a Toilet Pan and Cistern
Are you looking for information on how to install a toilet pan and cistern? This article will go over everything you need to know about installing a toilet pan and cistern. We will include a complete step-by-step guide on toilet pan and cistern installation, as well as a list of all of the tools and materials you’ll need to get the job done.
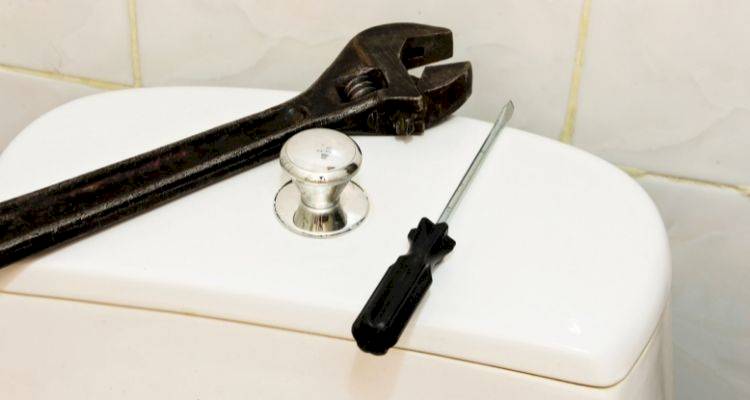
Table of Contents
What Tools Do I Need to Install a Toilet Pan and Cistern?
Below is a list of the tools you’ll need to install a toilet cistern and pan:
- Drill
- Screwdriver
- Spirit level
- Silicone gun
- Tape measure
- Spanner
- Grips
- Flat-headed screwdriver
What Safety Equipment Do I Need to Install a Toilet Pan and Cistern?
Although there isn't any specific safety equipment required when you replace a toilet, it's always a good idea to take some basic precautions - especially when there is drilling involved:
- Protective gloves
- Eye protection
- Dust mask
- Knee pads (optional)
What Materials Do I Need to Install a Toilet Pan and Cistern?
Below is a list of the materials you’ll need for a toilet installation, you can purchase these yourself as a DIY project or hire a local plumber who can help with bathroom and WC plumbing.
- Toilet Pan
- Toilet seat
- Cistern
- Cistern components
- Isolation valve
- Flexi hose
- Pan connector
- Silicone
- Silicone lubricant
- Plugs
- Screws
How to Prepare for a Toilet Pan and Cistern Installation
You can purchase a new toilet pan and cistern at most DIY and home improvement stores, as well as ordering online. This also includes bespoke and "back to wall" systems, although for the purpose of this guide we will assume a traditional toilet set-up.
Once you've purchased your toilet, check the manufacturer’s manual to ensure all the parts listed are included. You should also check you have all the tools needed to complete the job within easy reach.
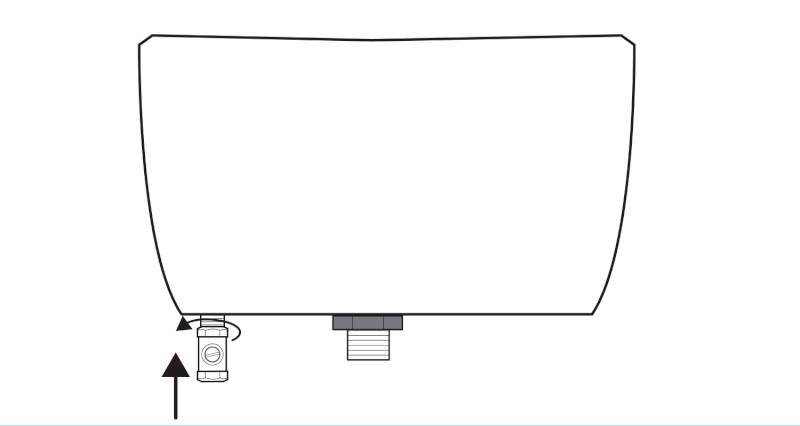
If you are replacing an old toilet, you will need to turn off the toilet's isolation valve as well as drain the cistern before removing the pan and cistern.
How to Fit a Toilet Pan and Cistern Yourself
Below is a step-by-step guide on how to do a DIY toilet pan and cistern installation job:
Step 1
The first step in installing a toilet pan and cistern is to install all of the cistern components. Pick up the syphon and undo the nut and the washer from the bottom.

Put the syphon through the hole in the cistern and then re-apply the washer and nut at the bottom of the syphon where it pokes through the hole. Tighten it as much as you can by hand and then take your grips and give it an extra tighten. Be careful not to over-tighten it as you may end up cracking the nut.
Step 2
Once the syphon is in place, you can now install the water inlet valve. Start by taking the nut and washer off the end of the water inlet valve and fit the valve into the appropriate hole in the bottom of the cistern.
Once again, you should re-apply the washer and nut where the valve pokes out at the bottom of the cistern. Tighten it up by hand, and then use your spanner to tighten it further. Again, be careful not to over-tighten it as you may damage the nut.
Step 3
The next step is to attach the cistern to the pan. If your new toilet includes a black bung, place this over the washer and nut at the bottom of the syphon. However, not all toilets have the same connections, as some may use a rubber doughnut seal or foam washer. As such, it's always best to check the manufacturer’s instructions before installing.
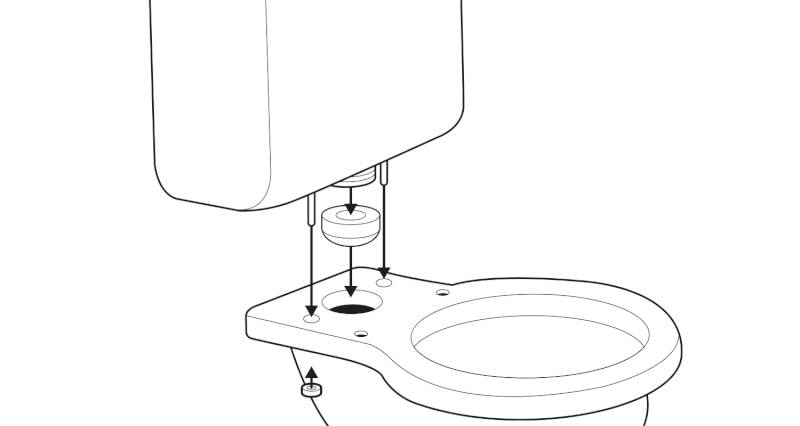
Next place the two longer fixing bolts provided with the toilet through their appropriate holes in the cistern. You can then place the new cistern on top of the pan, and once in place, tighten them up by hand using the plastic nuts. To ensure they are firmly in place, use a spanner to tighten them further, being careful not to cause any damage.
Step 4
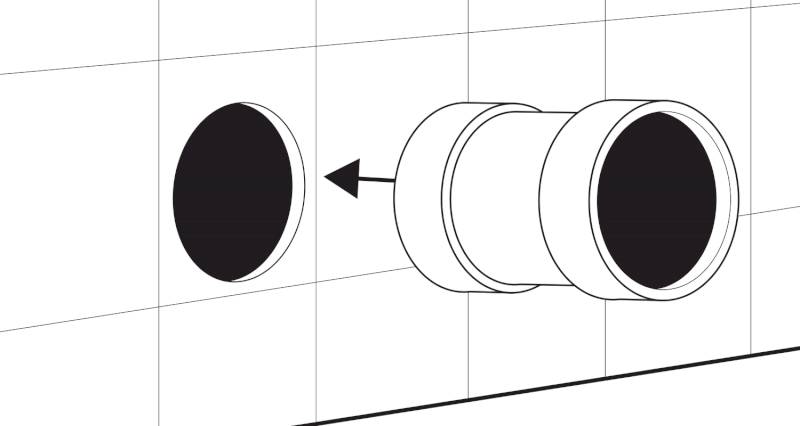
Next, you will need to install the pan connector into the soil pipe using some silicone lubricant. Use your finger to spread the lubricant all over the end of the pan connector. Then, insert the small end of the pan connector into the soil pipe in the wall.
Step 5
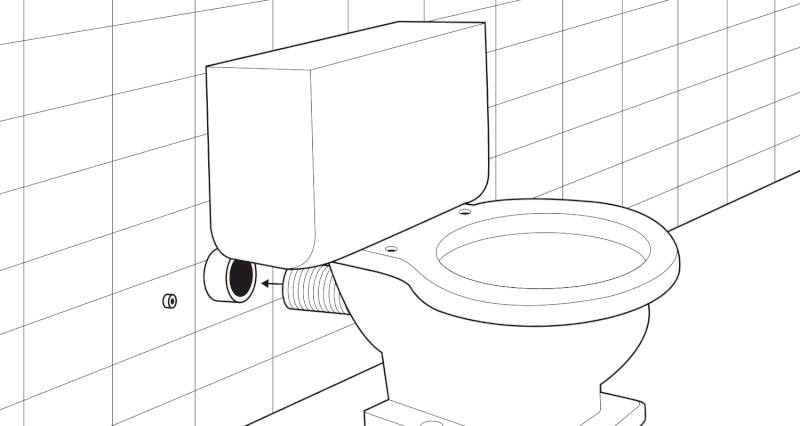
Once your pan connector is fitted to the soil pipe, you can now put your toilet into place. Do this by pushing the piped part of the back of your toilet into the pan connector.
Step 6
Use a spirit level to ensure the cistern is straight, and then mark the holes on the wall where the cistern will connect. Pull your toilet away and drill holes in the wall where your markings are.
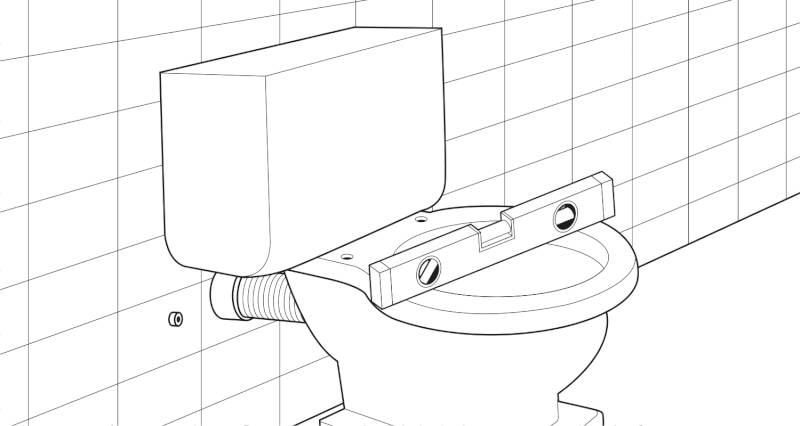
Then, re-position the toilet and screw the cistern into place according to your drilled holes. Use your screwdriver to ensure the screws are tight.
Step 7
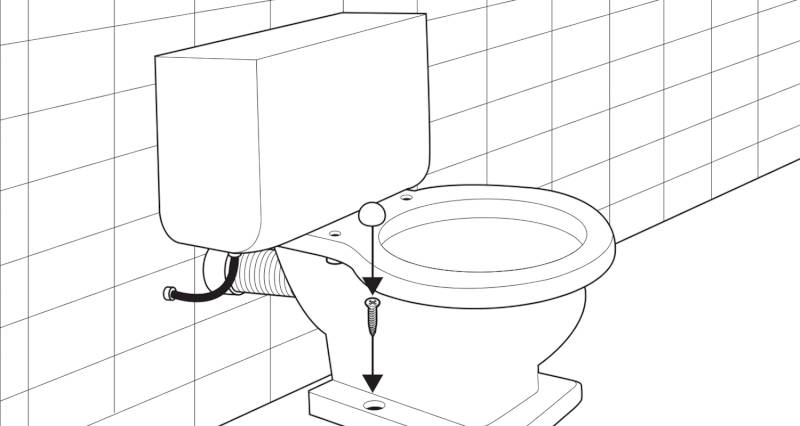
Use your screwdriver to tighten the screws via the holes at the bottom of the pan. This will fix your pan to the floor. Once the screws are in place, put the provided caps over the top to hide the screws. You will need to mark the fixing points first, and make pilot holes before installing where necessary.
If you are fixing the pan to a tiled or masonry floor, using the correct drill bit for the material and drill the holes slowly to avoid cracking any tiles. Insert the appropriate wall plugs before repositioning the toilet.
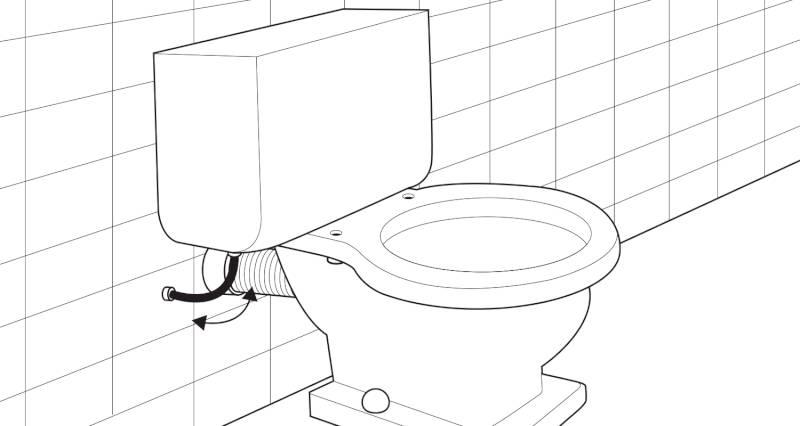
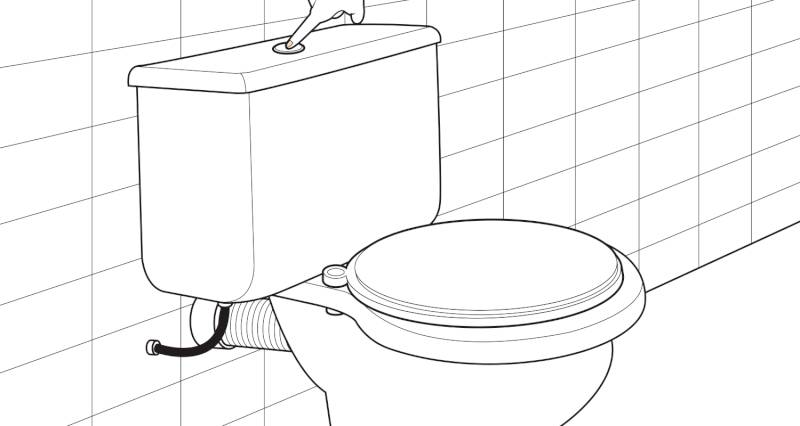
Step 8
Once your toilet is secured to the wall and floor, you can then install the flexi pipe. You will need to connect it to your cold water supply and into the toilet inlet valve. Connect to both using the nuts provided and use your spanner to tighten the nuts.
Step 9
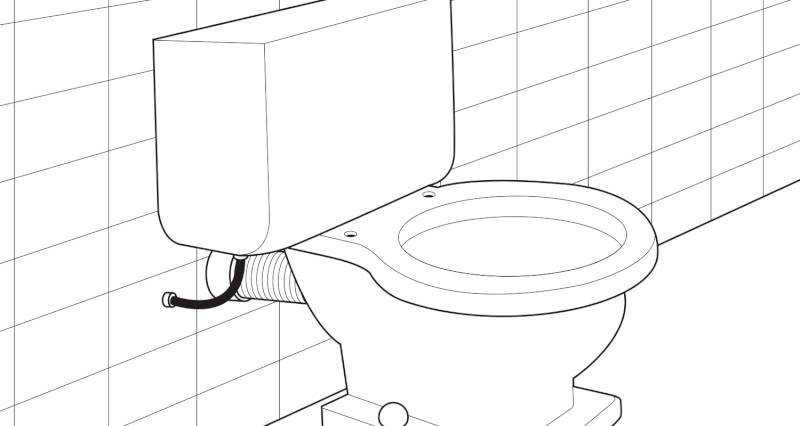
Once your toilet is fully connected, go back over everything to ensure that all the fittings are nice and tight.
Step 10
Next, you can install the lid for your cistern. Place your flush through the appropriate hole on the cistern lid, and then apply the nut at the bottom where the flush mechanism pokes through the lid.

Tighten the nut by hand and once it’s tight, you can check the flush button is working.
Step 11
Now you can connect your toilet seat. Start by connecting the connections into the tab on the toilet seat. Then, pop the connections through the holes on the pan.
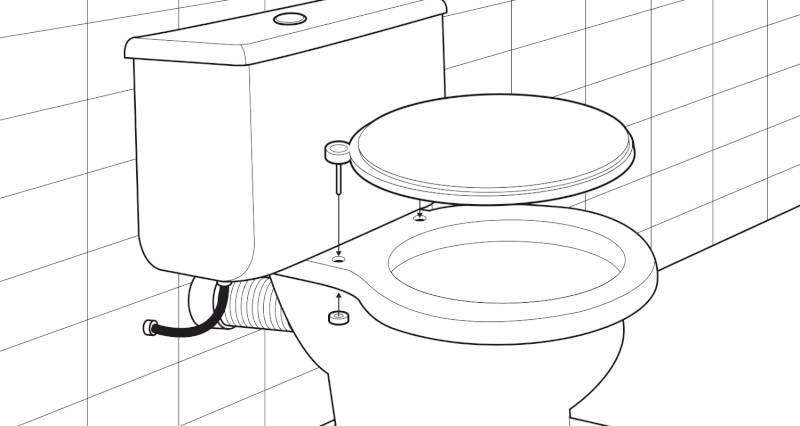
Put a washer and nut on the connector where it pokes through the hole on the pan and tighten them up to ensure the seat is secure.
Step 12
Once your seat is fully secure, go back and check everything again. Then, you can turn your water supply back on and test your toilet to make sure everything is working and that there are no leaks.