my
myHow to Fit a Shower
Do you want to install your own shower? This guide will explain the tools, materials and safety equipment you need as well as breaking down how to fit a shower in 15 easy steps.
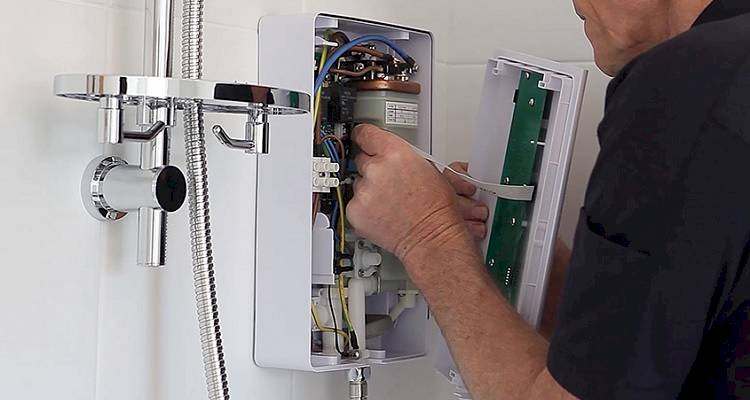
Table of Contents
What Tools Do I Need to Fit a Shower?
Before you learn how to fit a mixer shower, you should equip yourself correctly with the following tools, these will allow you to carry out the job correctly and professionally:
- Adjustable Pliers
- Adjustable Spanner
- Drill
- Suitable Drill Bit
- Pencil
- Small Spirit Level
- Spirit Level
- Copper Pipe Cutter
- Screwdrivers
- Tape Measure
- Pipe Guide
You can source these from your local DIY store or online.
What Safety Equipment Do I Need to Fit a Shower?
It’s always important to complete any DIY job as safely as possible, and it’s recommended when fitting a shower to use the following safety equipment:
- Safety goggles
- Face mask
- Sensible footwear
When drilling, especially thought tiles, it’s best to use eye goggles and a face mask. This is so no stray debris can damage your eyes, and you don’t inhale any dust particle.
What Materials Do I Need to Fit a Shower?
As well as tools, you will also need the following materials that will form the basis for your mixer shower.
Please gather these materials:
- Concealing Plates
- Shower Controls
- Shower Head and Flexi Hose
- Wall Brackets
- Filter Washers
- Rail
- Masking Tape
- Drill Plugs
- Hose Retainer
- Top Bracket
- Middle Bracket
- Soap Holder
You can purchase the above tools at your local DIY store or online.
How to Prepare for Fitting a Shower
If you have had any other work carried out, such as tiling, make sure you have left it long enough for the area to dry sufficiently. You also need to check the shower you're purchasing is suitable and compatible with your current bathroom.
As a safety measure, use an electrical scanner to check for any wiring before you start drilling and turn off the water supply - and for electric shower installation, switch off the power at the circuit breaker, before beginning any work.
How to Fit a Shower Yourself — Step by Step Guide
Before you begin fixing your electric shower, please ensure you turn off your water supply.
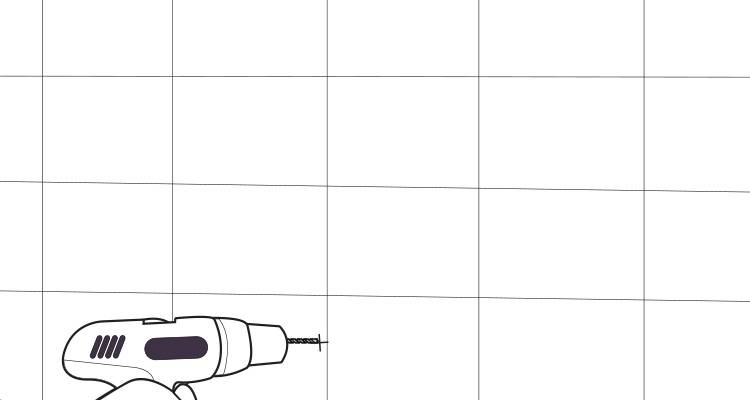
Step 1
Firstly you will need to measure the distance between your pipes. To do this, take your pipe guide, place this between your pipes, this will hold and secure the pipes into position. Now you can use your tape measure to calculate the distance between the pipe supply.
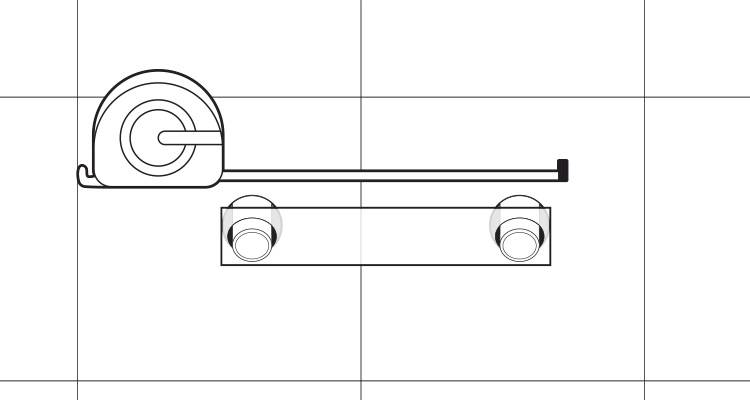
Step 2
Secondly, leaving the pipe guide in place, use the wall brackets and place them over the two pipes. You will notice the areas for the screws, take your pencil and mark through the holes to use as a guide for drilling.
Step 3
You may now remove the wall brackets and the pipe guide from the pipes.
Step 4
Cover the tiled area around the pipes with masking tape. This is to prevent the drill from slipping when using. The use of masking tape also allows you to see the marks you have just created.
Step 5
Before using your drill, you will need to check the settings and ensure the ‘Hammer Action’ is switched off, as well as checking for any hidden pipes or cables. Then, using the markings as your guide, drill two holes around each pipe, around 20-30 mm deep (depending on the length of wall plug and thickness of the wall).
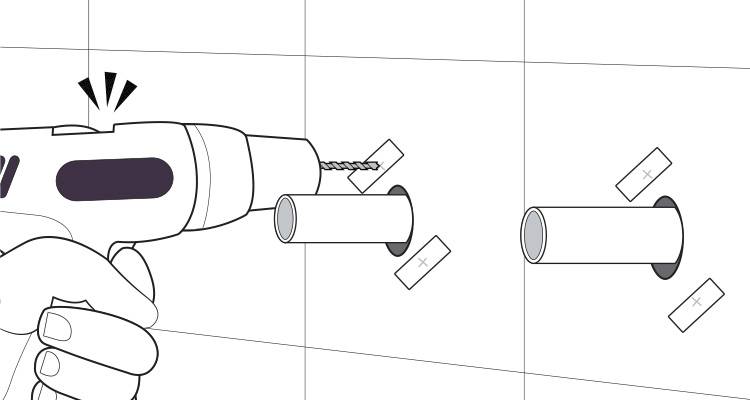
Step 6
You will then need to tap plugs (2-3mm) into the drilled holes. This will help avoid any tile cracking.

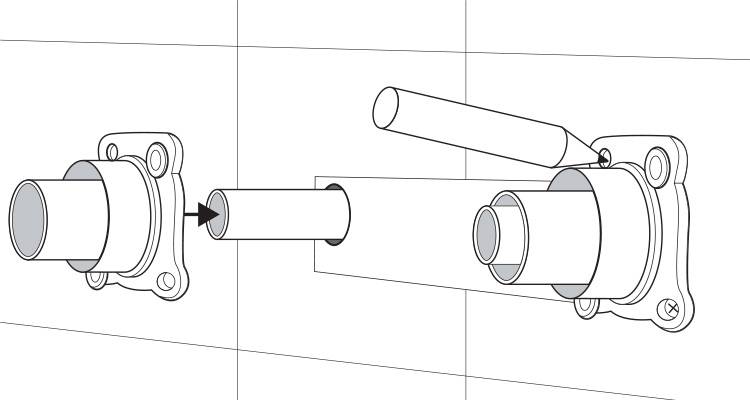
Step 7
Place the wall brackets back over the two pipes. Then using a pen, mark up the end of the pipe where it meets the wall bracket edging. We advise marking slightly back from the line to allow some room for the filter washer. Once marked, remove the wall brackets.

Take your pipe slice or cutting saw, and use the mark you have just made to trim the end of the pipe. Please follow the manufacturer's instructions.
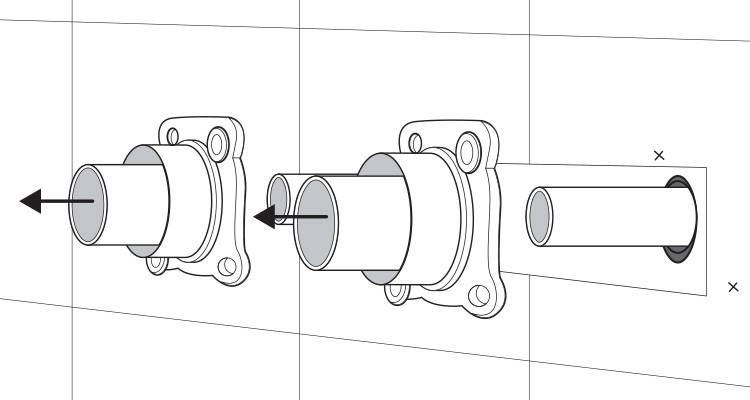
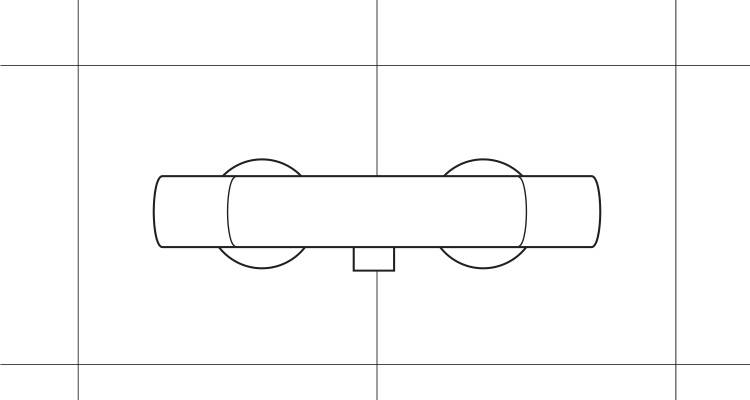
Step 8
You can now place the wall brackets back into place over the pipes, and fix into place using a screwdriver and screws. Using your adjustable spanner, tighten around the edge of your bracket and pipe, then add plumbers tape (PTFE) to create a seal.

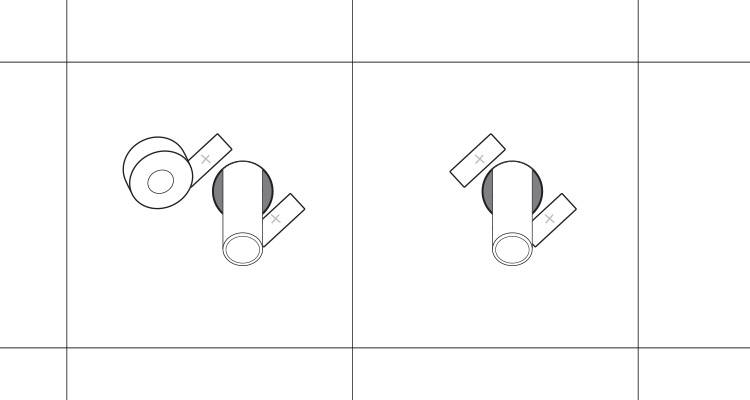
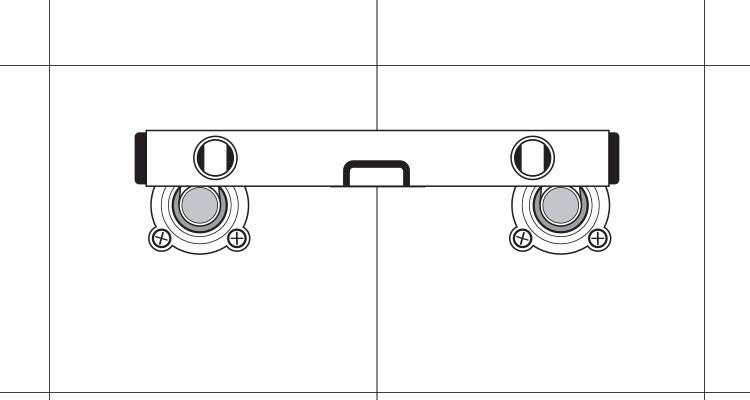
Step 9
Take the covers and fix them using the retaining screw in the top corner. Place a small spirit level on top, to check that your covers are level. Use your adjustable spanner to adjust the covers to ensure they are level. You can now fix the sealing ring and fix again using the final retaining screw in the lower left corner.
Step 10
It's now time to flush the pipework by briefly turning on the water, using a bucket to catch any spillage. Check all the connections carefully to ensure there aren't any leaks and then fit the concealing plates and chrome trims, use a spirit level so they're all even. Tighten fittings gently with an adjustable spanner, avoiding overtightening.
However, don't attempt to connect or test the electrical components of the shower yourself as any electrical work must be completed by an officially qualified electrician.
Step 11
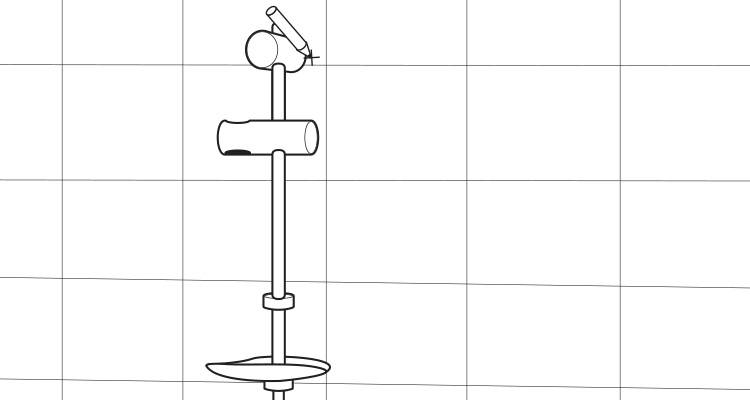
Take your hose retainer, slide on the middle bracket to the middle, then on either end, slide the soap retainer and top bracket. Position this at 200–210 cm from the floor of the shower, with the hose rail allowing for adjustment. Then once happy, mark out the position of the lowest bracket on the wall using a pencil.
Step 12
Drill a hole into the wall in the correct position where you have marked the lowest bracket. As before, use a wall plug into the drilled hole, and then squeeze a spot of sanitary silicone sealant onto it.
You can then remove the brackets from the hose retainer and fix the bottom bracket to the bottom hole you have just created using a screw.
Step 13
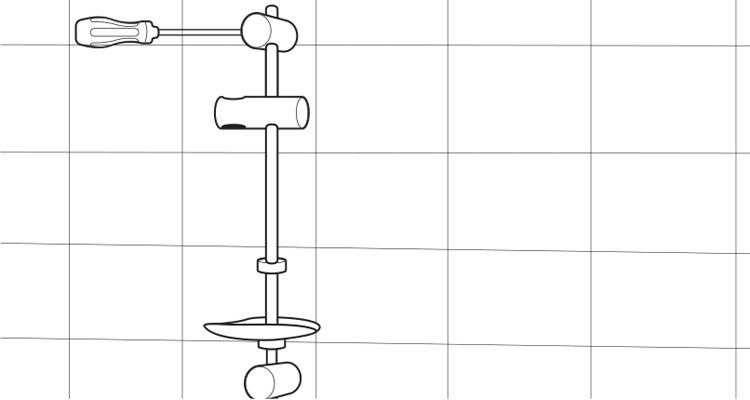
You will now need to position the top bracket. To do this place the hose retainer rail back into the bottom bracket and place the top bracket onto the top of the rail. Use a pencil to mark out the correct area for the bracket. Use a spirit level to check the rail will be vertical.
Step 14
Fix the top bracket, by drilling a hole and applying the wall plug, using the same technique as before. You can then go ahead a fit bracket covers over the top and bottom.
Step 15
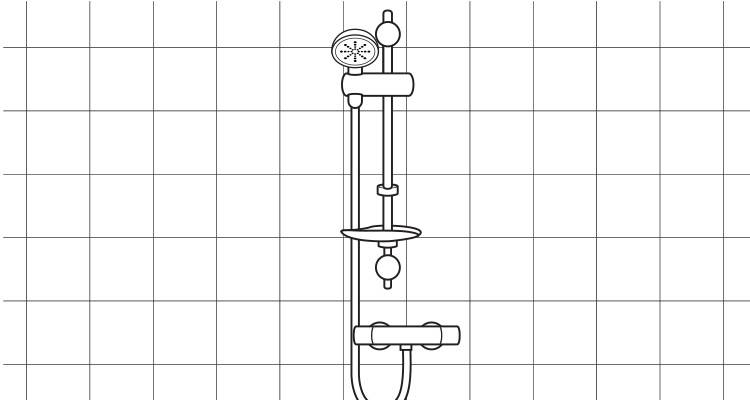
Finally, attach the shower head to the chrome tap trim by twisting the end of the hose to the nozzle. Use the bolt to tighten. Use the same technique to fix the shower head to the other end of the hose and your electric shower should now be ready for use.
Shower Types
There are many types of showers available to you, it’s important you explore all options to allow you to decide which shower is right for your home.
Electric Shower
This type of shower installation will provide you with hot water at the flick of a switch. It works by drawing the cold water straight from the mains into the shower unit, which is then heated by an element. Another great advantage to the electric shower is that if you have any issues with your boiler, the shower will not be affected, leaving you to enjoy a hot shower. The majority of electric showers come with a thermostat control, allowing you to change the temperature to suit you.
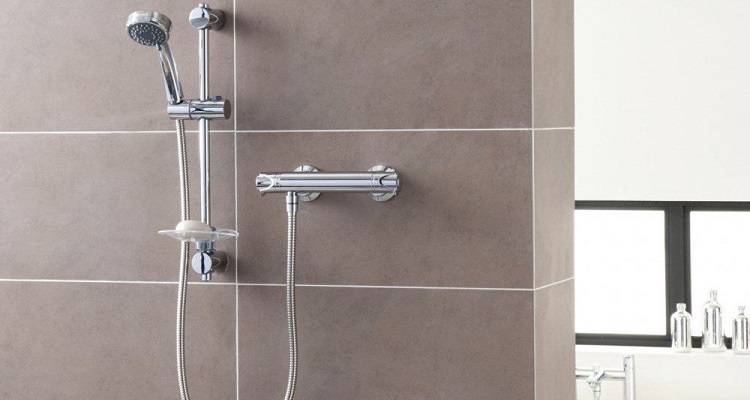
Mixer Shower
This type of shower combines both hot and cold water, which occurs in the shower valve, and the temperature is regulated. One of the cons to this type of shower is you can experience loss of pressure depending if someone else is using a tap elsewhere. They often come in a multiple of designs and a range of prices to suit your budget.
Power Shower
Often found in luxury spas and hotels, installing a power shower in your own home can leave you feeling awake and refreshed. One of the pros to this type of shower is they are brilliant for your circulation and you can often purchase add on massage systems which are ideal for sore muscles. The downside being they're not always considered as environmentally friendly as other showers due to the water consumption levels.
Digital Shower
This type of shower is easy to use due to it’s various settings making it ideal for any user.
The settings on a digital shower are designed so that the user can select their ideal experience, ranging from a choice of temperatures, pressure and water output. The ability to provide very specific details can help make your shower eco-friendly, depending on water usage, as you're tailoring it to your own requirements.
Cleaning a Shower Head
Below are some easy steps so you know how to effectively clean and descale your shower head, which you should aim to do every 3-6 months to avoid any build-up and keep it running smoothly:
- Begin by removing the head from the hose. Take extra care to ensure you don’t lose the rubber washer from between the head and the hose.
- Fill a bucket with white vinegar and warm water ( 1 part vinegar to 1 part water)
- Place the shower head into the bucket and leave to soak for 1-2 hours.
- After this time, remove the shower head from the water and rinse in clean water.
- You can now use an old toothbrush and gently scrub away any build up of limescale that resides on the shower head.
- Wash away any excess with water and dry with a cloth.
- You can now reattach your shower head.