my
myHow to Fix: Shower
First of all ensure that water coming to the home is shut off. This can be done by shutting the main water valve into the home. Shutting the main water valve will ensure that fixing or replacing the shower will be done smoothly as presence of water may make it difficulty to work well.
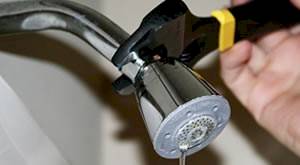
After shutting off the water, carefully remove the already existing shower. Identify the location of mounting screws along the unit and unscrew them by use of a power driver. This will then make it easier for the removal of the shower drain by first of all unscrewing the top part which will facilitate the disconnection of the bottom part of the drain.
With the help of some people, remove the shower stall from its position. This can be achieved by pushing the stall from its rear via the wall behind the shower unit. With the help of two or three people, remove the shower from the bathroom to some designated place. If necessary, the shower may be cut into two so as to make its removal easier.
Having removed the old shower, the main task now is the installation of the new shower. To ensure that the shower drain is in its right position when installing, apply putty (plumber's putty) on the lower side of the rim and on the top part of the drain. This is then followed by placing the bottom part and the upper part on their right position in respect to the shower drain and the floor. The two halves can be tightened firmly by use of hands. This is very important as it will determine the efficiency and effectiveness of the shower later on in life.
To set the new shower in place, push it along the floor. The flush of the shower is a very important component hence needs to be carefully put in the right place by positioning it against the frames of the wall. With the carpenter's level, make sure that all the parts of the shower are levelled. If there are some areas which need adjustment, do the necessary adjustments while cross examining with the carpenter's level. This is because it is only at this point that any adjustments can be made. On the other hand, some wood shims can be used in order to achieve the required level of the shower walls.
Once the shower is levelled, mount it to the wall frames and finally plump it to the wall. The shower has mounting holes where screws are placed and tightened to the wall frame by use of a power driver. Fix one screw at a time to ensure that they hold the shower in position and also give it the necessary support. Finally turn on the main water valve followed by turning on the shower to observe how it functions.
Last updated by MyJobQuote on 29th October 2013.