my
myHow to Regrout Tiles
This article explains with the help of images, how to regrout tiles. We explain everything that you might need to know about tools, materials, maintenance, safety equipment and we also answer some of the most frequently asked questions for homeowners looking to regrout their tiles.
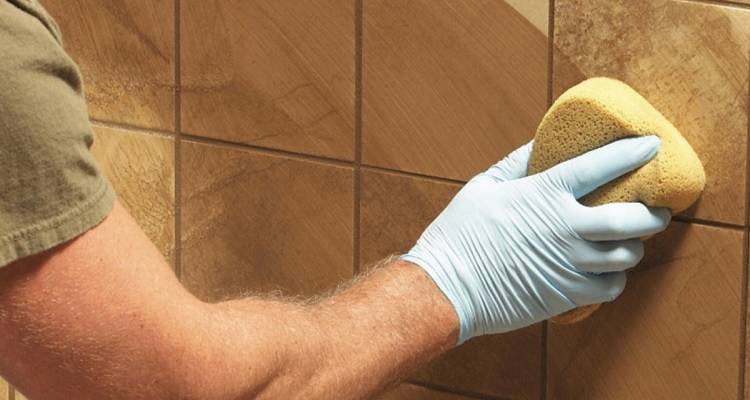
Table of Contents
- What is Tile Grout?
- Do My Tiles Need Regrouting?
- What Tools Do I Need to Regrout Tiles?
- What Safety Equipment Do I Need to Regrout Tiles?
- What Materials Do I Need to Regrout Tiles?
- How to Prepare for Tile Regrouting
- How to Regrout Tiles Yourself ? Step by Step Guide
- What Grout to Use
- Tile Grout Repair & Maintenance
- How to Clean Tile Grout
- FAQs
What is Tile Grout?
Grout is a mixture of cement, water and sand. Apart from providing an appealing aesthetic look, this material also plays a vital role within the entire tiling process. This thick fluid is then used to fill any voids and seal joints between tiles. This mixture will then dry creating a fluid concrete, which will subsequently keep your tile structure in place.
Grout is an integral part of tiling a floor or wall, as it keeps the moisture from damaging the property, keeps tiles straight, and stops tiles from connecting and cracking.
Do My Tiles Need Regrouting?
Over time grout attracts algae and moisture and can become stained and unsightly. Grubby, mouldy, cracked, or loose tiles are a sign that you should start to think about regrouting.
Even if you clean your grout on a regular basis, it is likely to need replacing every 12-15 years. Alternatively, it may be time to think about replacing your wall tiling altogether.
What Tools Do I Need to Regrout Tiles?
Now you’ve decided to take on the DIY task of regrouting the tiles in your home, it’s now imperative that you have all the tools to allow you to do the job correctly and efficiently.
You will need the following:
- Grout Float
- Grout Spreader
- Flat Scraper
- Trowel
- Tile Sponge
- Bucket
- Grout Finishing Tool
- Soft cloth
What Safety Equipment Do I Need to Regrout Tiles?
As we have stated previously, the grout removal process can get messy and dusty. It’s essential when undertaking any home projects, such as regrouting your tiles, that you take the appropriate safety measures first before mastering the art of how to regrout tiles. We advise that you purchase the following:
- Safety Goggles
- Protective Gloves
- Dust Mask
We also advise that where possible, you keep the room as ventilated as you can, open any windows to allow for dust to escape. Please wear your safety goggles and dust mask when removing grout to prevent any dust and dirt inhalation or coming into contact with your eyes.
You will need to wear protective gloves if you are handling your grout remover. Ensure you always read and follow the manufacturer's instructions.
Keep a dustpan and brush or vacuum cleaner handy to clear up any mess.
What Materials Do I Need to Regrout Tiles?
To regrout your tiles, you will need the following materials:
- Protective Sheets/Dust Sheets
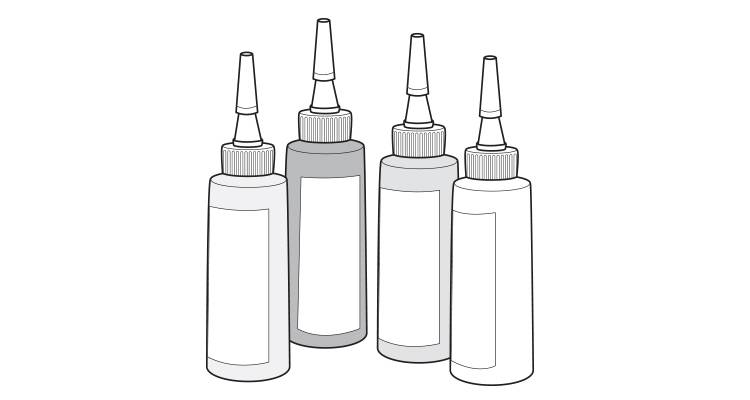
- Grout (powdered or ready mix)
We also advise that you check the date on your grout, if you have previously used this before, you wouldn’t want to use any products that are out of date.
How to Prepare for Tile Regrouting
Before beginning to remove the grout from your tiles, you’ll need to prepare the room you’ll be working in. Firstly, take your dust sheets and cover the whole area of your room, this will help collect any old grouting and dust, which will make the clean-up process a little easier for you.
We strongly advise that if you are in your kitchen or bathroom to put the toilet seat down and also put the plug in any sinks as you don’t want any old grout clogging up your drains. After all this has been done, you should be ready to remove the grout.
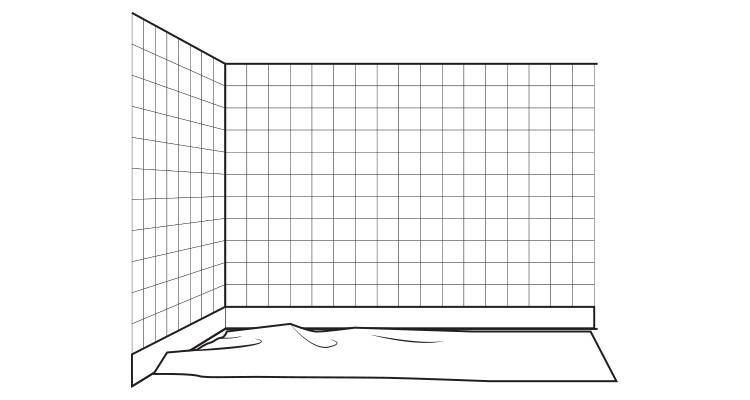
How to Regrout Tiles Yourself — Step by Step Guide
You should have all the correct tools and materials needed, so let’s look step by step of how to regrout wall tiles:
Step 1
When grout dries it forms into a hard, dense material, so you need to work vigorously to remove the grout between the tiles. Luckily there are tools you can use to help you with this process.
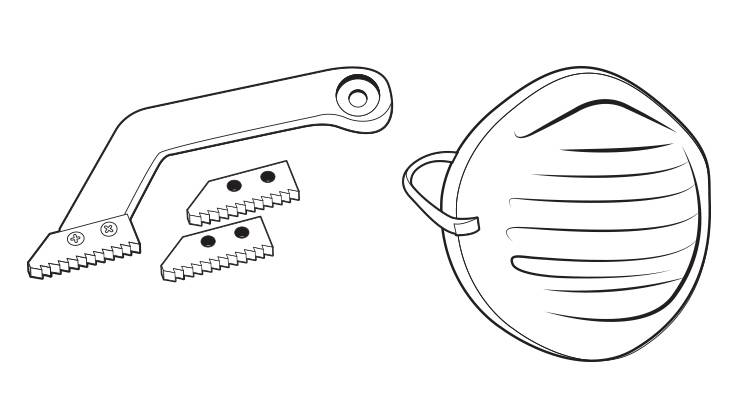
You could consider using a grout remover (grout rake), this tool has been designed to fit into the tile joints and rake out the old grout. When purchasing this tool, we advise you also get some spare blades, as they can become blunt when you are removing the grout.
This process can get messy and dusty, so please ensure you wear the correct safety equipment and keep the room ventilated by opening doors and windows where possible. If you don’t have access to any of these, we advise you wear a dust mask to stop any inhalation of dust.
Step 2
As well as laying down dust sheets, if you're working over a sink or bath remember to put the plug-in place before you begin. Any grout that ends up going down the drain could result in them getting clogged.
Step 3
To remove the grout between your tiles, use your grout rake, you will need to apply pressure and start in the middle of two tiles. Moving the tool, allow the blade teeth to sink into the grout. The teeth of the blade only face in one direction, so don’t try moving the tool back and forth, only work in one direction.
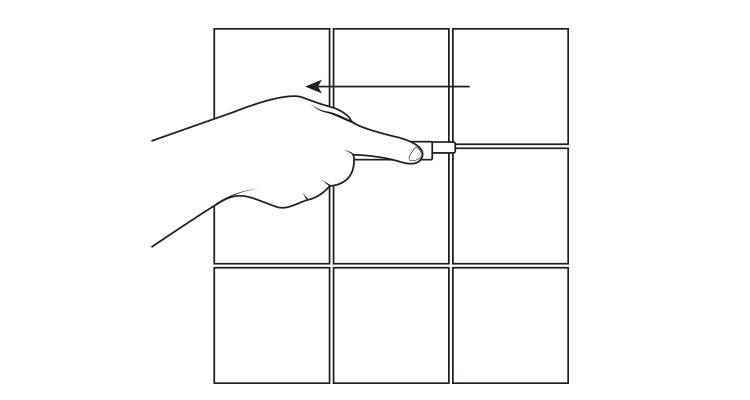
This tool is simple to use but requires much time and dedication and can be rather tiresome. We would advise you to use this tool when you have a smaller area of grout to remove.
Step 4
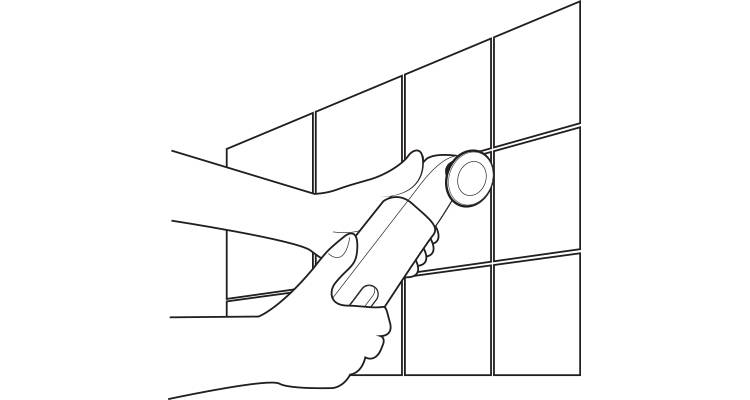
For larger areas, it’s worth investing in an electric grout remover. This tool is easier to handle and speeds up the job significantly. As with manual tools, start in the centre of two tiles rather than at the edges to avoid scratching or damaging the surface.
Work vertically , then horizontally between the tiles to make sure all grout is removed evenly. Aim to clear the grout to a depth matching the thickness of the tile.
Step 5
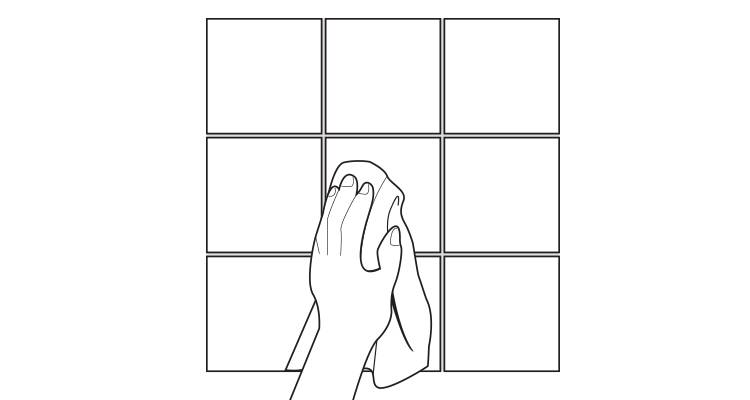
Once all the grout has been removed you will need to ensure you clean the surface. Use a damp cloth to remove any dust or dirt remaining.
Step 6
It’s now time to start preparing the adhesive. Remember that the type of adhesive you require will depend the type of grout you wish to use, your wall surface and the overall style and colour you want the finished product to look like.
Grout is available in a variety of colours, so ensure you do your research first. Please ensure you follow manufacturer’s instructions and suggestions before preparing your adhesive.
Step 7
To mix, will need to follow the correct measurements on your packaging guidelines. You’ll need to take your trowel, to create a thick paste, with no lumps. Make sure you only make as much as you will need to use in roughly 30 minutes, as grout dries extremely quickly. Making little and often is key.
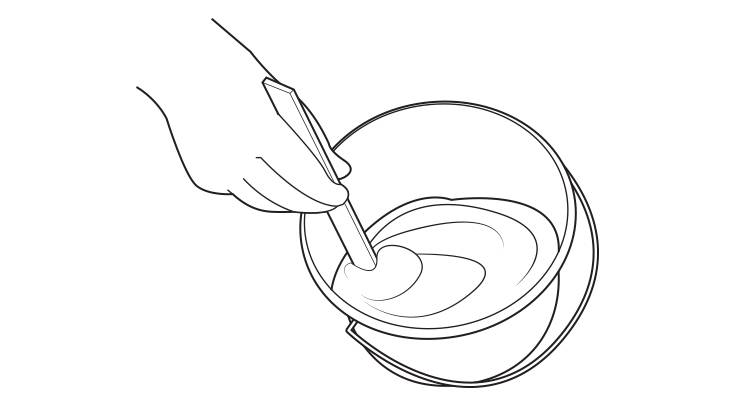
When you mix the grout, don’t overwork the paste as this creates air bubbles, and you want to avoid that before applying.
Step 8
Now you can between to start grouting between your tiles. When it comes to applying the grout, you will need a grout spreader or a grout float (used for larger surface areas). Start by using your trowel to place a small amount of grout onto your spreader. Simply spread this across your tiles, allowing the grout the submerge into the jointing gaps. Then wipe the tiles with the other side of the spreader to try and remove any excess grout.

Use a range of different directions to ensure that all the jointing between the tiles have been successfully filled with grout. The grout will begin to Harden after 20-30 minutes, so ensure you work at a good pace.
Step 9
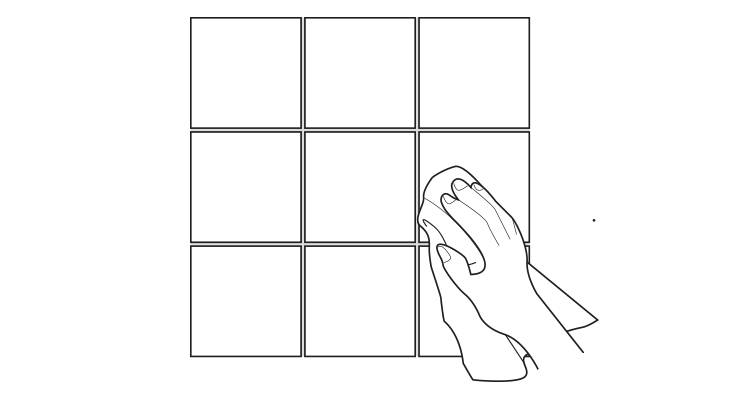
Whilst the grout is drying, use a damp sponge to clean the tile surfaces, ensuring you don’t over saturate the sponge. Should you accidentally remove any grout from the jointing, use the spreader to reapply, or use your fingertip to fill the area.

Allow your grout to dry for about 30 minutes. Then in order to achieve a really professional finish, use a grout finishing tool. Use this over the grout, pull down over the jointing, in one continuous swift movement. Be prompt with this, as your grouting hardens quickly. Then repeat this process between all of the grout jointing.
Step 10
You’ll now need to leave the grout to dry according to your manufacturer's guide. After a few hours, a dusty film will form over your tiles. To remove this, take a soft clean cloth and polish it over the tiles. This will remove any dust and give you a professional looking finish to your work.
What Grout to Use
There are several options when it comes to choosing grout type. Choice will firstly boil down to the room you are choosing to regrout. For a kitchen or if you're re-grouting a bathroom, it’s important you choose one that is waterproof or resistant to mould.
There are four types of grout that you could consider for your project:
Cement-Based Grout (non-sanded)
Unsanded grout is popular for DIY projects due to being easy to use, although it tends to be weaker than epoxy grout. It is most suited for joints smaller than ⅛ inch, especially within natural stone, ceramic, or polished marble tiles. Wider gaps may shrink which can lead to exposed areas.
Epoxy Grout
Epoxy grout is slightly more expensive than other types but provides excellent water resistance, making it ideal for bathroom tiles. However, be prepared to work at speed as it starts to set relatively quickly, as such we recommend applying the grout in small sections at a time.
A key advantage of this product is the variety of colours available, making it easy to either match to your tiles or create a visually contrasting design.
Sanded Cement Grout
Although similar to regular cement grout, sanded cement is more water-resistant, making it ideal for bathrooms or kitchen countertops with grout lines wider than ⅛ inch. The sand prevents shrinkage and strengthens tile joints and is suitable for stone or ceramic tiles, although avoid using on marble, and note it may attract dirt, requiring regular cleaning.
Caulking Grout
This grout is perfect for those tough to reach corners, as it can be squeezed from a tube, or you could use a caulking gun.
Tile Grout Repair & Maintenance
It may come to a time where your grout becomes damaged, this is usually due to cracking. There are two ways you can repair your grouting to remove those unsightly cracks.
Using Caulk To Fill Gaps
If you choose this method, you should start by removing any loose grout with a grout saw. Then, apply the caulk gently over the cracks, use a plastic spoon to smooth this down. Or you can wet your fingers and smooth over. You will need to allow 48 hours for this to dry. Caulk comes in a variety of colours, so choose the one that best matches your previous grouting.
Regrouting The Damaged Area
If the area of damage is slightly larger, then this should be your method of choice. Firstly, begin by cleaning the area with warm water and one-part vinegar ratio. Use your grout saw to remove all of the damaged grout, then remove any dirt and dust from the jointing area.
Next, dampen the tiles with water, and use a paper towel to remove any puddles that lie in the gaps. Mix your chosen grout adhesive and apply at an angle using the grout float to fill the gaps completely. You’ll need to clean away any excess grouting and leave for 15-30 minutes.
After this time, you should take a damp sponge to remove any excess grout from the surface. Follow the manufacturer’s guide and let the grout set firmly. After this, use a dry cloth to polish off any residue on your tiles as you have done previously.
How to Clean Tile Grout
Tiles may be easy to keep clean, but grout can be a little trickier to keep on top of. This is because homeowners have to contend with mould and mildew or perhaps staining if your tiling is in the kitchen, so it’s important to keep on top of your cleaning.
Cleaning your grout requires minimal products, all you will need is a bucket of warm water and an old toothbrush. Start by scrubbing the grout with the brush using small, circular motions.
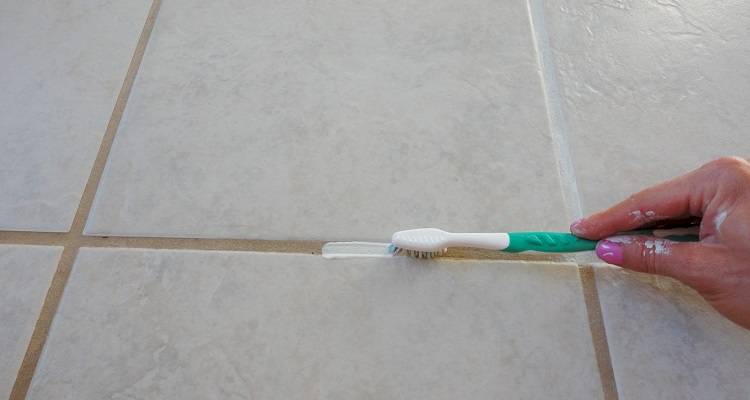
If the staining is a little tougher, then we suggest using equal parts of vinegar and water to try and battle the trickier stains and mould. Again, using your stiff brush in circular motions to remove the mould.
We recommend keeping on top of cleaning your grout at least once a week to keep it looking fresh and tidy. To do this, take a spray bottle and add your one-part vinegar and water. Spray this onto your grout and wipe your grout down with a clean cloth. You can also try spraying a small amount of alcohol onto the grout to keep mildew and any mould at bay. This will really help with keeping up the appearance of your home and your new grout feeling and looking fresh!