my
myHow to Build a Summer House
If you'd like to learn how to build a Summer House, read our easy-to-follow guide below. It includes step-by-step instructions and images, as well as a tool list of everything you'll need.
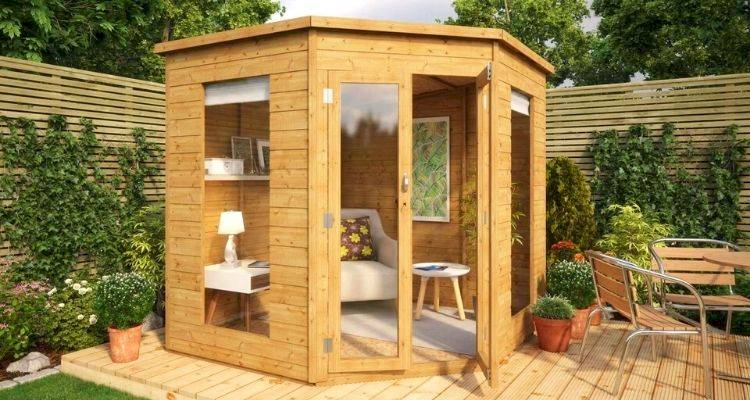
Table of Contents
- What is a Summer House?
- What Tools Do I Need to Build a Summer House?
- What Safety Equipment Do I Need to Build a Summer House?
- What Materials Do I Need to Build a Summer House?
- Planning Your Summer House
- Preparing to Build a Summer House
- How to Build a Summer House Yourself
- How Do You Make Summer House Doors?
- How to Clean and Maintain a Summer House
- FAQs
What is a Summer House?
A summer house is an outdoor structure that features doors and windows and can usually be found in gardens. They are most commonly made with timber and sometimes appear quite similar to a shed.
Summer houses are often used for entertaining in the garden or for relaxing. However, it can be used for many things such as a playroom, an outdoor office, a gym, or even a bar.
The doors and windows on a garden summer house allow a lot of light to pour in, making them a very attractive place to chill out in – especially during sunny weather.
What Tools Do I Need to Build a Summer House?
Below is a list of the tools you’ll need to build a summer house:
- Spade
- Drill and drill bits
- Electric screwdriver
- Spirit level
- Hand saw
- Hammer
- Pencil
- Nail gun
- Electric saw
- Ladder
- Tape measure
- Square
- Clamps
What Safety Equipment Do I Need to Build a Summer House?
This is a list of the recommended safety equipment that you will need to build a summer house, although the complete list may vary depending on any specific equipment being used. For larger projects, you may also wish to hire a structural engineer for any additional advice on your build:
- Protective gloves
- Safety goggles
- Ear protection
- Sensible footwear
- Hard hat
What Materials Do I Need to Build a Summer House?
Below is a list of the materials needed to build your summer house:
- Timber frame materials
- Screws
- Nails
- Clamps
- Wood treatment
- Clout nails
- Roofing felt
- Cladding materials
- Windows
- Doors
- Plywood pieces
- Fibreboard pieces
- Felt roof adhesive
Planning Your Summer House
Building a summer house is not a quick or easy job. There are many things that you’ll need to consider when planning to build a summer house, with the location being one of the most important as you may not be able to move it once in place.
Try to think about aspects such as do you want it in the shade, or embracing the sunshine? You’ll need to think about the best position for your particular garden.
It’s also very important to consider the location in terms of the foundations. You need to choose ground that is fairly level or can easily be levelled out and if any digging is required, will the ground be suitable.
Choosing the Right Materials
While most summer houses are built using wood and timber, you can build other types of summer house such as a plastic summer house or metal summer house.
The materials you use will depend a lot on your budget, the type of aesthetic you’re going for, and what your summer house is intended to be used for.
Preparing to Build a Summer House
When preparing to build a summer house, you will need to start by choosing an appropriate location in your garden, ideally where the ground is quite level.
Once ready, start by digging out the area where the summer house is going to be placed. Remove any plants, bushes, or turf from the area. Dig out the top layer of soil, and make the surface level ready for building a summer house.
Once the surface is cleared and level, you should then lay a weed membrane down on the base, or use concrete slabs for larger designs.
How to Build a Summer House Yourself
Every summer house is different, so you should refer to the manufacturer’s instructions or change the follow steps as necessary. As a basic guide, the following is based on a standard timber construction. Additionally, you should also ensure any load-bearing timber has been suitably treated and consider adding metal brackets or angle plates for extra strength when building the frame.
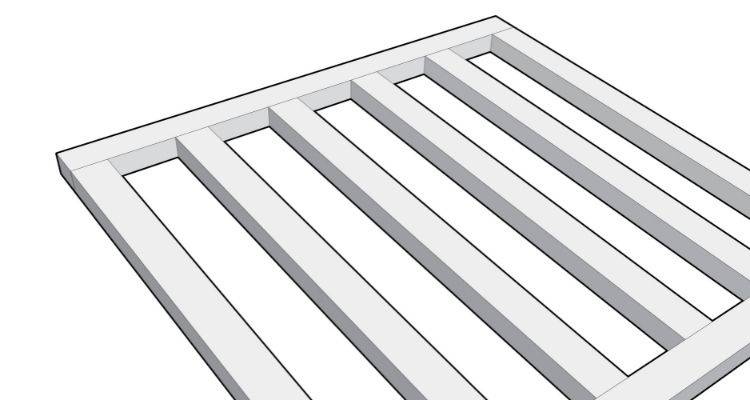
Step 1
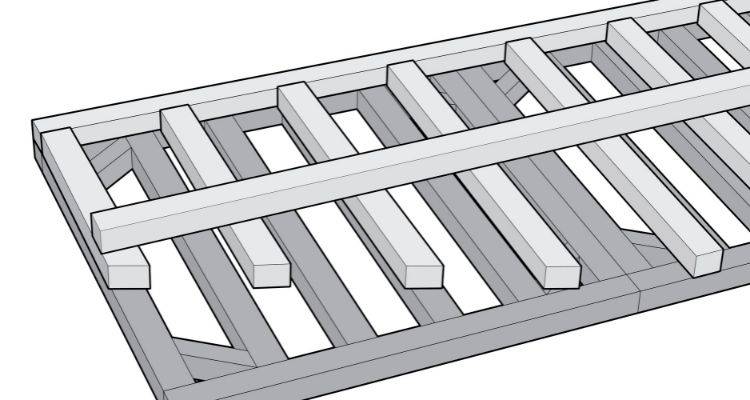
The first step in building a summer house is to build the base. Create a frame for the base and then use structural timber to make it sturdy.
Use timber spars evenly spaced at around 30-40cm distance from each other and secure these to the frame using your drill and screws. Drill pilot holes first to prevent the wood from splitting.
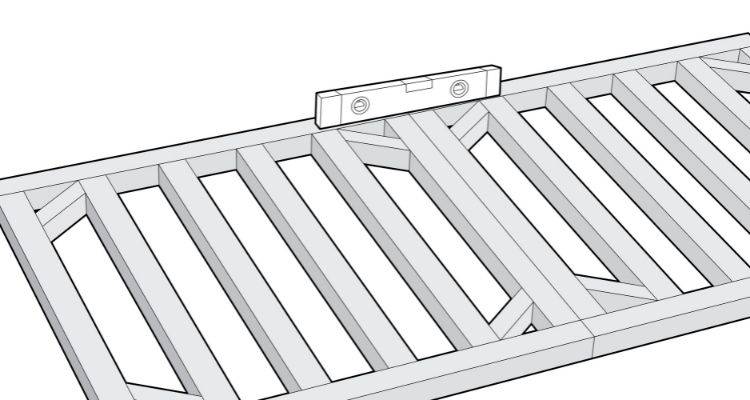
Step 2
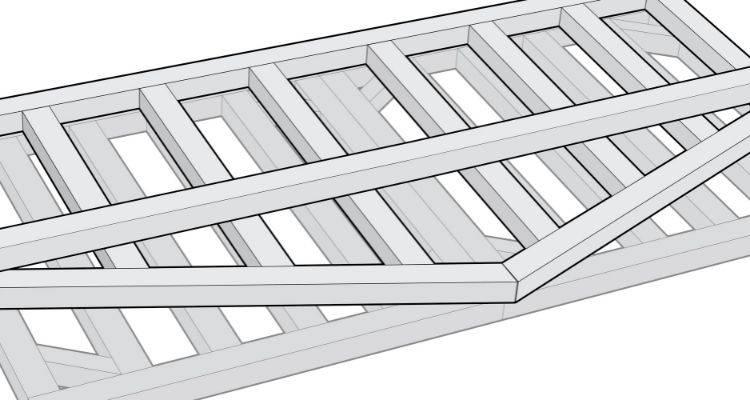
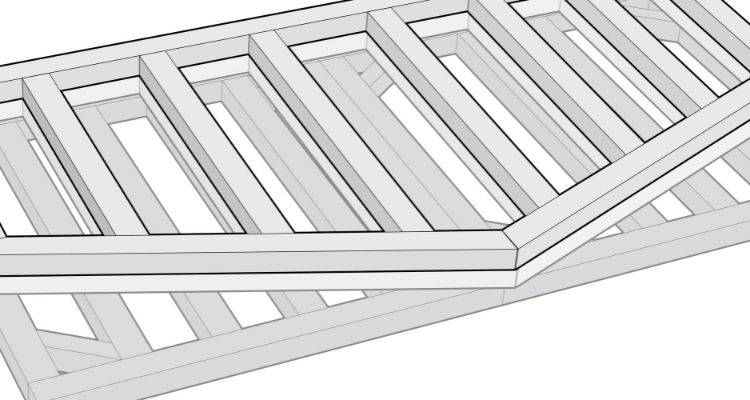
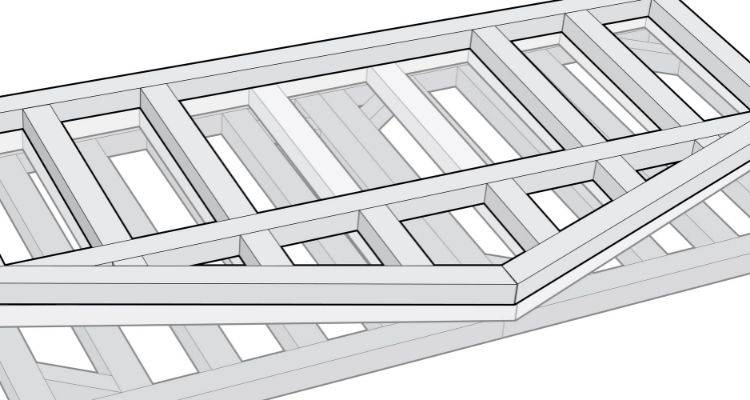
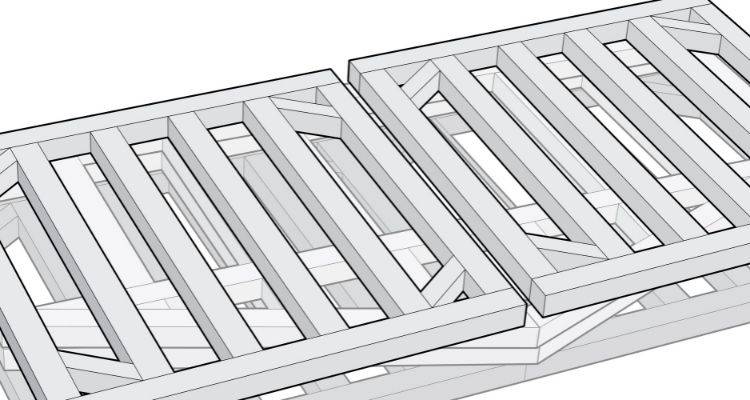
Next, cut some braces with 45-degree mitre cuts and screw those to each corner to ensure the base stays square and remains structurally sound. If you are creating a large summer house, you may need to create two bases and fit them together.
These can be fitted together using clamps. Small builds can be raised on bricks to help prevent it from rotting, although larger summer houses are often built onto a foundation of concrete slabs or pressure-treated timber. If you are using weed membrane under a raised structure, be careful that it doesn't restrict any air flow.
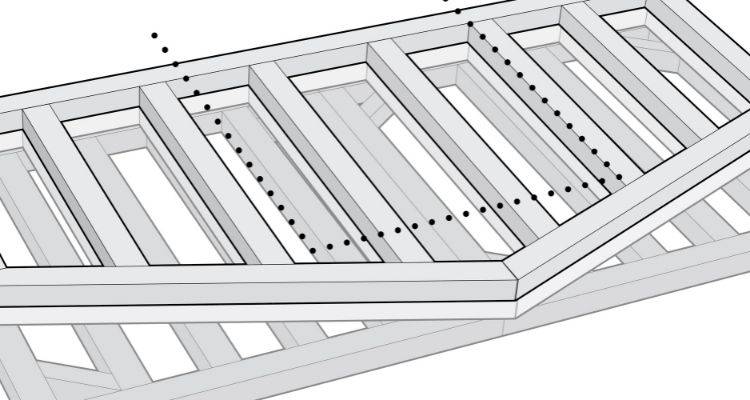
Once in position, use a spirit level to ensure that it is level.
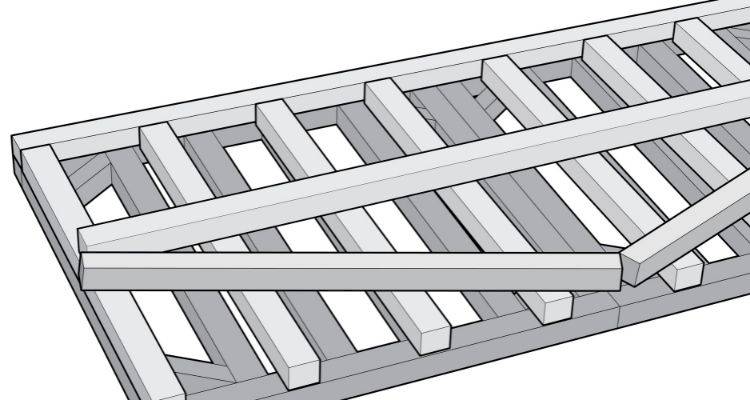
Step 3
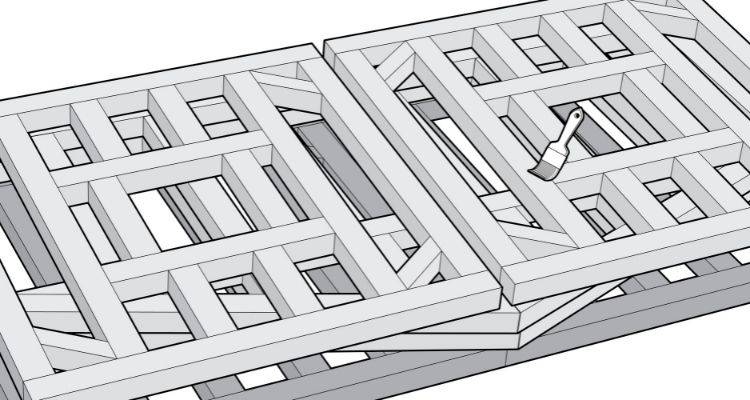
Once you’re happy that the base is level, use a protective wood treatment and paint over the base to protect it on all sides.
After the treated base is dry, you can then start using timber to build the frame for the summer house walls. You want to use your base as a frame and line up pieces of wood to the base.
If the wood you have is too long, cut it to size using a hand saw. Add timber spars in the same way that you did with the floor base. Connect the pieces using a hammer and nails. This will act as the back side of the summer house.

Step 4
Next, create the pitched roof frame in the same way as the walls. Measure and cut the rafters to the desired angle (a 30° pitch is common practice), then attach them to form the frame. Make sure to label the centre rafter with a pencil so it is easy to identify during assembly.
Step 5
Once the centre rafter is in place, mark where the other rafters need to sit along the top of the wall frames. Cut the ends of each rafter with a hacksaw so they sit flush against the 30° angle.
To add the top piece, you’ll need a mitre cut to match the roof so it fits into place. Hold one of the lengths up to the edge of the centre spar and run your hand saw along the straight edge. This will naturally create the mitre that you need. Repeat this step for the opposite side.
Step 6
Join the mitre cuts together and secure into place with screws and drilling in nails. If you are left with any overhang, simply saw these pieces off.
Next, build the front sides of the summer house. Use your first wall frame as a guide and line up the timber exactly the same way as the back frame.
Temporarily nail the pieces of timber to the original frame to hold them in place, making it easier to keep everything lined up.
Attach the sloped rafters to the front of the frame, so they align to the pitch of the roof before securing.
Step 7
Once the top and bottom are matching, you can then line up another spar along the sides, hold a straight edge against it and draw underneath where it lies to get your new cutting line. Saw the timber at these cutting lines and then pre-drill and screw the pieces together.
Step 8
As this is the front piece, you want to figure out where you’re fitting the windows and doors before putting the spars in. Measure the width and height of all of the doors and windows to fit them in. Add around 5mm to each of the measurements so that the fits aren’t too tight.
For the doors, work out the halfway point on the frame and split it equally along the bottom. Put pencil markings at these points. Put a straight edge across to get the same equal measurement along the top.
Step 9
Once you’ve found and marked the positioning of the door. Create pilot holes and screw your spars accordingly around the door gap. Continue fitting your spars along with 30-40cm gaps, the same as you did before but remember to leave a gap where your windows will be placed.
When you come to the window sections, place your windows in situ and attach some horizontal timber bars and extra supports around them to create your window frames. The same needs to be done for the door as well.
Step 10
Once your front framework is done, you can then move on to creating the side frames. Start again by stacking the timber on top of the original frame to get the outline. However, the side pieces may be shorter if your summer house is a rectangular shape.
If that’s the case, you will need to take measurements of the sides of the base and cut your side frames to size accordingly.
Step 11
Once you have the outline of your side piece, fit spars at 30-40cm intervals the same as before. Repeat this step to create both side frames of the summer house.
If you plan on incorporating any other windows or doors on the side of the summer house, be sure to leave room for those and create frames in the same way as the previous windows and doors.
Create some more mitre cut pieces using cut-offs of timber and fit these into the corners of the remaining frames to ensure everything stays secure and remains square.
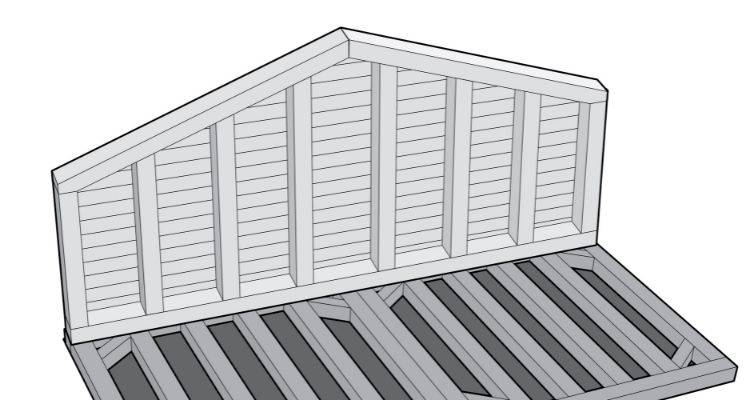
Step 12
Next, create the bottom frame for the roof. Do this by creating a frame in the same way as before by lining the timber up on top of the front and back frames.
The difference with the roof is that you want to leave a slight overhang, so it should be slightly longer than all of the other pieces all the way around. Fix spars to this frame in the same way as the other frames.
Step 13
Now that all of your frames are complete, you can then add the cladding to your frame. The process for this will depend on the type of cladding or wall materials that you are using.
However, most commonly, this would involve fixing plywood to each of the frames and securing it with screws. This creates the walls for your summer house. Treat all of the sides with a wood preserver and set the pieces aside while working on each new section.
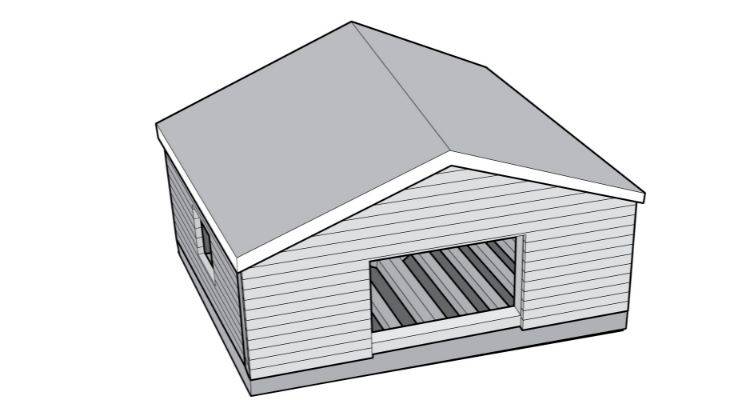
Step 14
Next, use your wood cladding pieces to create the decorative finish on the outside of the summer house. Use a nail gun to fit each of these pieces to the frame. You may need to cut some pieces to size, particularly where the windows and doors are going to be placed.
Step 15
Once all the walls are prepared, you need to create a notched space for the roof to sit on and not move. Use a strip of wood and set it back to the depth of the structural timber and then the pilot hole and screw it on in several places. Repeat this step on each side of the roof and attach battens on each side to create the notch.
Next, apply a wood preserver to all remaining parts that haven’t already been treated. Set all of these pieces aside while you work on the base.
Step 16
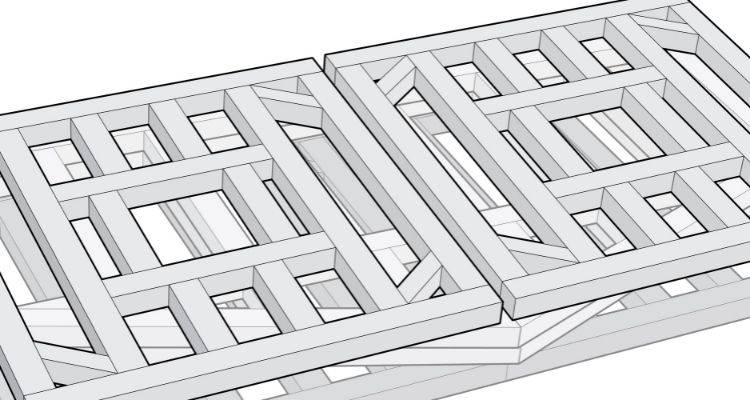
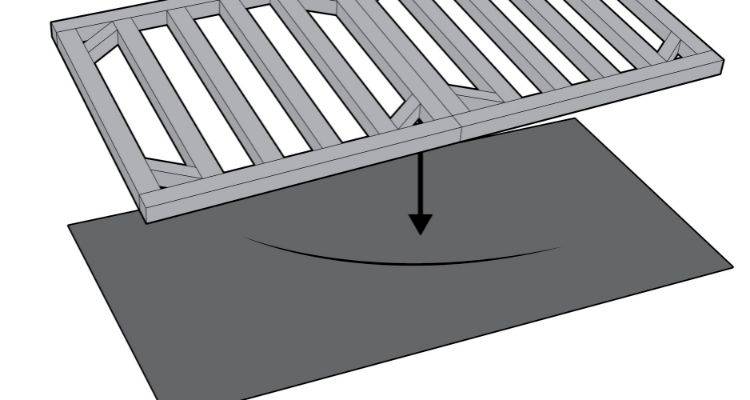
Set the base back on the weed membrane and clamp any parts together that need to be attached. You can now screw these separate pieces together. To prevent any weaknesses, pack as many gaps as you can see with treated wood.
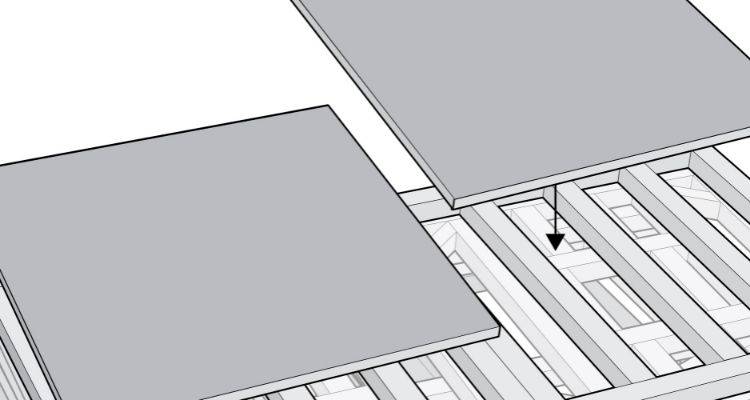
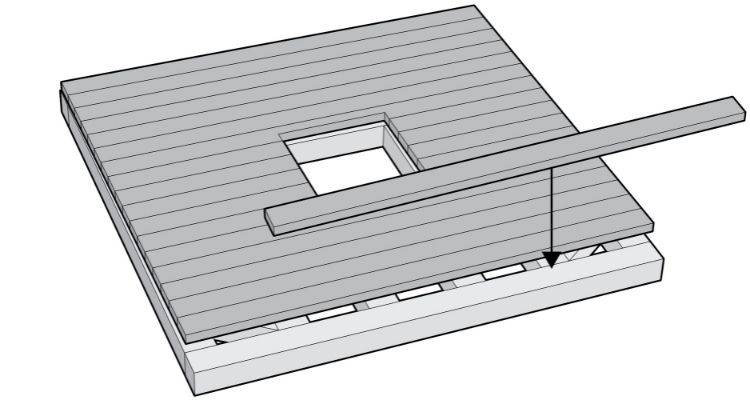
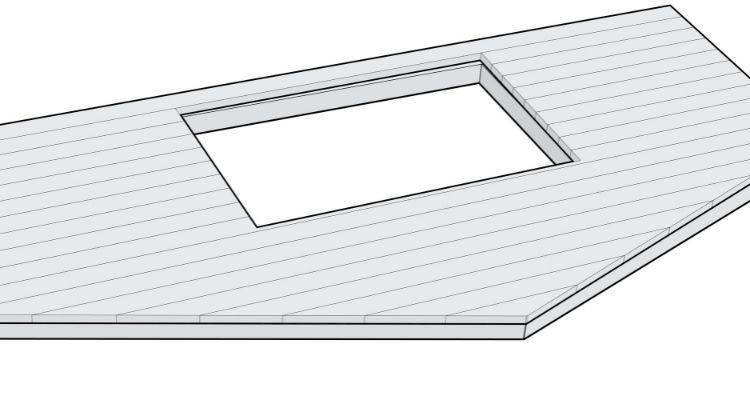
Next, you will need to ply-line the base. Screw plywood to the base with screws along each of the spars to ensure the flooring pieces are completely secure.
Step 17
Next, ask someone to prop up the back piece on top of the base where it needs to be secured. Then, ask someone else to hold up the side piece in line with the back piece and screw these two parts together where they join at the corner.
Repeat this step for the opposite side and then do the same for the front wall. Once each wall is in position, screw them all down to the base.
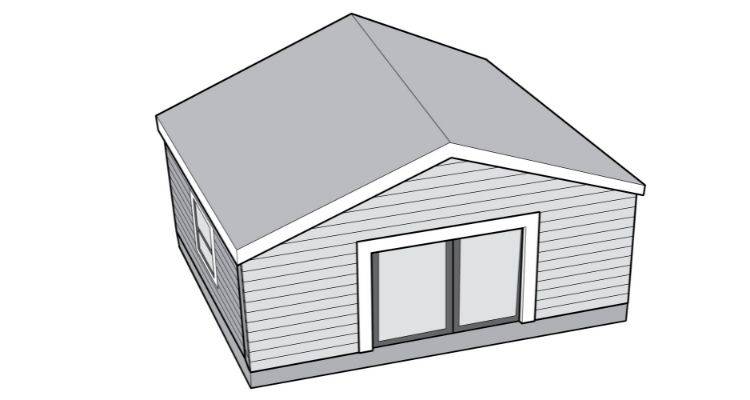
Next, insert the windows and doors and attach them according to the manufacturer’s instructions.
Step 18
Next, nail strips of OSB (Oriented Strand Board) to the framework of the roof. Then, roll out strips of felt over the OSB and clout nail the felt into the frame. At the corners, create a blanket fold and nail the felt into position. Use adhesive on any overlapping sections.
You should then put the roof onto the structure and screw each of the separate roof pieces together. Then, also screw the frame onto the cladding and wall sections to ensure it’s completely secure.
Step 19
Once you’ve completed the summer house and all windows, doors, and the roof are fitted and secured, you can then paint or stain your summer house as required and add any décor as desired to the interior.
You can then add your summer house furniture, and the job is complete.
How Do You Make Summer House Doors?
To build a bespoke door for your summer house, you want to start by measuring the opening at the door frame so that you know how big the doors need to be. You can then purchase the material for the door and cut it down to size so that it’s the right size for the opening.
Use smaller pieces of wood to create a brace for the door. These should be nailed around all four sides of the door and across the middle. If you are putting a window in the door, you will need to cut the opening and create a frame for the glass.
Then, insert the glass into place and apply some sealant to secure the glass. You can then attach the handle and hinges to the door and fit it into the frame.
How to Clean and Maintain a Summer House
Below is a list of things that you should do to clean and maintain your summer house:
- Sweep and dust the inside regularly
- Clean the glass in the windows and doors with glass cleaner and a soft cloth
- Re-paint or stain your summer house roughly every 2-3 years or sooner if needed
- Inspect your summer house regularly to check for damage
- Fix any problems with the summer house quickly to avoid them getting worse