my
myHow to Build a Log Cabin
Are you thinking about building your own log cabin? If so, take a look at the following guide which sets out everything you need to know about constructing a log cabin.
The article will cover the tools and safety equipment you need, as well as a step by step guide on how to prepare and build a log cabin.
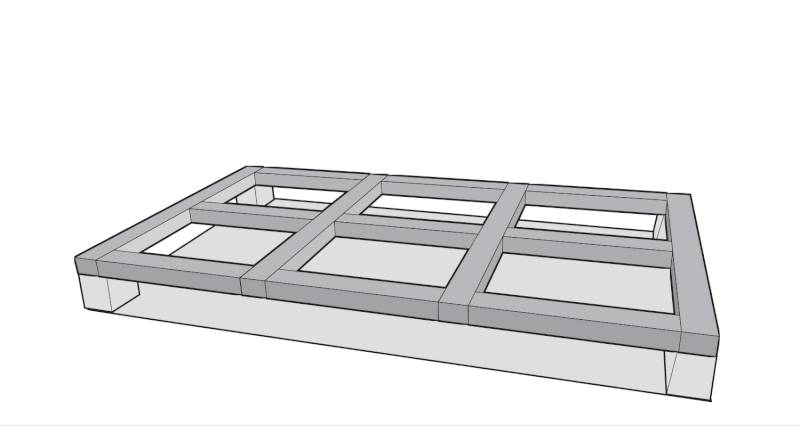
Table of Contents
- What Tools Do I Need to Build a Log Cabin?
- What Safety Equipment Do I Need for Log Cabin Construction?
- What Materials Do I Need to Build a Log Cabin?
- How to Prepare for Building a Log Cabin
- How to Build a Log Cabin Yourself ? Step-by-Step Guide
- How Do You Insulate a Log Cabin?
- Types of Log Cabin
- FAQs
What Tools Do I Need to Build a Log Cabin?
Below is a list of the tools you’ll need to construct a log cabin:
- Wood shaver
- Axe
- Saw
- Spade
- Screwdriver
- Rubber mallet
- Set square
- Spirit level
- Tape measure
- Drill
- Sharp knife
- Ladders
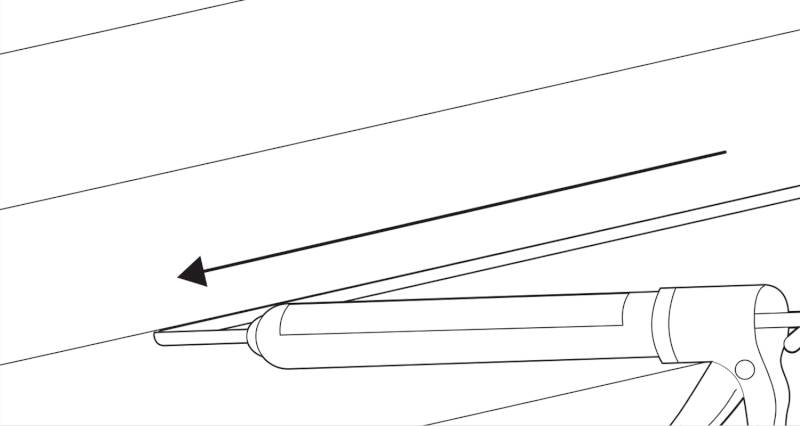
- Caulking gun
- Hammer
What Safety Equipment Do I Need for Log Cabin Construction?
Below is a list of some basic safety equipment you’ll need when building a log cabin, however, the full list may vary depending on the specific equipment used for the job:
- Protective gloves
- Safety goggles
- Hard hat
- Sensible footwear
- Ear defenders
What Materials Do I Need to Build a Log Cabin?
Here is a list of the materials you’ll need for a log cabin build:
- Fell and dried logs
- Rocks
- Concrete mix
- Wood for framework
- Wood floorboards
- Roofing boards
- Roof materials
- Corner pads
- Rebar pins
- Through-bolts
- Screws
- Silicone sealant
- Windows
- Door
- Wood stain
How to Prepare for Building a Log Cabin
Start by choosing an area to build your log cabin. This should be somewhere easily accessible and the ground is level, although you may also need to remove any plants, bushes or trees.
If you are planning to build a log cabin yourself as a DIY project, ensure that you have all of the relevant tools and materials needed to complete the job. However, due to the extent of the work required, we'd recommend hiring a professional tradesmen who is already experienced in log cabins and timber framed buildings.
The best timber to use for log cabins are pine, cedar, spruce, or any hardwood trees such as oak or walnut. Always source the timber for your log cabin responsibly, and only cut down trees if you have permission to do so.
Once you have your logs, they will need to be shaped to size and have the bark removed using a wood shaver, before being left to dry. Keep them off the ground and protected from the elements, spacing them out so they're well-ventilated.
When it comes to drying times this can vary, softwood usually requires 6 to 12 months, while hardwood may take anywhere from 1 to 3 years. Logs with a larger diameter will need longer.
How to Build a Log Cabin Yourself — Step-by-Step Guide
Follow our step-by-step guide below on DIY log cabin construction:
Step 1
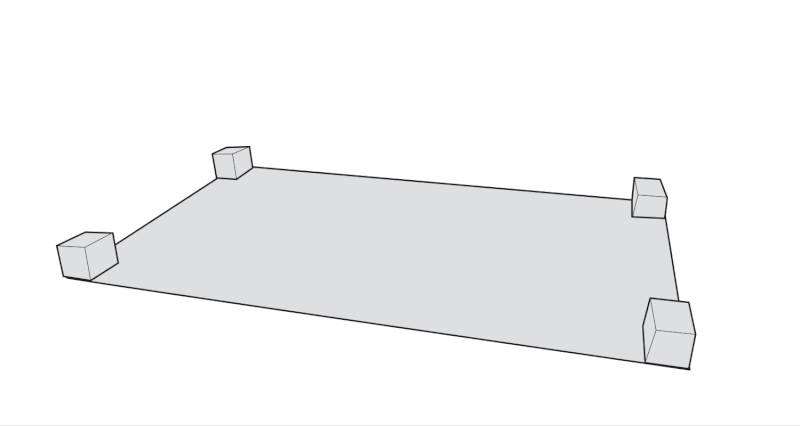
The first step in building a log cabin is to create the foundations. You should dig down until you reach firm and stable soil, as well as deep enough to provide enough support for the structure. For exact measurements, you can ask a structural engineer for advice.
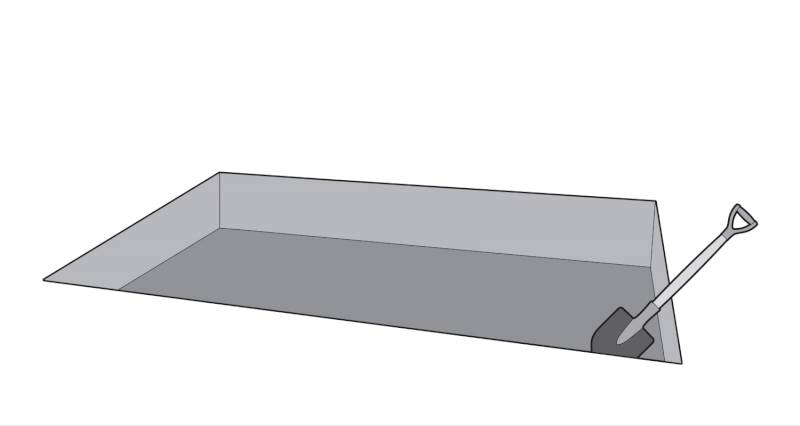
Lay several rocks within the foundation that you’ve dug up to allow for water drainage and to keep your log cabin raised. The number of rocks you’ll need will depend on the size of the cabin you’re building.
Step 2
Next, you’ll want to add a concrete mix to your foundation to ensure it stays sturdy and level. If it is not level, this can have a big impact on the rest of the cabin build.
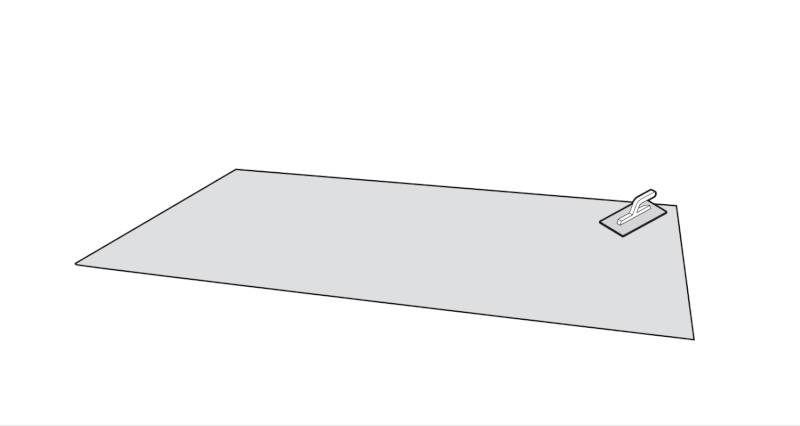
Start by laying a wooden framework around the perimeter of the foundation to keep the concrete in and then pour concrete into the foundations.
Step 3
Next, you will need to place concrete pads in each of the four corners of the foundation. This will essentially lift your cabin away from the floor and will prevent the construction from becoming damaged by water.
Step 4
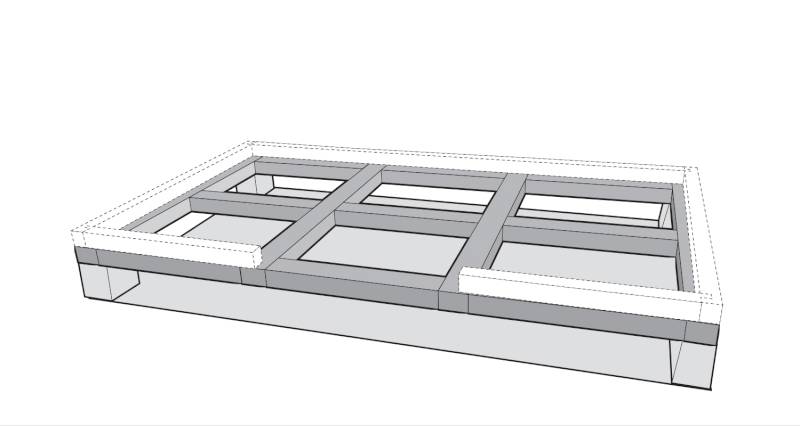
Next, you will need to lay your sub-floor. If you're building a small cabin, lay pad stones in the centre of the foundation, but for larger projects you should consider concrete piers or complete slabs to evenly support the weight of the build.
Step 5
Next, you will need to install the framework for the walls. You will usually need two people to do this as it requires some lifting and steadying. You will need to secure the framework as you go along. Although it is not always necessary, the frame will give you something to work off when installing the logs themselves.
Step 6
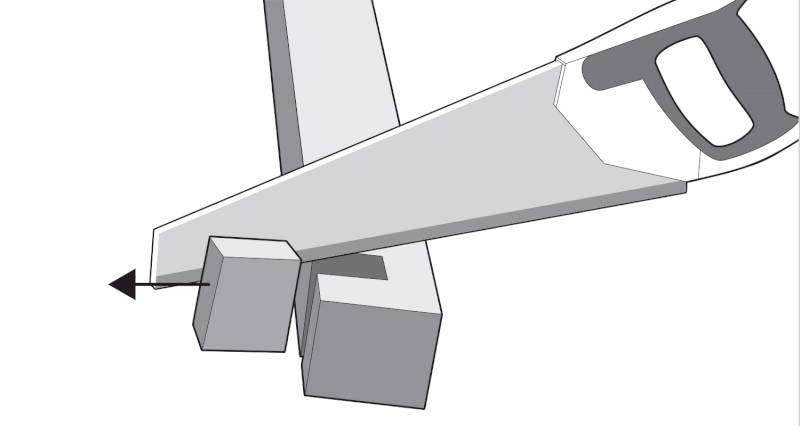
Next, you will need to decide on a notch type. Your logs can be notched in several ways to help them fit together. You will need to cut all of the logs at the edges to create the appropriate notches that will allow your logs to fit together perfectly in the corners.
Step 7
Once your logs are prepared, you can then lay your sill logs. The best logs for the sills are those that are the thickest, longest, and straightest. Begin by laying these four logs around the frame at the bottom. It’s best to work with the thickest logs at the bottom, moving up to thinner logs at the top.
Your sill logs will need to be secured and drilled into the frame to keep them in their correct position. Ensure that the logs are notched together appropriately at each corner.
Step 8
Once your base logs are in position, you can now work on creating the cabin floor. You will need to lay floor joists roughly 14 inches apart. Create notches in the sill logs so that the floor joists can slot in place. Ensure the notches are the same width as the floor joists so that you get a snug fit when laying them.

Once your joists have been laid, add your top layer of floor planks on top of the joists. These should be drilled into the joists to keep them in position.
Step 9
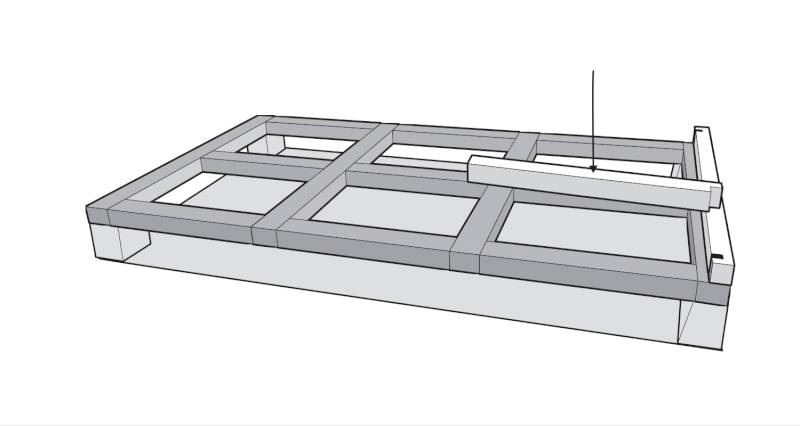
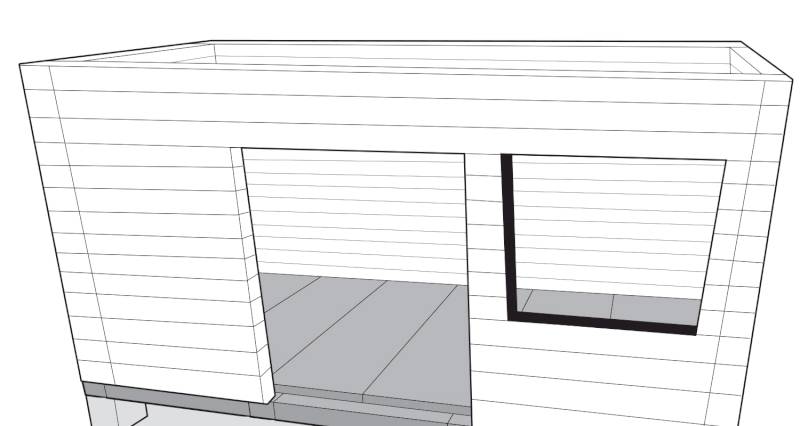
When you’ve finished fitting your cabin floor, you can then construct the rest of the walls. Each log should be slotted into place using rebar pins or with through-bolts and notched to the joining log at each corner. Continue to build up all four walls using this technique, and be sure to leave gaps for doors and windows as necessary.
Step 10
Once the walls are completed, you can then move on to building the roof. You should start by building the outer frame for the roof. Measure and cut your rafters to size according to the size of the roof that you’re building. You should also take into account the pitch height when doing this.
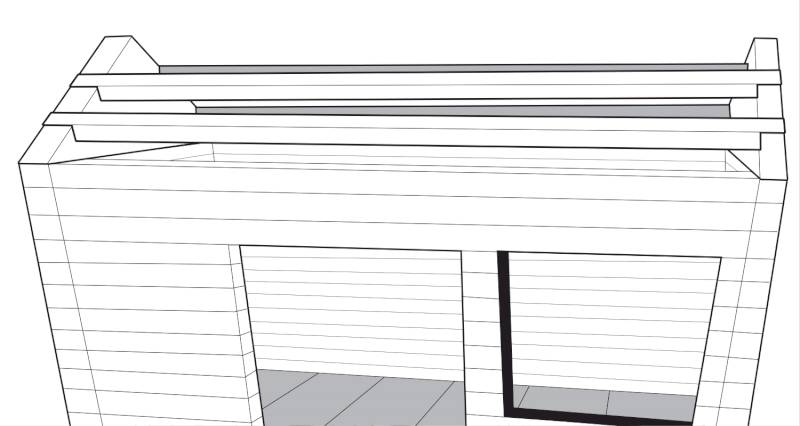
Create a notch at the end of each rafter to help it sit in place correctly.
Step 11
Once the frame is built and installed, you should then install roofing boards. These boards can be drilled into the rafters to secure them in place. You can then install the finish to your roof.
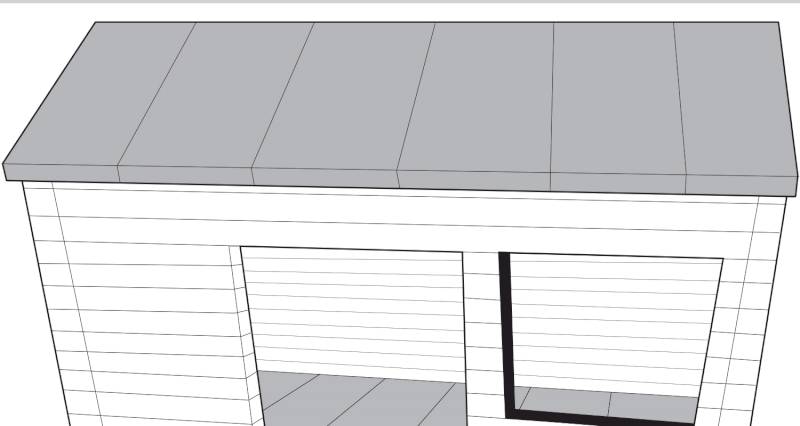
You can choose several finishes, including thatched, wood shingles, metal sheeting, or roofing felt. The design you choose will be based upon your personal preference and should be installed according to the manufacturer’s instructions.
Step 12
Once construction is complete, you can now fit your windows and doors. You should begin by constructing and installing window and door frames to each of the openings. Your windows and doors can then be installed onto the frames to ensure they’re secure and safe.
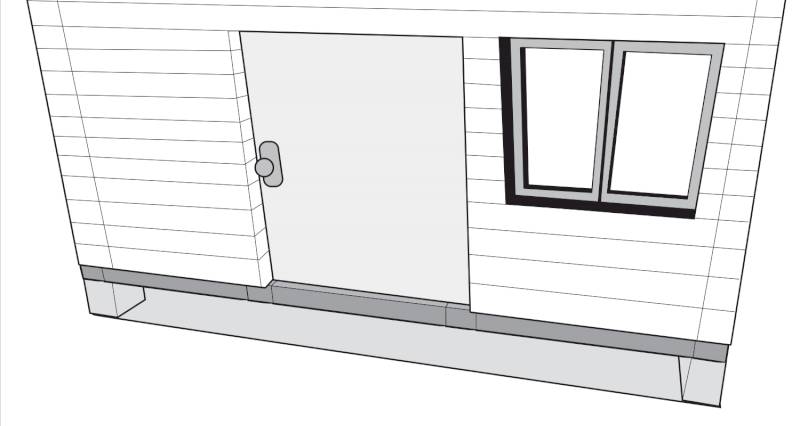
Door and window frames can be constructed simply by drilling pieces of timber around the gap where the window or door will go. Doors will not need a piece of timber at the bottom.
Step 13
This concludes the construction part of the log cabin. You will now need to treat the wood. Clean the logs using a mild detergent and a soft-bristled brush to remove any dirt or debris that may have accumulated during the construction stage.

You will then need to leave your cabin for at least two days to completely dry and set, depending on the local weather conditions.
Step 14
After the two days is up, you can then stain your log cabin. This will help it to retain its colour and will protect it from harsh UV rays.

Step 15
The final step in building your log cabin is to seal it. It is best to use sealing caulk on all of the joints, as well as filling in any cracks that are larger than 2cm. This will prevent air and moisture from infiltrating the cabin.
How Do You Insulate a Log Cabin?
Below are some great tips on how to insulate your log cabin:
- Use thick logs to construct the cabin
- Invest in double-glazed windows for your cabin
- Fit insulation under the floorboards between the joists
- Fit insulation above the roof boards
- Install underlay and carpet in your log cabin
- Hang curtains at your windows
Types of Log Cabin
Below is a list of the types of log cabin and some information on each type:
Post and Beam Log Cabin
Post and beam log cabins use complete logs as beams to support the structure, providing a natural log surface both inside and outside the cabin. This type of cabin requires fewer logs for the build compared to a full scribe cabin. This makes this type of cabin more cost-effective than other types.
A post and beam log cabin consists of vertical posts and horizontal beams that form a structural frame. Rather than filling the spaces between the posts with a complete log wall, post and beam cabins are often filled with conventional framed wall panels and insulated stud walls, or by using natural materials such as straw bales for added insulation.
Full Scribe Log Cabin
A full scribe log cabin is a traditional type of cabin where the logs are stacked horizontally to complete the walls. This type of log cabin tends to be what most people think of when they hear the words “log cabin”. All of the logs in this type of structure have a hand-cut groove in them so that they can fit securely to each other.
This type of log cabin keeps heat in well and is very energy-efficient. Full scribe log cabins are considered the best log cabin type as they look more traditional and offer great thermal insulation, although they can become labour-intensive and take longer to build.