my
myHow to Wallpaper a Wall
This article explains with the help of images, how to wallpaper a wall. We discuss everything that you need to know about, materials, tools, maintenance, cleaning and safety equipment. We also answer some of the most frequently asked questions for homeowners looking wallpaper their home.
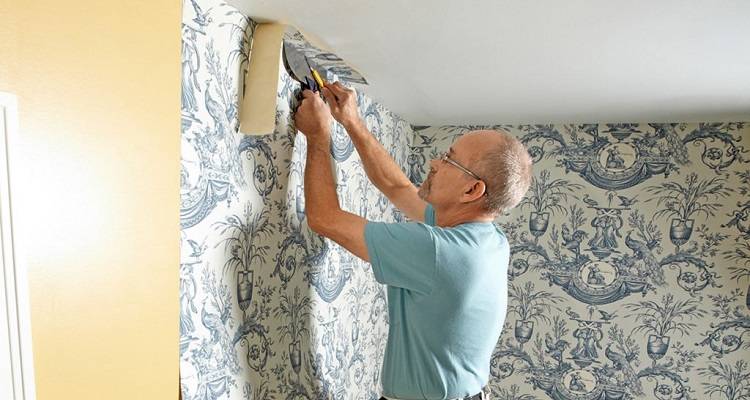
Table of Contents
- What Tools Do I Need to Wallpaper a Wall?
- What Safety Equipment Do I Need to Wallpaper a Wall?
- What Materials Do I Need to Wallpaper a Wall?
- Preparing To Wallpaper Your Wall
- Wallpapering a Wall ? Step-by-Step Guide
- What Wallpaper to Use
- Wallpaper Repair
- How to Clean Wallpaper
- How to Remove Wallpaper
- FAQs
What Tools Do I Need to Wallpaper a Wall?
Just moved home? Or maybe you are deciding to redecorate. Wallpaper is the perfect way to add life to a room, whilst completely adjusting the style and overall aesthetic. Before you get started, you will need to collate the following wallpapering tools:
- Dust Sheet
- Sponge or Damp Cloth
- Filling Knife (if required)
- Sandpaper (if required)
- Plumb Line
- Spirit Level
- Tape Measure
- Pencil
- Wallpaper Scissors
- Bucket
- Pasting Brush
- Pasting Table
- Roller (if pasting the wall)
- Roller Extension Pole (if pasting the wall)
- Wallpaper Smoother
- Wallpaper Hanging Brush
- Seam Roller
- Trimming Wheel
- Retractable Knife
- Radiator Roller
- Stepladder (if required)
- Screwdriver (if papering around a light switch)
What Safety Equipment Do I Need to Wallpaper a Wall?
As you are mixing adhesive and using several types of tools, it’s important we highlight the importance of safety during this process.
You will need to use the following safety equipment:
- If you are using filler for any cracks, then you will need to wear protective goggles during this process.
- When you are preparing your surface with sugar soap you will also need to protect your eyes with goggles.
- If you are sanding down the wall surface, then a dust mask and goggles will be required. We also advise that you keep the room ventilated during this task, to stop any inhalation of dust.
- When it comes to mixing and applying the adhesive paste, ventilation is just as important. You should also protect your eyes with goggles and be cautious when using the paste not to make contact with your skin. In the event you do get any paste on you, please wash this immediately with water.
- If you are wallpapering around any light sockets, it's vital that you disconnect any power going to the socket first.
- If your walls are high and require a stepladder, please take extra care and have a person with you in the home should you need their assistance.
What Materials Do I Need to Wallpaper a Wall?
As with any DIY project, you are going to need some materials to get you started.
Please purchase the following:
- Wallpaper
- Paste-the-Wall or Paste-the-Paper Adhesive
- Sugar Soap
- Filler (if required)
Preparing To Wallpaper Your Wall
Once you have chosen your wallpaper, you need to calculate how much you will need. Start by measuring the width of each wall and add them together. Then, divide the total width by the width of your wallpaper roll — this will tell you how many vertical strips, or “drops,” are required. Next, measure the height of the room and multiply it by the number of drops to estimate the total amount of meterage needed.
Check the length of wallpaper per roll and divide your total meterage by this figure. Don’t forget to account for the pattern repeat, which should be listed on the packaging. As an additional tip, add an extra 10% to cover any waste during cutting and trimming.
- Start by removing any old paper. You can do this with steam or using hot water to soak any previous paper, then use a scraper to remove any that doesn't come off easily by hand.
- After the paper has been removed, use filler on any holes or cracks in the wall and allow to dry. Smooth out these areas using sandpaper. We would also advise if you are giving the whole room a makeover to paint any doors, ceilings and skirting areas first.
- Remove any furniture from your room before starting, and if not practical, cover the furniture with dust sheets. You will also need to cover your entire floor area with protective sheeting.
- You are now ready to start cleaning your walls. Use a cloth and Sugar Soap to clean the walls which will help remove any dust, dirt and grease.
- If you're plastering an indoor wall, you will have to ensure it is completely dry before treating the surface with a wall sealant prior to applying wallpaper.
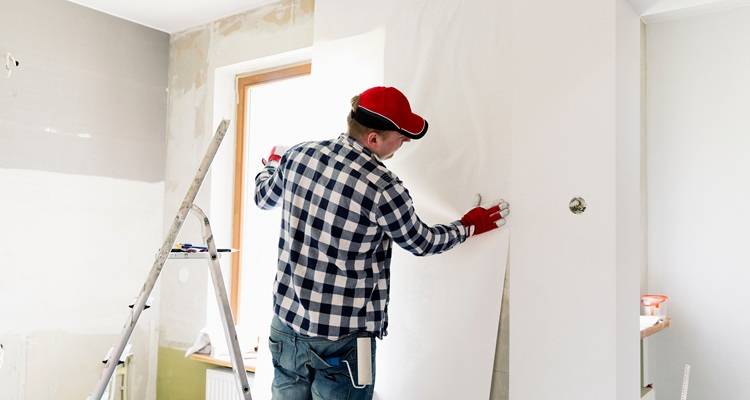
Wallpapering a Wall — Step-by-Step Guide
Wallpapering a wall, can make a beautiful design focal feature or add to a stylish design in your home. In this step by step guide we will show you, how to put up wallpaper, how to paste the wall, how to paste the wallpaper and finally how to wallpaper around tricky obstacles.
You should have all the correct tools and materials needed, so let’s look step by step of how to wallpaper your wall:
Step 1
Just with any DIY project, it’s important that you thoroughly prepare before carrying out the task in hand. Firstly, you will need to clean the surface using a cloth and Sugar Soap spray, to remove any grease and dirt, then leave this to dry.
If you notice any chips or holes in the wall, consider filling these areas with filler, wait for that to dry. Then sand down to create a smooth, level surface.
Step 2
Using a spirit level, mark out a vertical line 500 mm from your starting point, this will help ensure your first piece of wallpaper hangs straight and prevent having to cut narrow end strips. Next measure the height of your wall and add 100 mm as this will allow room for your trimming.
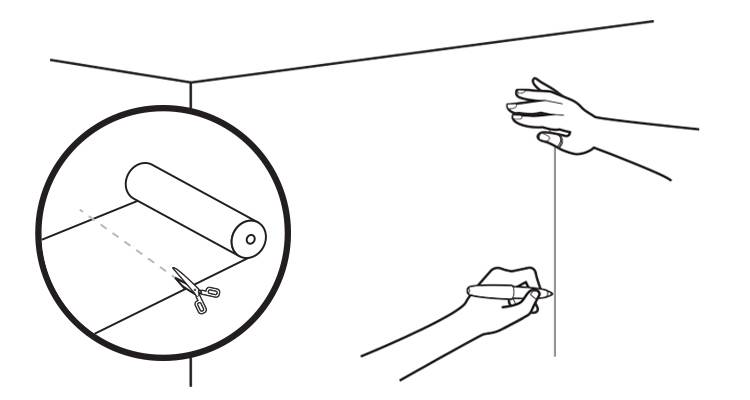
Using this line, cut using wallpaper scissors. If your wallpaper pattern is large, consider where you would like your starting point to be before cutting.
Step 3
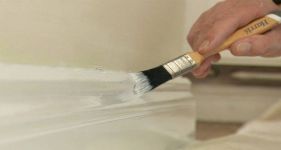
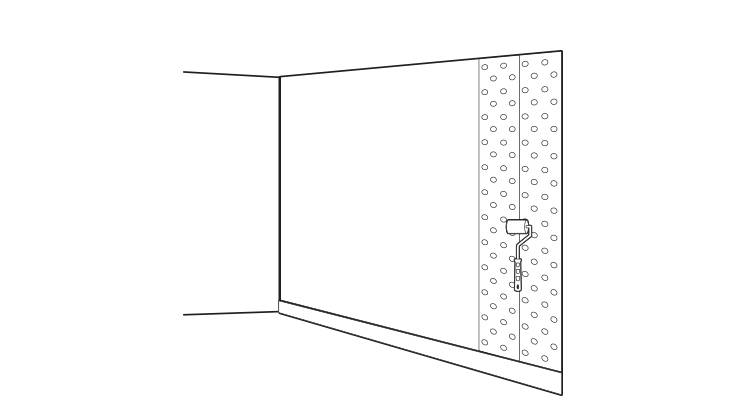
Following the manufacturer's instructions mix your wallpaper adhesive. Once this is mixed, use a roller to apply the paste directly on to the wall. Remember to only apply this paste to the section you are starting with, not the whole wall.
Take your wallpaper and apply it over the paste, ensuring you adjust the position to match to your original guide mark. Once you are happy with the position, use a brush over the surface of your wallpaper, you could also use a roller. Ensure that you work outwards from the centre of the paper to remove any trapped air bubbles.
This will leave you with a smooth, flat surface. Once the paper is smooth and you are happy with its positioning, take your retractable knife and trim off any excess paper.
Step 4
You’ll then need to repeat the process of trimming and pasting the wallpaper. Please be aware that you will need to match the pattern of the wallpaper up with the piece that is already in place. Smooth out the piece of wallpaper as you did before, removing any trapped air bubbles.
The adjoining pieces of wallpaper will now need firming together. To do this, take a seam roller, applying a small amount of pressure and move up and down the joint to compact together. Then continue using the process until the wall is then completely covered.
Step 5
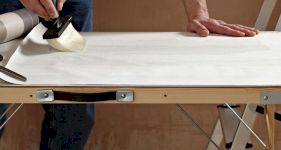
If you are using paste paper wallpaper, prepare, measure and cut as outlined in the previous steps. Following the manufacturer’s guidelines, mix the wallpaper paste. Place your paper faced down on a pasting table. Apply the paste to the wallpaper using a pasting brush, working out from the middle of the paper to the edges.
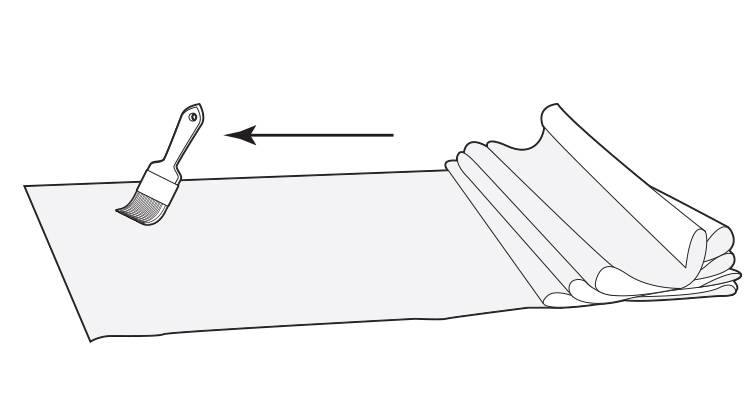
After the paste has been applied, fold over the wallpaper to create a concertina. Follow the manufacturer’s instructions and allow the paper to soak. Please wash down your table to remove any excess paste, as you want to avoid any damage to the next sheet of wallpaper. Once the paper has been soaked, hang the wallpaper, using the instructions from the previous steps.
Step 6
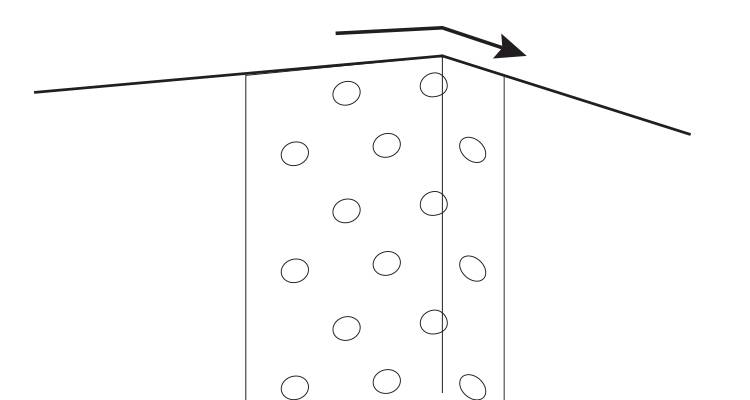
If you are wallpapering corners, measure the gap between the edge of the wallpaper and the corner from the top, middle and bottom. The reason for this is most corners are not equally square. Then, add 25mm to the longest measurement and mark that onto the paper. You can then cut your paper vertically. Hang the wallpaper, using the same technique described previously. Please ensure you smooth the excess wallpaper into the corner and just beyond to the adjoining wall.

If the distance from the paper to the corner equated to more than half of your wallpaper roll, then use a full width of the roll, don’t cut. Likewise, if your wallpaper doesn't have a pattern, use the complete width of the roll. If not, you’ll need to mark the remaining distance that would be required to complete the width of the roll. Then on the next piece of wallpaper, deduct the 25 mm overhang, as this will help you to align your pattern.
To continue, you’ll need to measure from the corner and mark out the width of the wallpaper onto the wall. Then use your spirit level to mark a vertical line. Apply your wallpaper so that it overlaps into the corner. Be sure you align the pattern.
Step 7
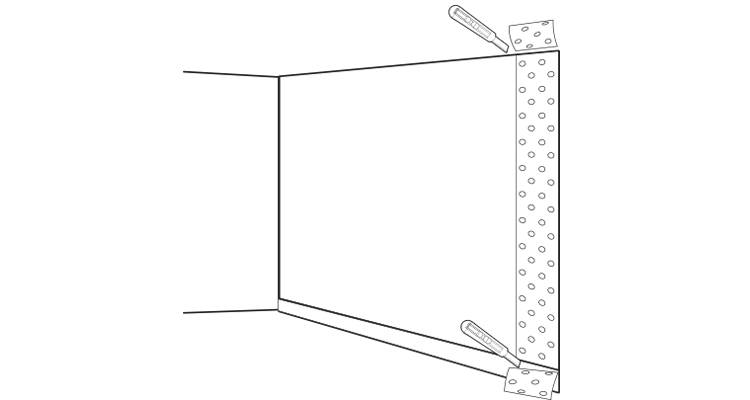
If you are working with an external corner, you will need to wrap the wallpaper around, and then smooth it out using your brush or roller. On your new wall, measure out the width of your wallpaper.
As before, use your spirit level to mark a vertical line as a guide. Then continue to apply the paper, matching the pattern as you go.
Step 8
If you are wallpapering around a light socket, for safety reasons, ensure you cut any power to the switch before continuing. Position the wallpaper, as if it were hanging. Using a pencil, mark the points of the four corners of the switch.
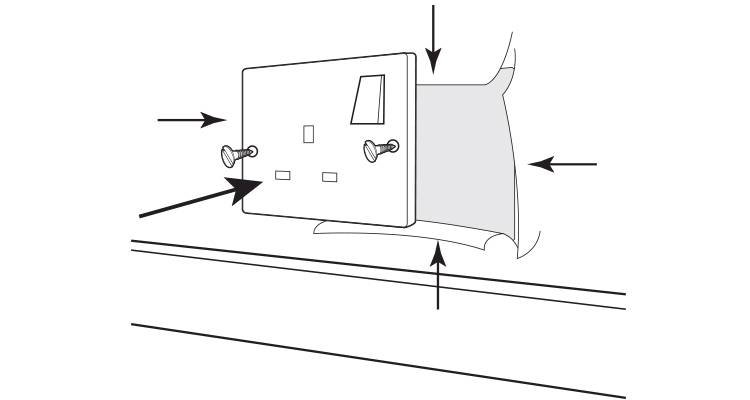
You will then need to cut out this area. To do this, create a hole in the centre of the four points, then use scissors to cut diagonally towards the four corner points, and trim off the paper. Ensure you leave a small amount on the edge to create an overlap. Paste the wallpaper as per the instructions previously. Lightly unscrew the socket and use your smoother to feed the paper around the socket. Then re-tighten screws.
Step 9
When it comes to wallpapering around radiators, see if you are able to remove the radiator, to allow you to wallpaper as before. If you cannot remove it, you will need to turn it off and allow it to cool.
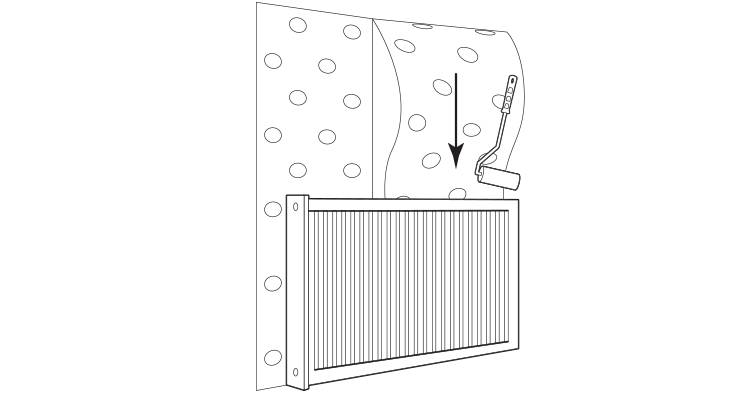
Hang the wallpaper up to the radiator as you have done previously. Let the paper overhang the radiator by roughly 150 mm, then mark and cut. You’ll need to carefully feed the paper behind the radiator. As best you can, mark the position of the radiator brackets, and cut a slit in the paper to allow for this.
You can then apply your paste. Using caution, feed the paper behind your radiator and smooth down the paper using a roller. If you have a gap between the radiator and skirting, use the same technique.
Step 10
Should the wall have a door frame, please follow this step. Using the same technique as before, paste the paper, and smooth to the wall. You will have an overhang above the door, so smooth out the rest of the paper right up to the door frame. Then mark the top corner of the frame onto the paper.
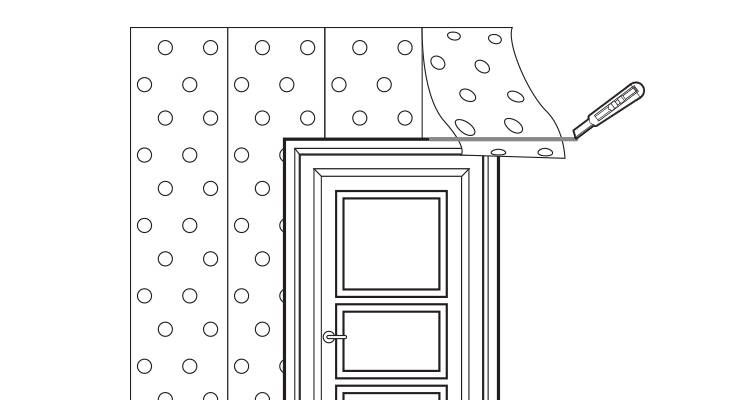
Using the mark as a guide, take your scissors and cut a diagonal line to the top corner of the frame. You will then need to trim the paper. Ensure that you have an overhang of 60 mm left on your paper.
Finally, use your roller to smooth out the wallpaper around the frame and trim any excess off using a retractable knife. Then smooth the paper into place.
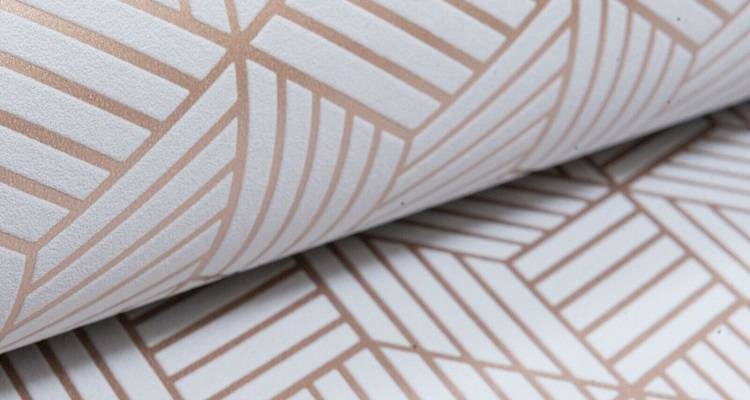
What Wallpaper to Use
Wallpapers have become an increasingly popular design choice for homeowners these days. It is little wonder with the range of versatile styles and materials available to us.
Over the years the choice of wallpaper material has really opened its doors. So, let’s explore these types of wallpaper a little further:
Vinyl Wallpaper
This type of paper seems extremely popular, as it’s so versatile. This paper is simple to install, although thicker vinyl wallpaper can be hard to remove. Another advantage to this product is it’s easy to clean. You’ll find many styles and options available to you, so shop around.
Solid Sheet Vinyl
This holds similar qualities to your standard vinyl; however, this wallpaper is usually thicker and often is ‘embossed’ in texture.
Vinyl Coated Fabric
This type of paper is quite natural in its texture. Whilst the vinyl coating allows for a degree of protection. If you are looking to decorate your living area or dining room, and want texture to be a key feature, then consider this type of paper.
Vinyl Coated Paper
If you are looking for a slightly upgraded version of the previous vinyl types of paper, then this is it. The reason for this is the coating on the paper, which makes this paper ideal for humid rooms, such as bathrooms, kitchens or washrooms.
Non-Woven Wallpaper
This type of paper is vinyl free. This is perfect if you are concerned about any environmental issues. It also has its perks as it is washable and breathable, which means you needn’t worry about mould. Other perks include: easy to install and remove, the product doesn’t tear easy.
Easy-Walls wallpaper
These hold similar qualities to non-woven paper. The paper is PVC and VOC free and the ink used on the surface is all water based. If you are looking for breathable paper which can be cleaned easily, then this could be perfect for your home. A key point about easy-walls paper is that the paper often comes with a pre-applied adhesive, making installation much easier.
Pre-Pasted Wallpaper
This paper is virtually the same as your ‘easy-walls’ qualities. The name refers to the prepasted adhesive on the paper. This adhesive will need to be activated by water to the back of the paper. Please ensure you read the manufacturer's instructions beforehand. It’s important to note that these are considered high-end, so prices will be increasingly higher.
Grasscloth Wallpaper
Grasscloth is a highly textured paper, which has been woven using only natural components. As this wallpaper is delicate, it's not suitable for rooms regularly exposed to moisture (such as the kitchen or bathroom) and should only be dry-cleaned using a brush or vacuum cleaner.
Of course, choosing your paper will also depend on pattern, colour, texture to suit each individual’s style needs. Do some research and look online and in magazines for inspiration and ideas. There will certainly be something to suit all.
Wallpaper Repair
Wallpaper ages like the best of us, edges can look messy, and tear. Luckily in most cases this can be rectified with repair. If these repair methods don’t fit the criteria, then the only solution is to replace the damaged wallpaper.
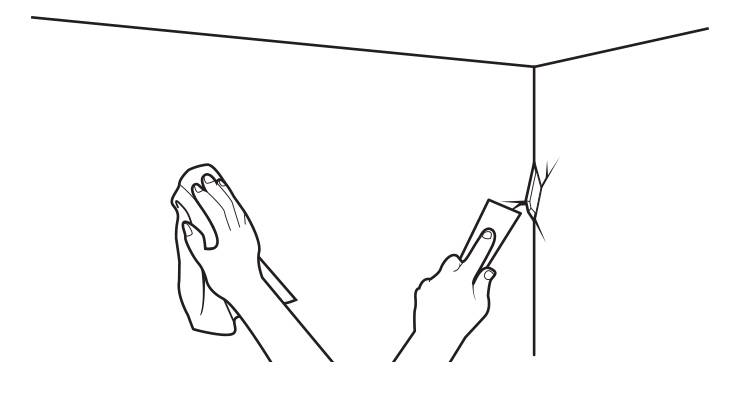
If your paper has some loose edges or a slight tear, then you can re-glue this. To do this, firstly lightly dampen the area and carefully lift the wallpaper from the wall. Get your adhesive and apply a thin layer to the paper. Press this firmly back into place and use a roller to secure. If any adhesive seeps out, wipe with a damp sponge.
If your wallpaper seams need resealing, then use the same technique to the seam of the wallpaper.
Should you need to patch your wallpaper, for example if an area has bad staining or a mark. To repair this, you will need to create a patch of wallpaper. Cut out a square larger than the existing area to be patched. You will need to ensure that your pattern matches. Get some masking tape and attach this to the wall on the specific area. Carefully cut the patch using a retractable knife. You will then need to put the new patch aside. Dampen the old patch and peel it off. You will need to let the area dry before applying a thin layer of adhesive to the new patch. Then carefully place and fix into place.
How to Clean Wallpaper
This process can easily be forgotten by the most meticulous cleaners. Your wallpaper can easily attract dirt, so it’s important you know how to clean this correctly. Be sure to consider your type of wall covering with your manufacturers guide first.
For all wallpapers, you should dust down using a microfibre cloth, every 2-3 months. You could also consider using a vacuum, just ensure the head doesn't have any bristles as this could scratch and mark your paper.
If you have vinyl or fiberglass wallpaper, then consider washing with soapy water. Use a mixture of warm soapy water, and mix 1/4 dish wash soap. Using a soft sponge, dip it in the water and ring out until lightly damp. You can then wipe down your wallpaper gently. Be careful not to over saturate your sponge as you could damage the paper.
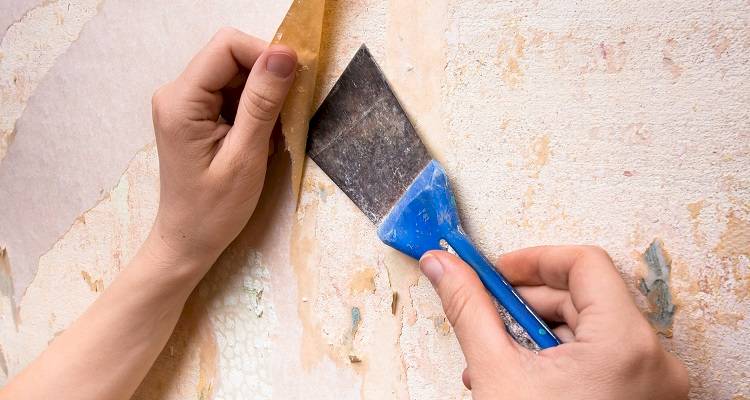
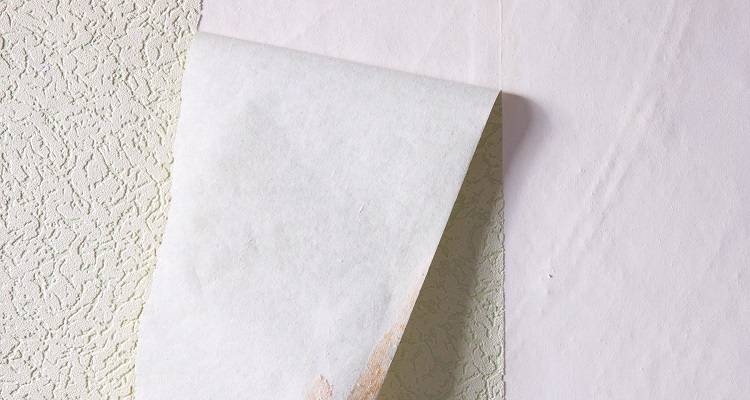
How to Remove Wallpaper
Before refreshing the room in question, you will need to prepare the walls by removing any existing wallpaper and learn how to remove woodchip.
To remove wallpaper, the easiest way to do this would be to use a steam wallpaper stripper. Fill this with very warm water, when you see steam starting to be released from the plate, you can then apply it to the wall.
Leave the plate on each area for around 10 seconds (or longer for hard to remove paper) and once the wallpaper becomes saturated, you can start to peel it away from the wall. For those stubborn areas, use a stripping knife. Repeat the process until finished.
When it comes to removing woodchip, you should do this in the same way you would wallpaper.
If you don’t have access to a steam stripper, find a bucket and fill that with hot water. Use the same technique, apply the sponge onto each section of the paper and dampen. Once damp enough you should be able to use the stripping knife to remove the paper.