my
myHow to Isolate a Radiator
Are you looking for tips on how to isolate a radiator?
Perhaps you're planning on removing a radiator, or moving it to a different room, and need to know how to isolate it first. Or, maybe you are interested in turning off a radiator in a room that you don’t use.
This guide will tell you everything you need to know about isolating a radiator, including a step-by-step guide on different radiator isolating methods.
Let's start!
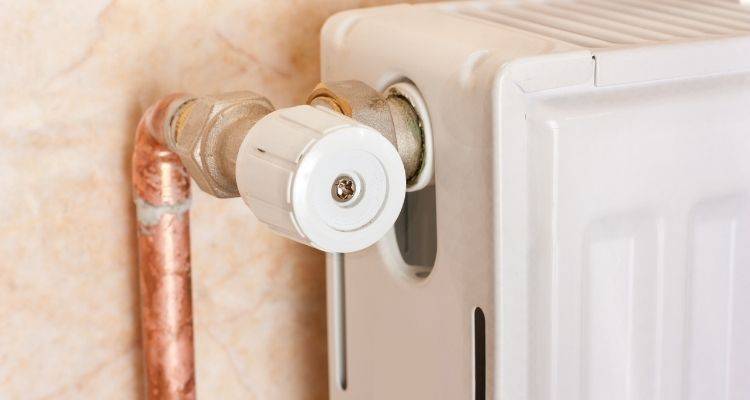
Table of Contents
What Tools Do I Need to Isolate a Radiator?
Below is a list of the tools you’ll need to isolate a radiator:
- Screwdriver
- Pliers, or an adjustable spanner
What Safety Equipment Do I Need When Isolating a Radiator?
You don't usually need any specific safety equipment when isolating a radiator.
However, if you plan on bleeding your radiator or isolating and removing a radiator, you may want to wear overalls or old clothes, as dirty water can leak out.
You may also want to have a container handy to catch any water that may leak from the radiator.
What Materials Do I Need to Isolate a Radiator?
You won’t need any additional materials to isolate a radiator, as it's done using the existing components on the radiator.
How to Prepare for Isolating a Radiator
When preparing to isolate a radiator, you should start by inspecting your radiator to determine the type of valves attached to it.
This will help you determine which tools you’ll need for the job, as different valves require different isolating methods:
- Radiators with standard turn valves, or thermostatic radiator valves (TRVs), can be turned by hand.
- Radiators with lockshield valves need a screwdriver or pliers.
How to Isolate a Radiator Yourself
There are several methods to isolate a radiator.
You should inspect your radiator valves first to determine which method you'll need to use:
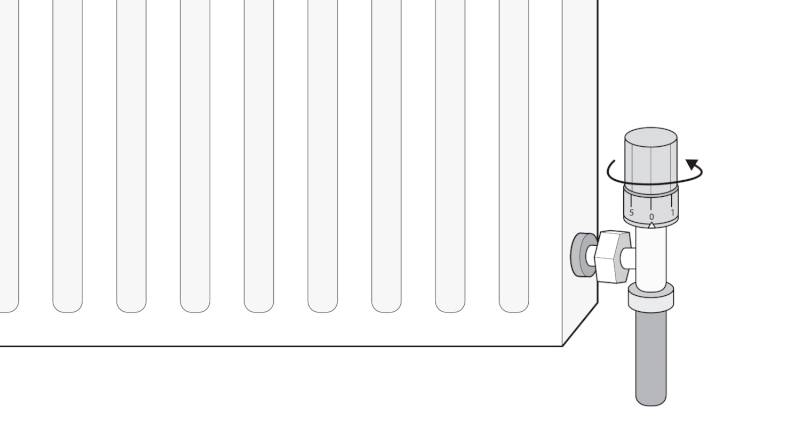
Isolating a Radiator with a Turn Valve
If your radiator has a standard turn valve, then the method of isolating is quite simple.
You will simply need to turn the valve all the way clockwise until it stops. This will turn the radiator completely off, and isolate it from the system.
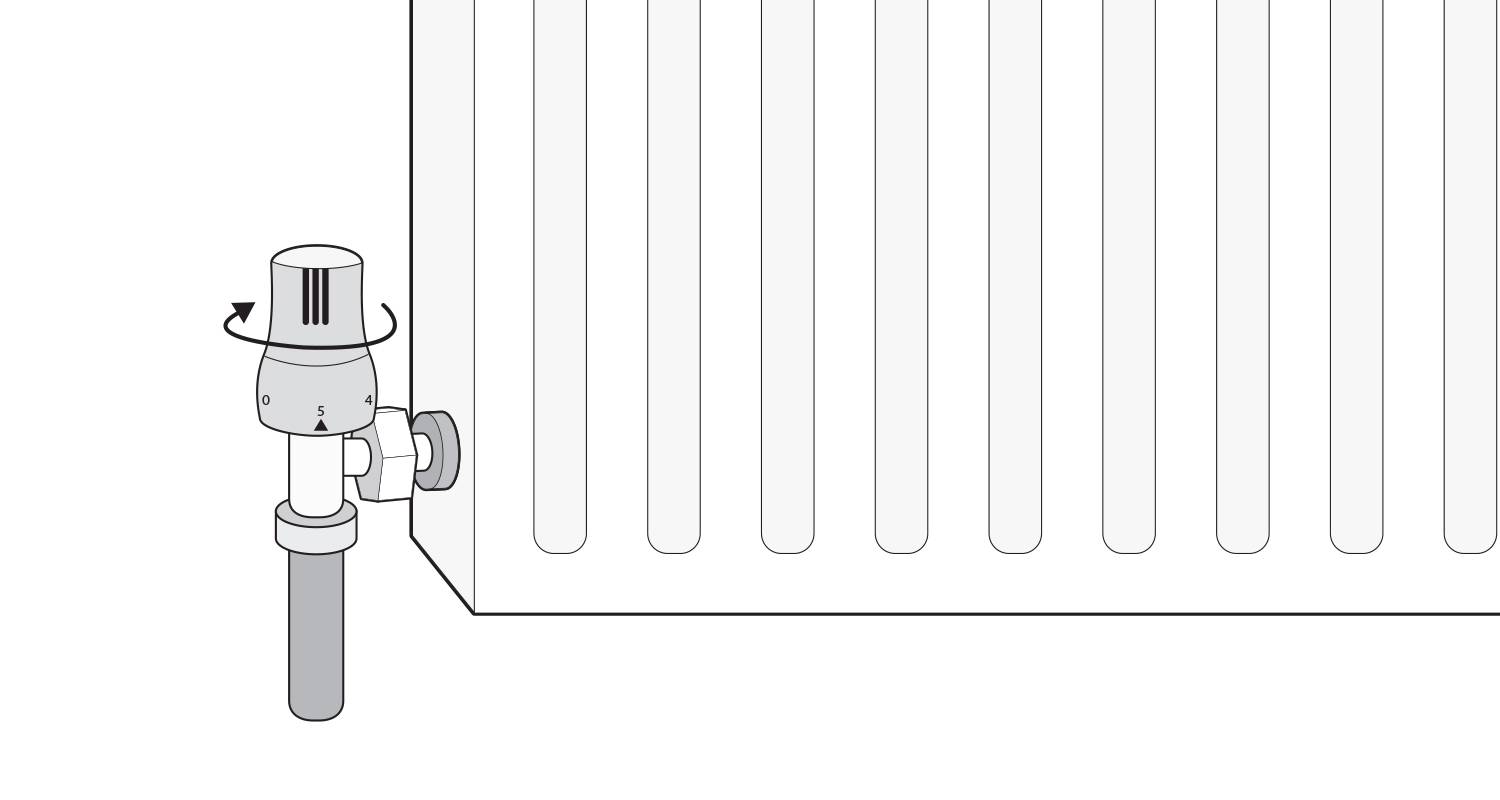
Radiator with Thermostatic Valve
Some radiators have a thermostatic valve that determines the temperature at which the radiator will heat up to.
If you have this type of radiator, you will need to turn the thermostatic valve fully down.
However, some TRVs have a frost protection setting, marked with a snowflake icon - if this is the case with your radiator, you may need to turn the lockshield valve for complete isolation.
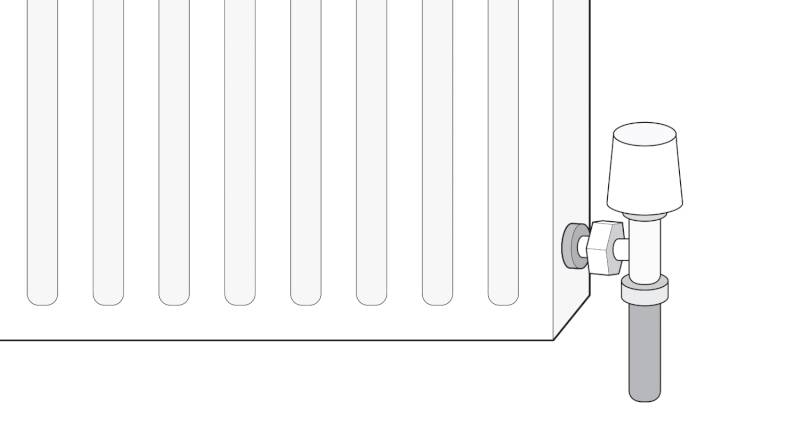
Radiator with Lockshield Valve
Step 1
A lockshield valve can be easily identified by hand as it won’t turn. Instead, the top of the valve should pull off. This part can usually be done by hand. However, sometimes you may need to undo it with a screwdriver.
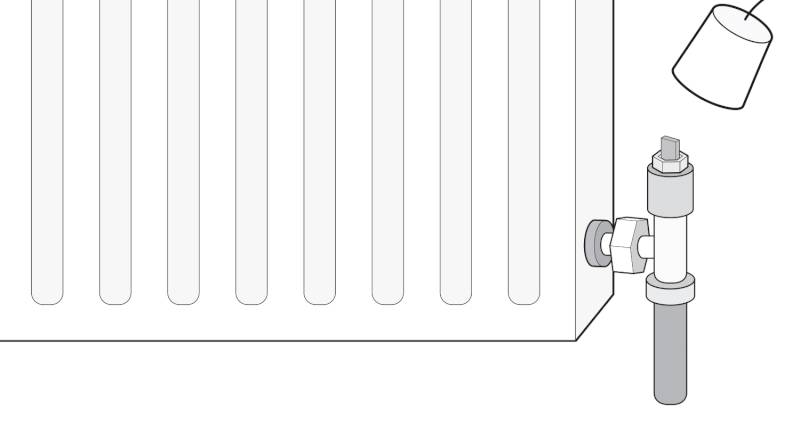
Step 2
Once you remove the cap from the valve, it will reveal the valve head.
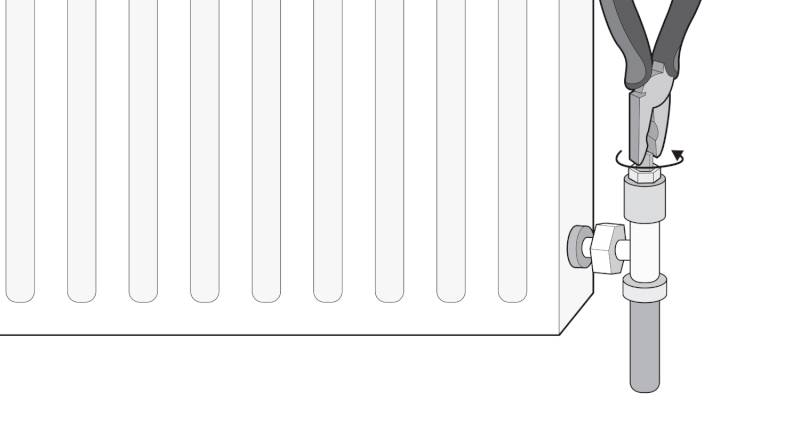
Step 3
Once you have revealed the head of the valve, use pliers to turn it all the way clockwise, until it won’t turn anymore. This will isolate your radiator from the system.
Why Would I Need to Isolate a Radiator?
There are several reasons why you may want to isolate your radiator:
- The radiator is leaking – Isolating a leaking radiator will stop the flow of water, minimising the damage the leak can have on your floors.
- You want to remove a radiator – If you plan to remove your radiator, you will need to isolate it first. A radiator is connected to a complete system that circulates water. If you remove one of the radiators in your system without isolating it first, then the entire water contents from your system will end up being emptied out onto your floor.
- You don’t want to use that radiator - You may also wish to isolate radiators if they are in an unused room that doesn’t need to be heated. This can help you save money on your energy bills.