my
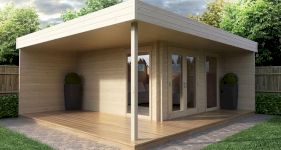
myHow to Build a Greenhouse
In this guide, we discuss what tools, safety equipment, and materials you’d need, as well as the steps involved in building a greenhouse, among other relevant subjects.
In this article, we focus primarily on how to construct a stand-alone greenhouse. Other types include a lean-to, detached, and ridge and furrow (gutter connected) greenhouses.
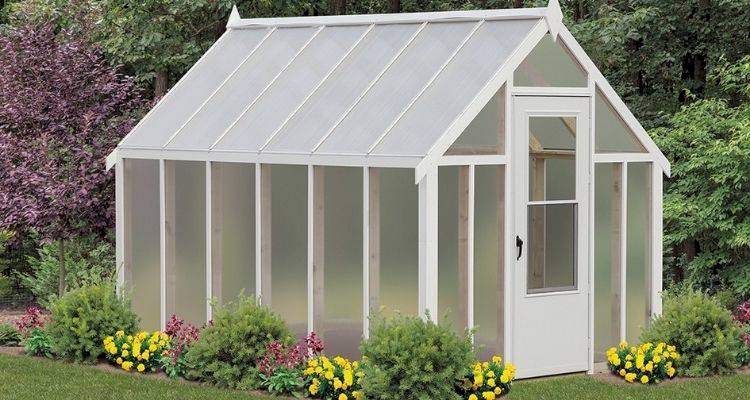
Table of Contents
- What is a Greenhouse?
- What Tools Do I Need to Build a Greenhouse?
- What Safety Equipment Do I Need to Build a Greenhouse?
- What Materials Do I Need to Build a Greenhouse?
- Planning Your Greenhouse
- Preparing to Install a Greenhouse
- How to Build a Greenhouse Yourself ? Step-by-Step Guide
- Types of Greenhouse
- FAQs
What is a Greenhouse?
A greenhouse is a structure usually consisting of a transparent roof and walls used to grow plants. Traditionally they are made with glass, however, many modern builds use translucent polycarbonate sheets - which we will consider for this article.
The purpose for the transparency of the structure is to allow sunlight to enter, which is then absorbed by the inside surfaces. It can then be re-distributed in the form of heat, which helps to create a warmer environment for encouraging plant growth, including fruit and vegetables.
You should construct a greenhouse in a convenient spot, with level ground, offers sufficient light, and has lots of space surrounding it. Greenhouses are a popular way of growing crops while shielding crops from pests and extreme temperatures.
What Tools Do I Need to Build a Greenhouse?
These are a range of tools you’d have to buy or rent (assuming you don’t already have them) in order to create a greenhouse build.
These are the tools you would require:
- Circular Saw Track
- Circular Saw
- Jigsaw
- Drill & Driver Combo
- Miter Saw
- Framing Nailer (optional)
What Safety Equipment Do I Need to Build a Greenhouse?
There is some safety equipment you may wish to use for the process of constructing a greenhouse. Such equipment can reduce the risk of injury or even death. For example, protective gloves will safeguard your hands when using a saw or drill.
This safety apparatus may or may not be necessary, depending on your confidence at the task and level of experience. If you are unsure, you should err on the side of caution.
Here is the safety equipment you may want to use:
- Protective gloves
- Safety glasses
- Ear protection
What Materials Do I Need to Build a Greenhouse?
Let’s now discuss the materials required to build a lean-to small greenhouse. The items listed in this section are necessary to ensure you build a high-quality greenhouse, even if on a budget.
Here are some of the basic materials needed to build a greenhouse, although this doesn't include materials for when any foundation work is required:
- Polycarbonate Sheets
- Panel Siding
- Structural Timber
- Door Frame
- 6mm H Channel
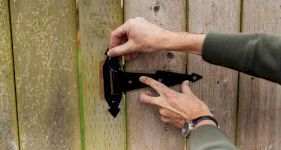
- Spring Hinges
- Glass Cleaner
- Wood Screws
- Galvanised Brackets
- Greenhouse Shelving Unit
- Ventilation Register
- Indoor/Outdoor Digital Thermometer
- Flex Tape (optional)
Planning Your Greenhouse
Before constructing a greenhouse, you’ll want to layout the design to a certain degree of detail. In the following subsections, we’ll look at various planning stages.
Best Place to Build
There are many ways you can maximise the utility of your greenhouse by picking the right location. Of course, you’ll want to make sure the greenhouse has access to lots of sunlight.
Therefore aim to position the greenhouse so its longest side receives the greatest amount of direct sunlight during the daytime, especially when it comes to making the most of the limited sunlight available during the winter months. However, you may need to strike the right balance in order for your greenhouse to not overheat.
You should also ensure your greenhouse isn't blocked by being placed near a wall or shaded by trees. It is also best practice to avoid constructing a greenhouse on a slope, and also allow room to easily open and close the door.
Design of Structure
What design options should I consider? After choosing the spot where you’ll build your greenhouse, you should come up with your design. In this article, we are focused on lean-to greenhouses, but other options exist.
Though you could simply follow the steps laid out in the ‘How to Build a Greenhouse Yourself’ section, you may want to consider consulting a professional designer or architect, especially if you have specific preferences that need to be taken into account.
Of course, a sloped roof is something you’ll also need to take into account when drawing up the design.
Choosing the Materials
The materials listed earlier are a good guide to those needed for constructing a greenhouse.
However, alternative options exist, and even if you do choose to employ the same materials on our list, you’ll want to consider what brands you’d like to purchase from and what quality of materials you’re willing to pay for.
It’s worth doing a bit of looking around online before jumping to a conclusion. With a little research, you can improve your odds of maximising value for money when making purchases on any given budget.
Preparing to Install a Greenhouse
Before we get to the steps involved in a greenhouse installation, let’s look at some important preparations needed on the day of construction.
This is essentially the first phase of building a greenhouse. Here, we are describing the preparations for a lean-to greenhouse at the side of a property.
Cleaning the Area
You’ll first want to apply an outdoor cleaner to the grass and property walls. If the area is uneven, you could grade the area as a means to level it out.
Alternatively, you could use timber 2 x 4s, which would act as structural feet to hold the greenhouse level (more on that in the next section).
Foundations
Greenhouse foundations may consist of materials such as concrete, pressure-treated wood or paving slabs. The surface also needs to be levelled beforehand - which can be done using concrete, timber sleepers or gravel. We all describe the steps involved in adding the floor base within the following section.
Measure the Area
Depending on the size of the greenhouse you’d like to construct, you’ll need to measure the area to confirm that your greenhouse will fit, or you may wish to measure the area first to act as a guide for deciding on the dimensions of your greenhouse.
How to Build a Greenhouse Yourself — Step-by-Step Guide
In the following steps, we lay out how to build a 12 x 6 ft greenhouse (about 6.7 m²), with a sloped roof. Something which can be completed by a professional in just a few hours. Whereas realistically, doing it yourself you could potentially take 2-3 days altogether if you're not experienced in such projects.
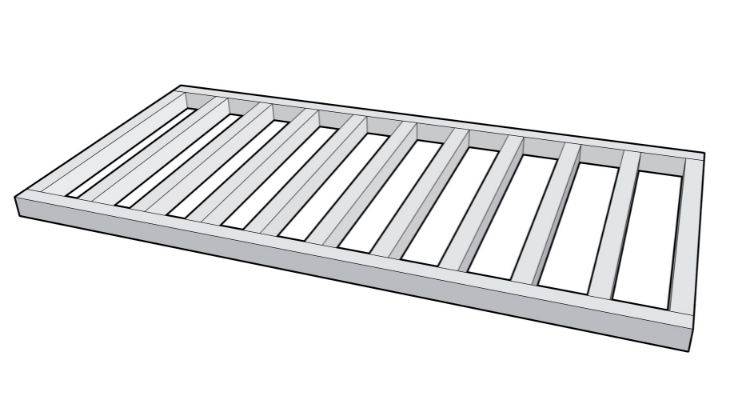
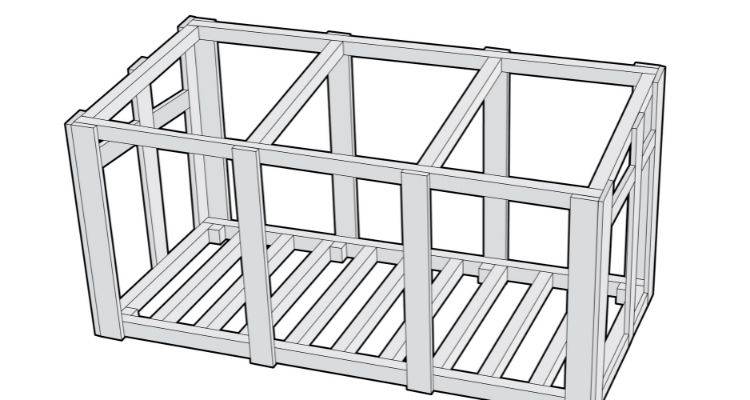
Step 1 - Creating the Floor Structure/Base
For starters, you will need to have all of your timber pieces ready to assemble the floor-holding structure.
Lay out timber pieces with a length of six ft each. Place the longer timbers at the top and bottom of the smaller pieces, and with a pneumatic framing nailer, add two to four nails for each connection. Once nailed into place, use exterior-grade screws or galvanised brackets for additional strength as you secure the floor and vertical timbers.
Next, place the floor base down at the installation area.
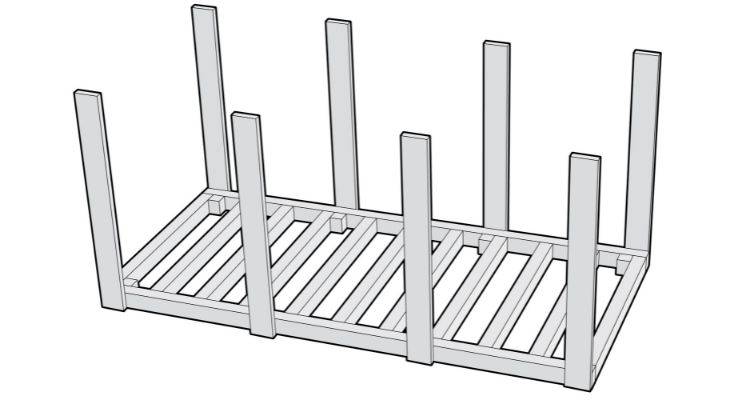
Step 2 - Adding the Inner Vertical Timbers
Keep the base a sufficient distance from the wall of your property, so that you have plenty of room when starting to fit the timber into position.
Nail the first vertical timbers to each end of the floor frame. Then, by counting from left to right, add two more pieces of timber into the middle so they align with positions three and six.
The vertical timber pieces on the left and right edges should be provided with an additional support timber and nailed together. Again, fix all the timber into place using screws and brackets so it doesn't easily collapse.
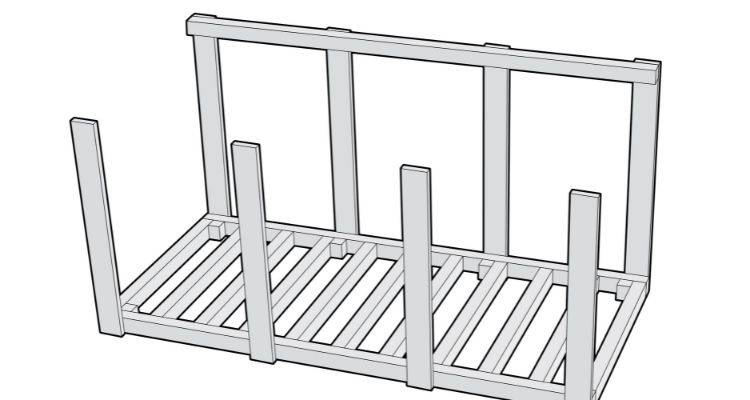
Step 3 - Connecting the Vertical Timbers
Next, connect all existing vertical timber sections with a single 2 x 4 timber and with four nails, nail it to each of the other four vertical pieces before adding screws and brackets.
If the ground has not been graded or levelled, you can add eight 2 x 4s to act as support feet, gently hammered into the soil beneath the frame.
Place four feet along each long side of the structure. Secure each with four nails, then trim the tops to remove any excess wood once the feet are in place.

Step 4 - Building the Outer Frame
How tall the vertical frames on the outer frame should be will depend on a) the height of the adjacent vertical pieces and b) the angle of the slope. The timber pieces used on the outer frame will need to have a small section cut off at the top in order to meet the angle of the top timbers at a later point.
Nail the timbers at the edge. Only screw the middle vertical timbers for the time being. The vertical timbers designed to connect the two timbers nailed at the edges may be installed and nailed into place to connect both sides of the greenhouse structure.
Two timber pieces may be added to achieve the same thing with the two middle vertical timbers of each side.
Make sure to keep using your set square ruler as you proceed. You should add a few more connecting timbers in between the existing connecting timbers, along with nailing everything into place, plus using screws and brackets where required. This will help give the roof the structure and stability needed to hold the roof.
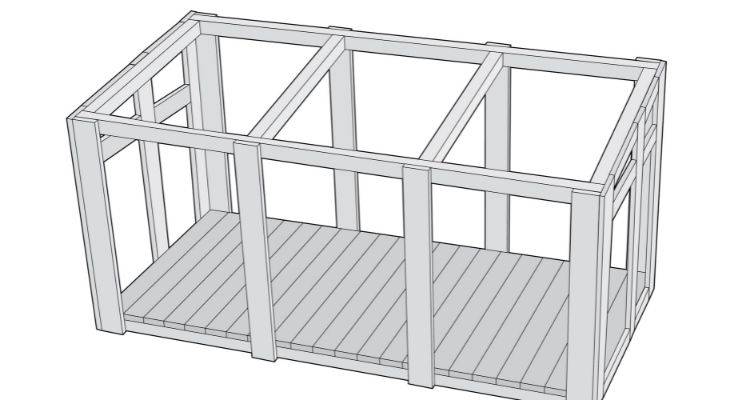
Step 5 - Installing the Floor Panels
The flooring will comprise two layers. First, you’ll want to cut three half-inch pressure treated plywood panels to size. Notch it around the timber pieces and cut off small square pieces at the edges to fit in with the additional timber pieces at the edges of the structure acting as support.
The plywood panels should be nailed into place. Next, add the uprights on the greenhouse’s sides. To ensure that the uprights are parallel with the vertical timbers at the edges, add some spacers at the bottom and top. Slide into position and nail them. Side-angled nailing will be necessary for the top spacers. Repeat this on both ends of the greenhouse.
Step 6 - Fit the Front and Side Panel
Panels should be added at the lower position of the greenhouse. Panel one, along the front of the greenhouse, can cover the first vertical timber, second vertical timber and half of the third timber, with the next panel covering the other half of the third timber as well as vertical timbers four and five.
Some additional vertical spacers will help secure the structure. Then add some small panels along the left and right sides of the greenhouse also. Once more, add some spacers.
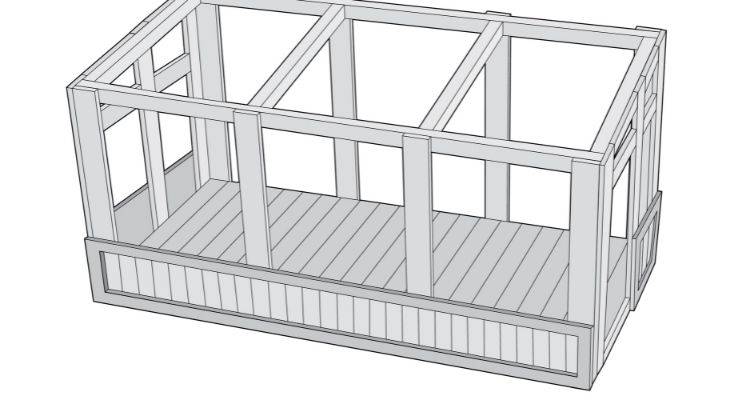
Step 7 - Adding Plastic Covering
Now, you may fit the plastic greenhouse covering, whether that is clear polycarbonate sheets, white polycarbonate greenhouse sheets or cheaper plastic sheeting roll.
You should now have three square openings at the front of the greenhouse with timber outlines. You’ll want to have a mini trough at the bottom of each of these openings so that you can easily slide the plastic (when cut to size) into place.
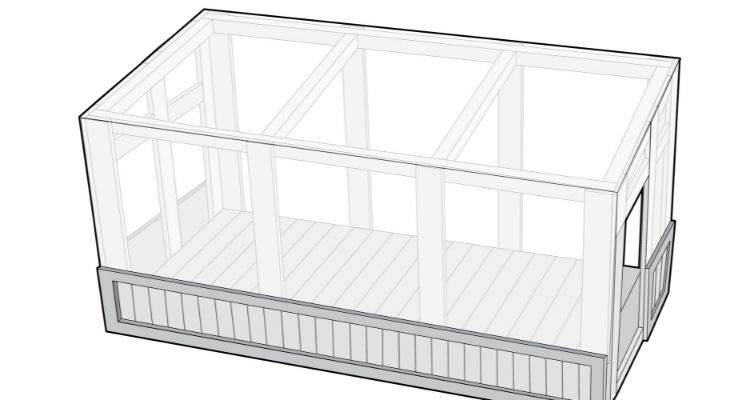
Step 8 - Finalising the Plastic
Remove the excess plastic covering at the top by using a circular saw. Add plastic sheets for the walls over the timber sections. Where the plastic covers the vertical timbers, use roofing screws with washers and gaskets to secure into the timber.
Add the remaining plastic covering to the rest of the greenhouse and cut it to shape and size, before screwing into place. The only spot you don’t want to cover with plastic is the side entrance, where the door is to be added.
Lastly, finish covering the roof and ensure all the plastic covering is attached securely.
Step 9 - Installing the Door
Use four timber pieces to create the door. A horizontal piece of wood should be added to the middle of the door before the lower part is covered with a square section of wood. To prevent sagging, using a braced frame technique (Z-brace) is also recommended.
Then add a plastic covering for the top part, or another sheet of polycarbonate for something more rigid. To fit the door into place, don’t forget to add a hinge and a handle to make it easy to open and close.
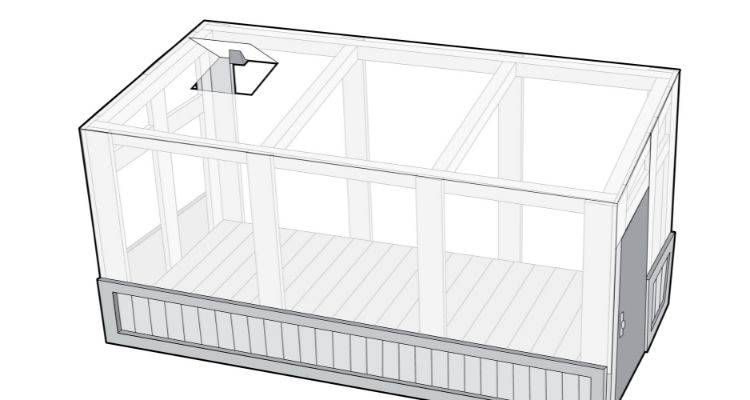
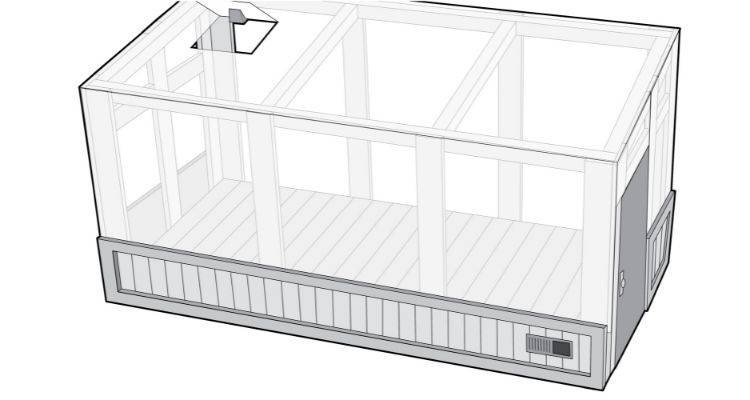
Step 10 - Ventilation
An essential part of building a greenhouse involves adding suitable ventilation. Add two vents on the roof of the greenhouse (one on the left and one on the right).
In order to action, you will need to cut openings in the top panels and add plastic vents that you can open and close easily. Seal the edges with silicone or EPDM tape to prevent leaks.
If you are adding manually operated vents, you can keep them open by adding a hinge or simply by using a piece of wood. Alternatively, automatic vent openers can be installed to help regulate the temperature instead.
Step 11 - Extras
This greenhouse construction does not include a back wall, but you may prefer to add this. Assuming all is well with the construction, you are now free to add plants and other accessories. You may also want to add a greenhouse heater, especially for the winter months.
Types of Greenhouse
Let’s look at some of the different types of greenhouse available. Whether it be fruits, vegetables, or flowers, a greenhouse is a fantastic way to grow crops indoors.
Traditional
The most common option is a standalone greenhouse. This features a full gable or hip roof design. This differs from a lean-to greenhouse which essentially has half of such a roof structure. A traditional greenhouse could be made from timber, metal, or PVC, among other materials.
Lean-to
This type of greenhouse differs from a traditional design as it leans against the house. The roof is basically half of a regular hip or gable roof. Once more, this type of greenhouse may comprise metal, timber, or PVC, or other materials.
Mini
A mini greenhouse is more or less the type discussed in this article (which, of course, is also a lean-to and timber greenhouse at that). It is simply smaller than your average greenhouse and can usually be constructed on a smaller budget than a mid-size greenhouse.
Metallic
Though a wooden greenhouse is cheaper, it’s possible to construct a greenhouse using metallic materials. For instance, the pillars and reinforcements/supports could be made of aluminium, iron, or galvanised steel.
The same materials could be employed for the straps, beams, and arches. Galvanised steel or aluminium may be used for the canals and crop wire too. Several metallic materials may be used for each part of the greenhouse.