my
myHow to Fit Guttering and Down Pipes
Fitting your own guttering and down pipes might be a daunting task, but if you're up for it, it can be done. We have created this step by step guide and explained all the safety equipment, tools and materials you may need so you can try and fit your own guttering without getting hurt.
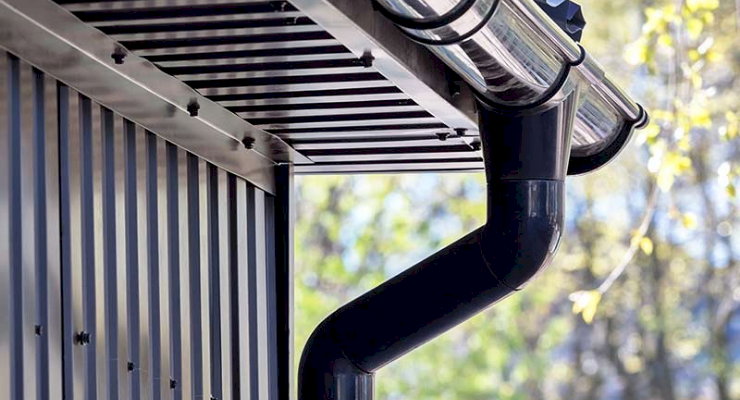
Table of Contents
- What Tools Do I Need to Fit Guttering and Down Pipes?
- What Safety Equipment Do I Need to Fit Guttering and Downpipes?
- What Materials Do I Need to Fit Guttering and Downpipes?
- How to Prepare for Guttering and Downpipes Installation
- How to Fit Guttering and Downpipes - Step by Step Guide
- How to Put Up Gutters
- How to Fit a Downpipe
- FAQs
What Tools Do I Need to Fit Guttering and Down Pipes?
Below is a list of the tools that you will need to install guttering and downpipes successfully:
- Scaffold/ladder
- Pencil
- Hacksaw
- Heavy-duty tape measure
- Spirit level
- Plumb bob and line set
- String
- Combi drill
- Drill bits
What Safety Equipment Do I Need to Fit Guttering and Downpipes?
Below is a list of the recommended safety equipment that you will need for this type of job:
- Protective gloves
- Safety goggles
- Sensible footwear
It is also recommended that you have a second pair of hands to help with lifting any heavy pieces of guttering, as well as having someone available to hold the ladder in place.
What Materials Do I Need to Fit Guttering and Downpipes?
You will need several materials to complete this job. Below is a list of the materials that you will need for installing guttering and downpipes:
- Guttering (including corners, outlets, stop ends, brackets, etc.)
- Downpipe (including sockets, pipe clips, bends, etc.)
- Suitable screws
- Suitable wall plugs
- Lubricant (silicone spray)
How to Prepare for Guttering and Downpipes Installation
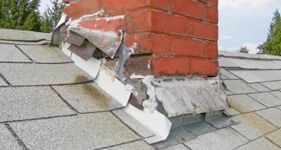
Guttering problems are often caused by lack of maintenance or poor installation, such as not allowing for the correct slope or badly fitted downpipes. Weather damage, natural wear and tear or even vandalism can result in the need to replace guttering and down pipes.
When it comes to preparing for the job, start by creating a plan for your guttering and downpipes so that you know exactly which pieces are needed to go where. Once you've purchased your supplies, ensure you have all the components and parts needed to complete the task successfully.
How to Fit Guttering and Downpipes - Step by Step Guide
Below is a list of steps that you need to take to fit guttering and downpipes. Although this is a DIY guide, you may wish to hire a guttering expert instead:
How to Put Up Gutters
Step 1
Remove and dispose of all of your old guttering. Since some guttering can be quite heavy, you may need help with this step.
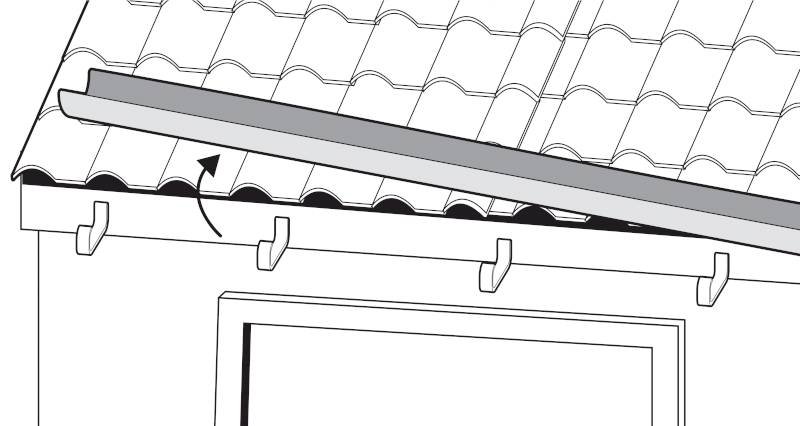
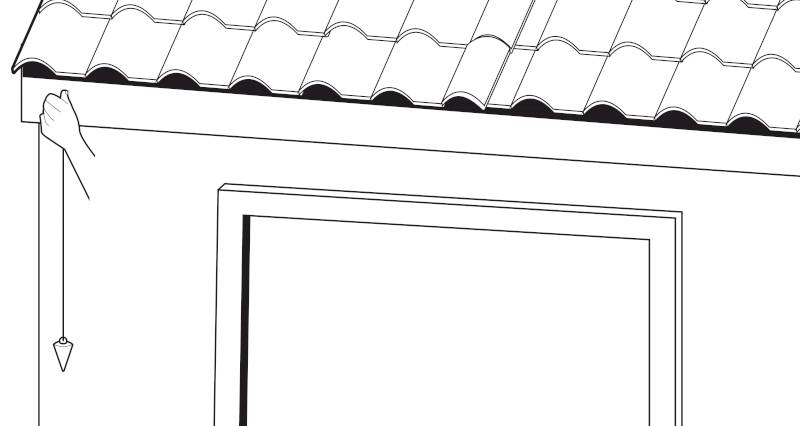
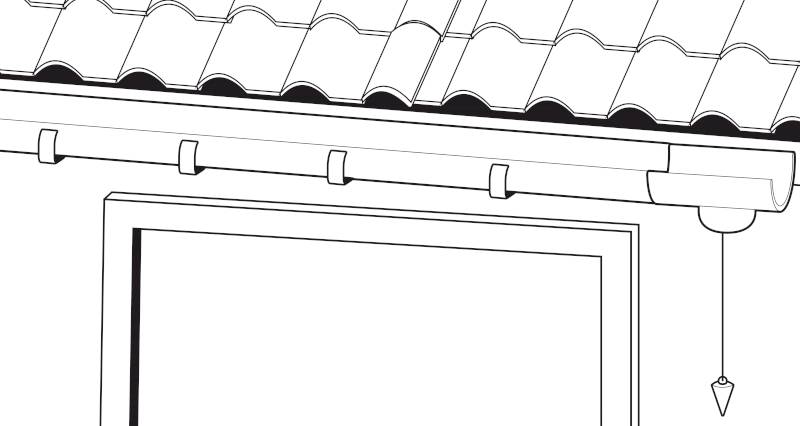
Step 2
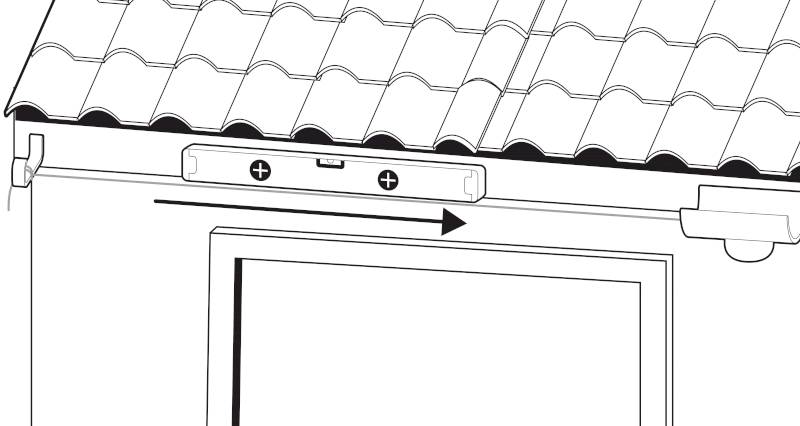
To establish the correct positioning of the running outlet or the stop end outlet, hang a plumb bob from the fascia, so it's directly above the drain.
Step 3
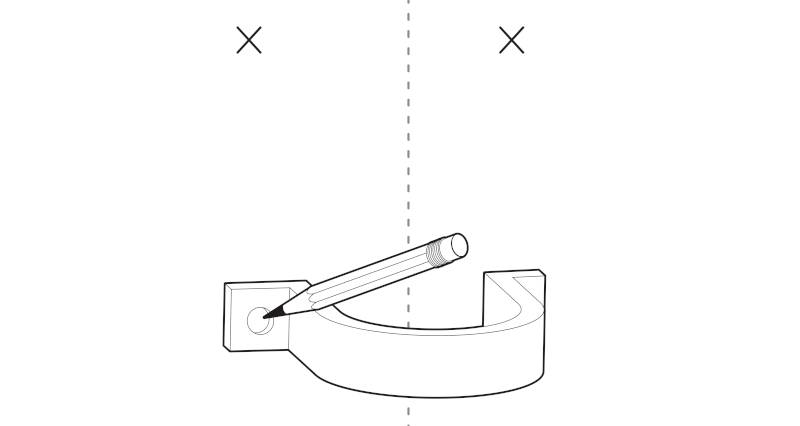
Using a pencil, mark the position of the outlet and its fixing holes on the fascia. Make sure the outlet sits no more than 50mm below the roof, although this may vary slightly depending on the type of fascia and design of your roofing.
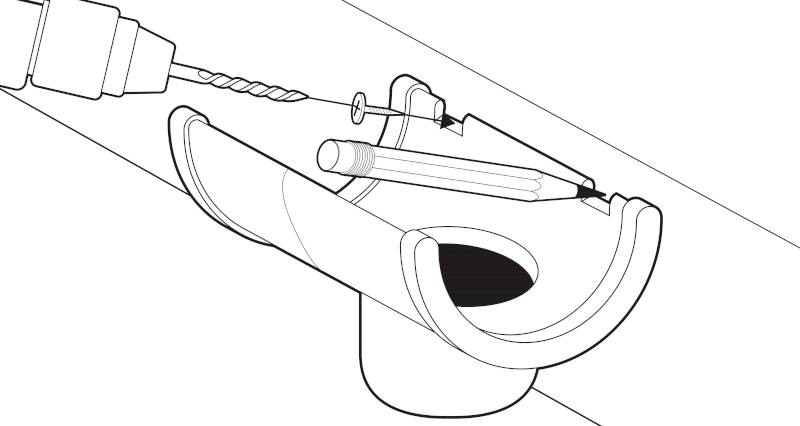
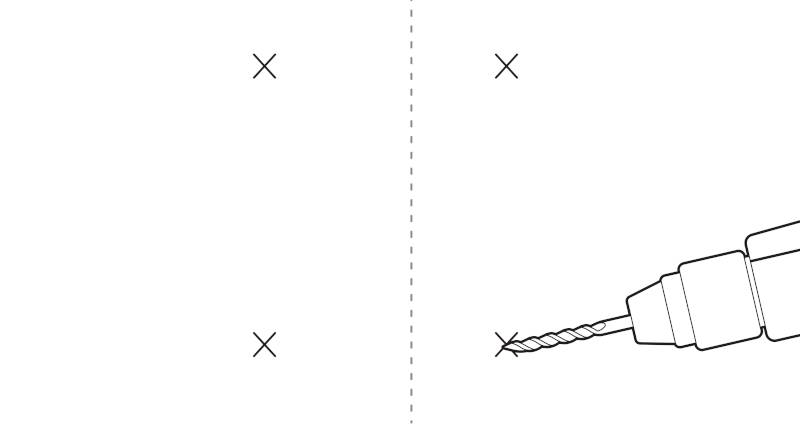
Once marked you can drill pilot holes, before then fitting the outlet. Make sure to use the screws recommended by the manufacturer and take care not to over-tighten when securing.
Step 4
From the opposite end of the fascia to the outlet, measure in 100mm and mark this using your pencil. Then, hold a fascia bracket up to this point and ensure that it is higher than the outlet. The fall to the outlet should be around 2mm to 5mm per metre.
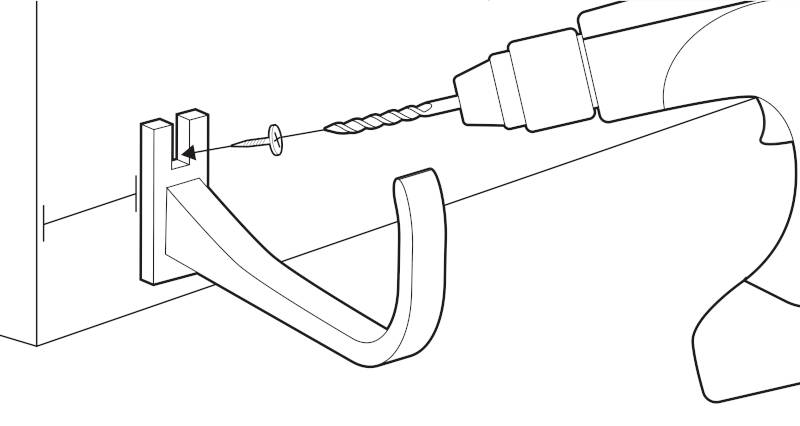
You can then mark the positions of the bracket’s fixing holes before fixing it into position using two screws. If your outlet is located somewhere in the middle of your fascia, repeat this step at both ends.
Step 5
Next, tie a string from the bracket to the outlet and pull it tight. Use a spirit level to check that the string runs slightly downhill from the fascia bracket. This should be roughly 3mm per metre to ensure a steady downward flow.
Step 6
From the fascia bracket, use the string to measure and mark the positions of the remaining brackets. They should be just touching the string to maintain an even fall and should be no more than 1 metre away from each other and no more than 150mm from any angles or stop ends.
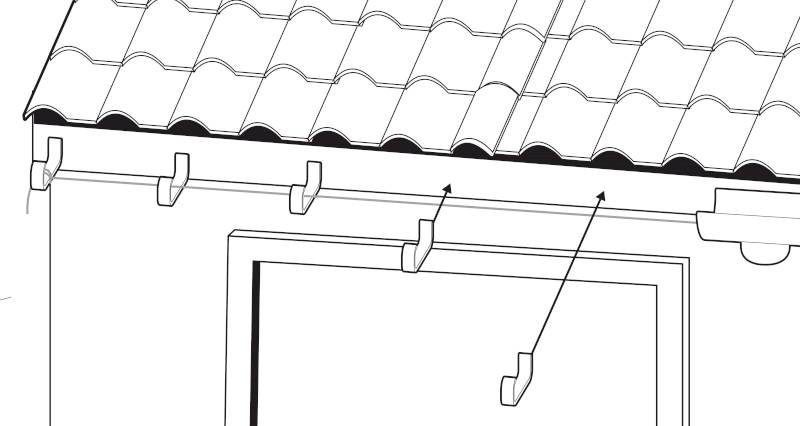
Once the markings are in place, fix the remaining brackets to the fascia under the instructions from the manufacturer and take care not to over-tighten them.
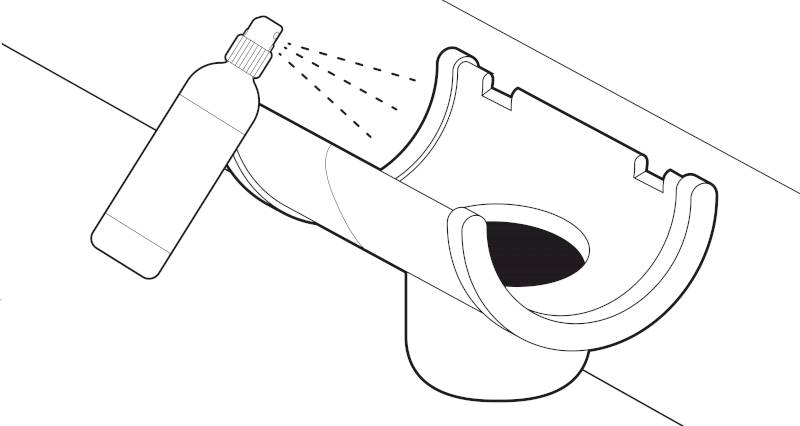
Step 7
Before you fit the guttering, lubricate all of the seals with silicone spray. This will help to make the fitting process easier and will help with expansion and contraction. Repeat this process for all of the gutter seals as you go along.
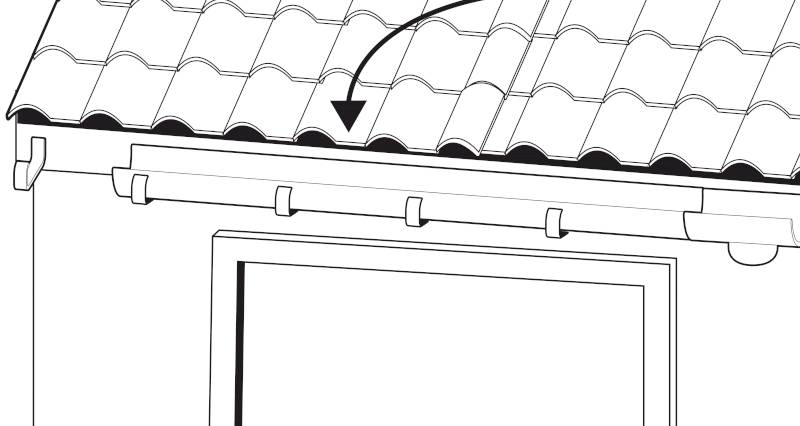
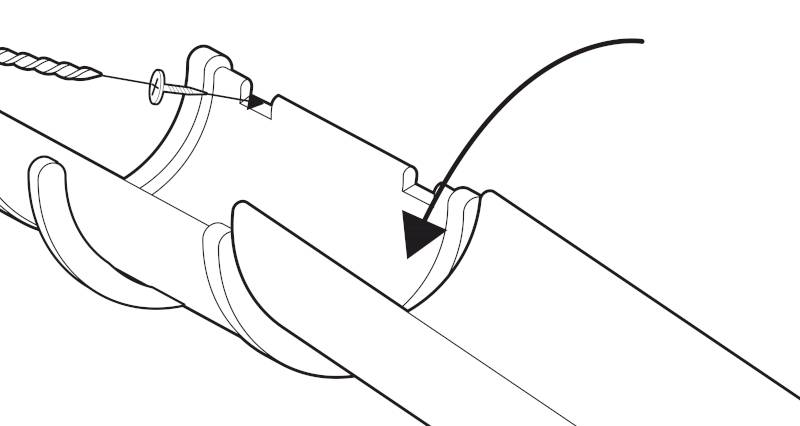
Step 8
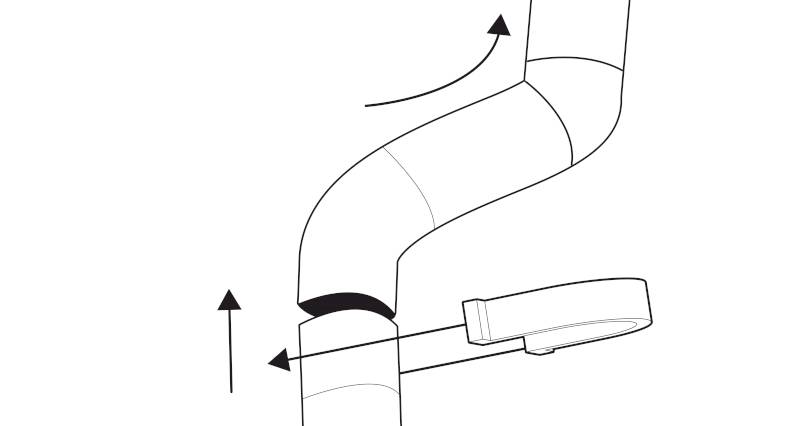
Work from the outlet towards the highest point. Fit the guttering by tilting it so that it sits beneath the back clip. Then, push it down at the front to snap it into the correct positioning.
Step 9
At the end of the first piece of guttering, fit a union bracket by screwing it into the fascia. Be sure to use the screws recommended by the manufacturer.
You can then go on to fit the second section of guttering into the union bracket, being sure that the joints line up with the insertion depth that is marked onto the fittings. Then continue to join all the remaining lengths of gutter in the same way.
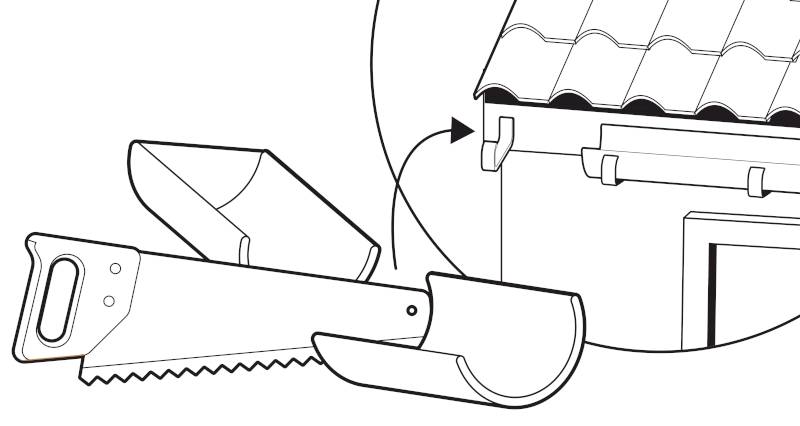
Step 10
On the last section of guttering, measure the length required and then use a hacksaw to cut it to size (if required). Lastly, attach an external stop end to the end to complete the run.
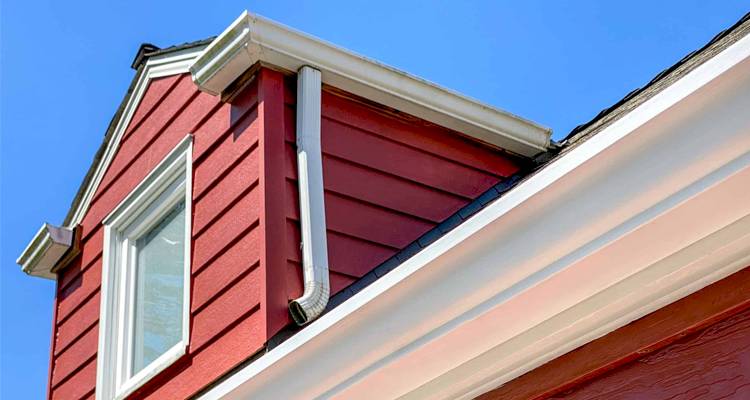
How to Fit a Downpipe
Step 1
Using a plumb bob that hangs from the outlet to the drain as a guideline, draw several marks onto the wall to show where the downpipe will run. Then, use a straight edge to join all of these markings into a vertical line to show where the centre of the downpipe will be.
Step 2
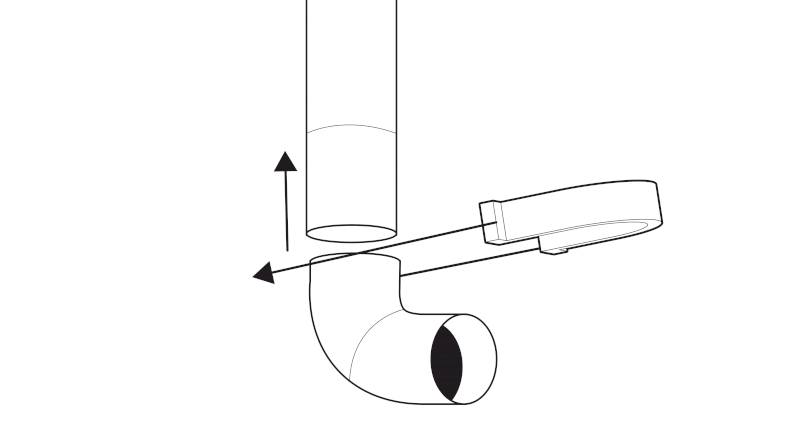
If an offset is required, you can either use an adjustable offset bend or two offset bends with or without a short piece of pipe that clears the fascia. When fitting plastic guttering, ensure there is a 6mm gap left at the top of the downpipe for expansion, although this isn't necessary for metal.
Step 3
Start at the top of the wall and position a downpipe pipe clip centrally over the pencil line that you have drawn. Use your pencil to mark the position of the fixing holes onto the wall.
If offset bends are required, position a downpipe clip directly below the bend. Continue this step down the wall and ensure that the space between each clip never exceeds 1.8 metres.
Step 4
Use a combi drill with the drill bit size recommended by the manufacturer, drill the fixing holes through and then insert appropriate wall plugs.
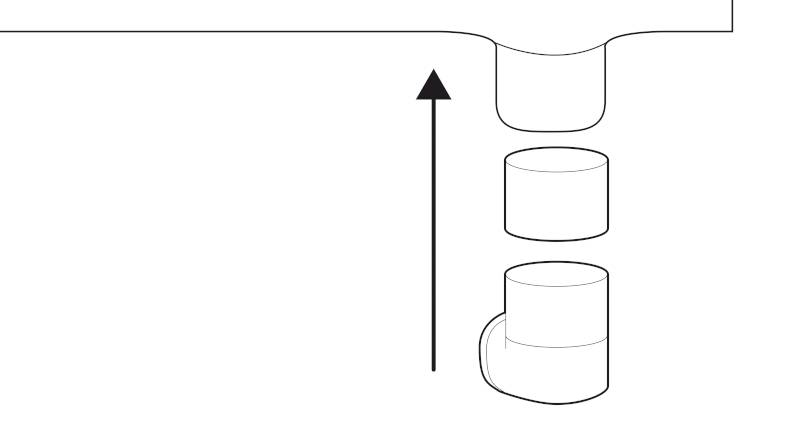
Step 5
Work from the outlet downwards towards the drain and fit the first section of downpipe. If you need to add another piece of downpipe, join the two pieces together with a downpipe pipe socket and clip.
For plastic pipes, leave a 10mm gap between the end of the pipe and the bottom of the socket to allow for expansion. Then, secure a pipe clip over the joint. When it comes to metal guttering and down pipes, refer to manufacturer’s guidelines.
Step 6
Continue to attach the pipe clips down the length of the downpipe.