 my
myBuilding Your Own Decking Area
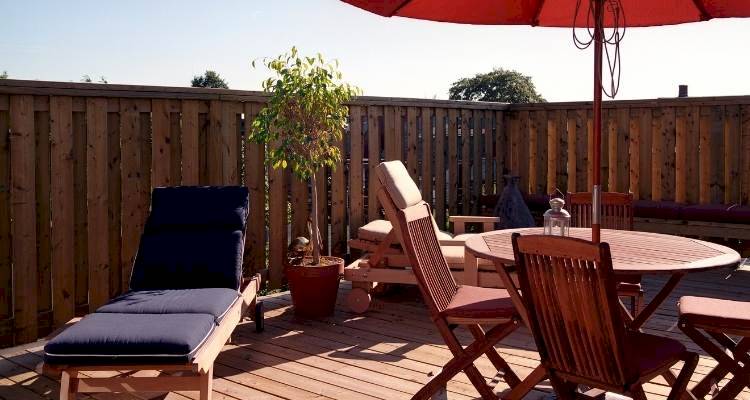
Building a decking area can greatly enhance your back or front garden by providing extra space for entertaining or dining. Decking is usually fitted as a raised platform onto the back of your property and essentially offers a transitional space between the house and the garden. For a full breakdown of costs check out our cost guide to timber decking.
Although today there are a number of decking materials to choose from, wooden decking remains the most popular choice and with many good reasons! Wood has a rustic and natural attractive look that is also strong and durable, requires very little maintenance and comes in a variety of shades and hues that can blend neatly with your existing garden.
Using a traditional hardwood also means it's 100% bio-degradable and ecologically sustainable, so friendly to the environment.
Should You Build a Decking Area Yourself?
Installing a decking area yourself might seem like a good idea, but do you have the right tools or the right skills to get the professional finish you deserve? Have you asked for a local quote from a decking specialist? If the answer is yes then go right ahead and build your decking.
If you are not skilled in the art of woodworking (a carpenter) or you don't have the required tools, you'll find it cheaper to hire a professional. With the average decking taking around 1 to 2 days and at a cost of £150 to £200 a day in labour, it's worth hiring a professional to get the job done right.
Planning your deck area
Planning is really important for any decking project, so before doing anything else, make a rough sketch of your design and once you have decided on the shape and size of your deck, draw a scale plan to include house walls, soakaways, air bricks, manhole covers, door openings and any trees, pipes or other obstacles. This is why we always recommend hiring a professional to install your decking for you.
Remember that the top level of the deck on your house wall must be at least 150mm below the damp proof course to comply with Building Regulations and ensure the deck does not block any air bricks.
You can now use your scale plan to calculate the area of your deck in square metres, simply divide the area of your deck by the area covered by one pack of decking to see how many packs you need to buy.
You also need to work out how many posts and rails you need, this should be detailed on the decking product, but you can always ask in store for assistance and bring your deck plan with you when purchasing decking.
Tools for Building a Decking Area
He is a list of the tools that you will need in order to build your decking area successfully:
- Quality Wood Saw
- Tape Measure
- Spirit Level (not the app on your phone)
- Power Drill
- Pencil
- Shovel
- T-Square
- Screws
- Decking posts
- Decking Boards
The cost of buying the right tools and being able to use them is why we always recommend hiring a professional to do the job for you.
Preparing the ground
Installing a decking area isn't just throwing some planks down on the ground and walking on them. You will need to prepare your ground correctly if you want to have any chance of the decking lasting longer than one summer.
Set out the deck perimeter using pegs and string then clear all turf and vegetation from the area and firm down the ground. Then lay a deck fabric and peg it or weigh it down with slabs to prevent weeds growing through the deck.
The framework for your deck should be laid onto concrete foundations or concrete paving slabs arranged in a grid pattern to support the timber joists. Take care to ensure the deck slopes away from the house by using a spirit level (10mm drop for every metre of decking).
Note that if you have poor drainage or bad soil conditions, the decking joists need to be supported on concrete bases which are 300mm square and 300mm deep covered with bitumen DPC membrane.
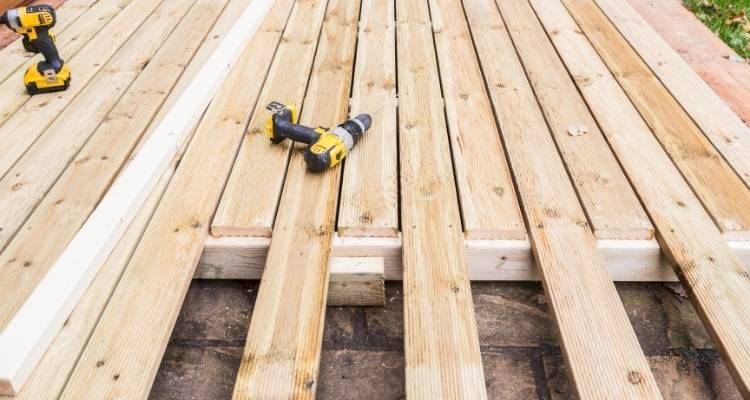
Building the framework
The outer frame should be formed with 150mm x 50mm joists on top of levelled concrete or slabs. These joists should be fixed together with 100mm rustproof screws and if attached the to wall of your house the first joist should be screwed into the wall using stainless steel washers to leave a gap of at least 10mm.
The outer framework joists can be added and spaced out at 400mm intervals then screwed to the outer frame at right angles to the finished deck boards, with any cuts and drill holes in the wood treated with a timber preservative.
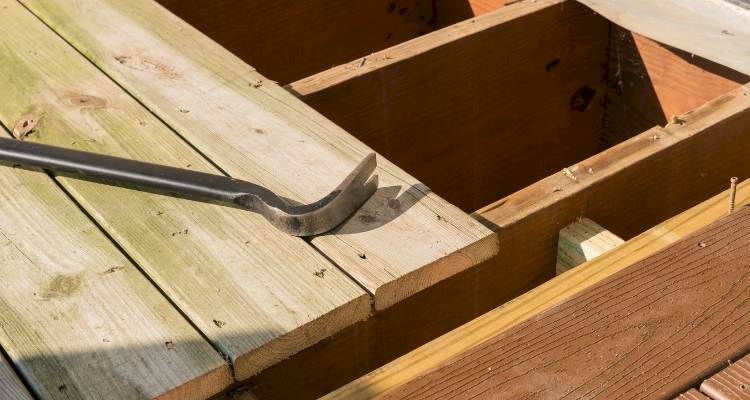
Fixing the deck boards
Once all the frame joists are in place lay the deck boards starting from next to the house and leaving spaces between boards of 5mm for ventilation and expansion in wet weather. Always use stainless steel or galvanised screws to prevent rust stains and pre-drill all screw holes to prevent splitting the wood.
If the deck is wider than the length of deck board, you'll need to stagger the boards and join them over a joist. Deck boards are pressure-treated with a preservative treatment that will last for many years, but the colour can fade after just a few months.
Many like to let the deck age naturally, but you can treat the decking with a penetrating oil that soaks into the wood in a choice of timber shades that can be brushed or sprayed onto the boards. There is very little maintenance required, but once a year, check and repair any loose boards and wash with a deck cleaning solution then re-treat the deck with deck oil on all the exposed surfaces.
Adding Lights to your Decking
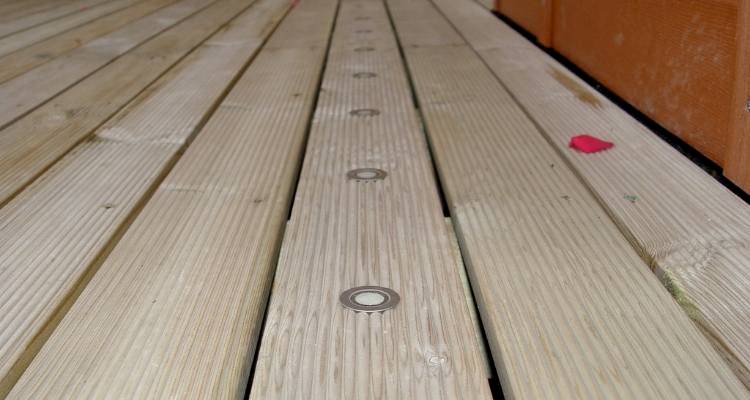
Choosing to add lighting to your decking can really finish it off and give it the professional look that you want in your garden. Adding the right lighting to your decking will also create the perfect mood and mean that you can even enjoy the decking area in the winter when you have your winter BBQ.
To add lighting to your garden, you will need to hire an electrician to install the cabling for you before you lay the decking boards over the frame. This can be done retrospectively, but is best done before your decking is finished, as lifting the boards can damage them and can be harder to get the required gap when relaying the deck boards.
Last updated by MyJobQuote on 14th March 2022.