 my
myHow to Lay Laminate Flooring: A Step-by-Step Guide
Laying laminate flooring is a fantastic way to give your home a fresh, modern look without breaking the bank. Whether you're a seasoned DIY enthusiast or a complete novice, this guide will walk you through the process step-by-step. By the end, you'll have a beautiful new floor that you can be proud of.
Tools You'll Need
- Measuring Tape: For accurate measurements.
- Utility Knife: To cut underlayment and trim.
- Laminate Cutter or Saw: For cutting the laminate planks.
- Spacers: To maintain expansion gaps.
- Rubber Mallet: To tap planks into place.
- Tapping Block: To protect the edges of the planks while tapping.
- Pull Bar: For fitting planks in tight spaces.
- Underlayment: To provide a smooth surface and sound barrier.
- Moisture Barrier: If installing over concrete.
- Pencil: For marking cuts.
- Safety Gear: Gloves and safety glasses.
Step-by-Step Guide
1. Prepare the Subfloor
Ensure the subfloor is clean, dry, and level. Remove any old flooring, nails, or debris. If you're installing over concrete, lay down a moisture barrier first.
2. Lay the Underlayment
Roll out the underlayment across the entire floor, making sure to cover all areas. Trim any excess with a utility knife. The underlayment will provide a smooth surface and help with sound insulation.
3. Plan Your Layout
Measure the room and plan the layout of your laminate planks. It's best to start along the longest wall and work your way across the room. Make sure to stagger the seams for a more natural look.
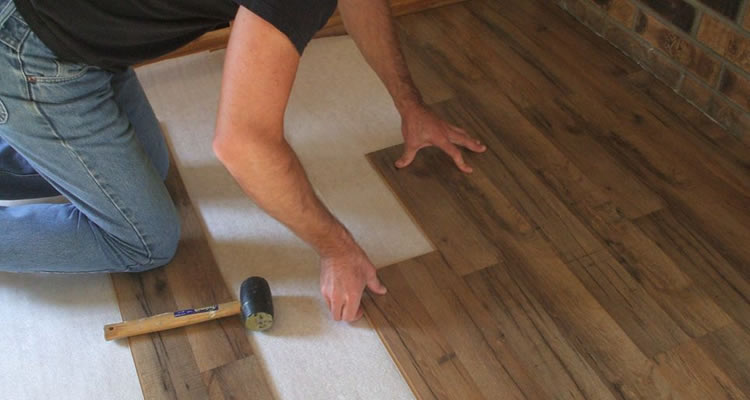
4. Install the First Row
Place spacers along the wall to maintain an expansion gap. Lay the first plank with the tongue side facing the wall. Continue laying planks end-to-end, using the tapping block and rubber mallet to secure them together.
5. Continue Laying Planks
Start the second row with a shorter plank to stagger the seams. Use the pull bar to fit planks in tight spaces. Continue this process until the entire floor is covered.
6. Cut Planks to Fit
Measure and cut planks to fit around obstacles and at the end of rows. Use a laminate cutter or saw for precise cuts. Remember to leave an expansion gap around the edges.
7. Install the Last Row
The last row may need to be cut lengthwise to fit. Use the pull bar to secure the planks in place. Remove the spacers and install trim or moulding to cover the expansion gaps.
Additional Tips
- Acclimate the Planks: Let the laminate planks sit in the room for 48 hours before installation to acclimate to the room temperature and humidity.
- Check for Defects: Inspect each plank for defects before installation.
- Use a Jigsaw: For intricate cuts around door frames and other obstacles.
- Work in Small Sections: This makes it easier to manage and ensures a more precise fit.
Common Mistakes to Avoid
- Skipping the Underlayment: This can lead to an uneven floor and increased noise.
- Not Leaving Expansion Gaps: Laminate needs room to expand and contract with temperature changes.
- Incorrect Measurements: Always double-check your measurements before cutting.
- Forgetting to Stagger Seams: This can make the floor look unnatural and less stable.
Conclusion
Laying laminate flooring can be a rewarding DIY project that transforms the look of your home. By following this step-by-step guide and taking your time, you can achieve professional-looking results. Remember to gather all the necessary tools, plan your layout carefully, and take care with each step. Happy flooring!