my
myHow to Build a Bird Box in Your Garden
Building a bird box, or nest box, is a fantastic way to create a bird nesting habitat from the convenience of your own garden or back yard. A bird box can be as complex or simple as you want to be, and most commonly, a bird box is exactly that! A box, with a hole large enough for birds to enter and exit.
It's also a great way for bird watching enthusiasts and amateurs to entice more breeds of birds to their garden and get a closer look at them. They're also great for kids to learn more about birds and where they live.
We're going to give you the complete guide to bird boxes – how to build them, where to place them, how to watch them and a whole heap of other bird box advice!
Bird Box Options
There are many options for you to consider before deciding on which type of bird box you want to build, have a read through the different types of nest box below and what each box is suited to.
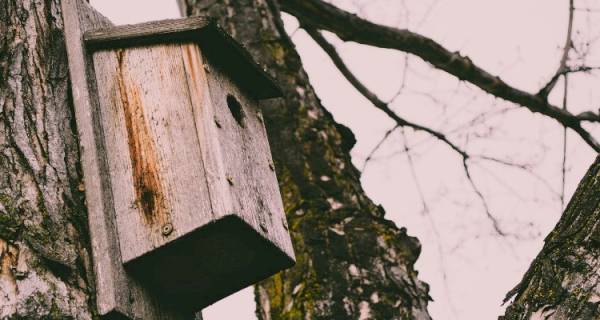
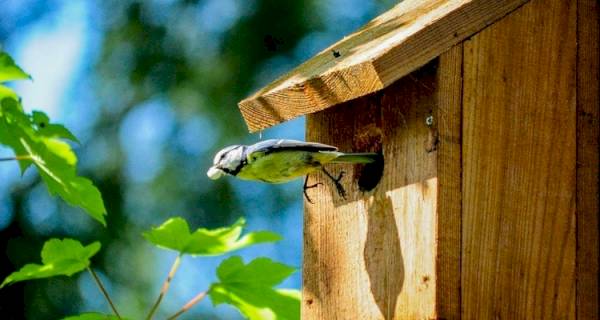
The majority of bird boxes are square, with a sloped roof and have a small hole in the front, as you can see in the pictures below. These boxes are usually around 250mm tall, 250mm wide and 300mm deep. These dimensions will provide a good amount of space for your birds to lay eggs comfortably and safely.
Of course, there are variations of these boxes, depending on how you want yours to look. Some people prefer miniature house-like boxes, and some prefer more subtle and basic designs. It won't matter to the birds what the box looks like, but the hole size on the bird box will decide on what breeds of bird you will attract. Later on, we'll show you a table of which size hole you'll need for which bird.
So, depending on what bird you want to attract into your new bird box when you build the nesting box, make sure your hole is big enough for them.
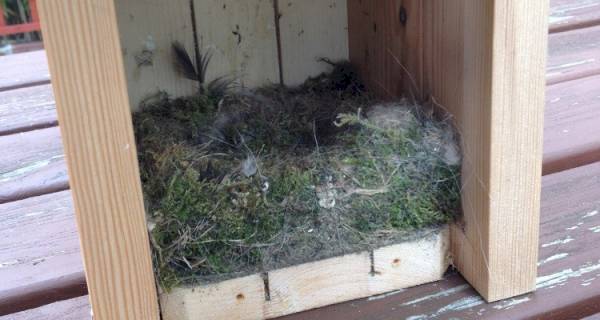
If it's a Robin you want to attract to your nest box, then you'll need another box entirely. Robins, Wrens, Blackbirds and Song Thrushes need an open-faced box like the one below. This is because they like to nest in dense undergrowth, and this allows them this habitat.

Swift's need another box entirely as they love a high, deep home to nestle in. Traditionally, Swifts could be found in the crevices of old homes and buildings, but due to the decreasing amount of those around, Swift's have been declining in numbers too.
To give Swift's their own home, make the box bigger and completely closed off, apart from a small section in the bottom corner.
Bigger species of birds like Kestrel's need even bigger homes still, they need a big open-faced box similar to a box fit for the Robin, but a Kestrel will need a beam to perch itself on proudly. Kestrels truly are majestic sights to behold, and if you have the luxury of living in the countryside, you may be lucky enough to have one grace a next box you've built.
Bird tables, birdbaths and bird feeders are another great way to get more wildlife visiting your garden. Tables are even easier to build than boxes and will attract any bird in the area for the occasional swoop. If you leave out some birdseed, you'll be in with a better chance, and we'll go over more details about bird feeding later on in this guide!
So, we've been over what type of size you need your nest box and holes to be, and what type of bird they may attract. But, let's look at what birds may visit your habitat. Here's a table outlining what birds may pay you a visit.
| Bird | Season | Location | Hole Size | Rarity |
| Robin | Year Round | All Areas | Open-Fronted | Common |
| Great and Coal Tit | Year Round | All Areas | 25mm | Common |
| Goldfinch | Year Round | Parks, Orchards & anywhere with an abundance of trees and greenery | 38mm | Less Common |
| Chaffinch | Year Round | All Areas | 28mm | Common |
| Tree Sparrow | Year Round | Midlands & Southern UK | 28mm | Fairly Rare |
| Marsh Tit | Year Round | Woodlands | 28mm | Less Common |
| Pied Flycatcher | April to October | Northern England and Wales in Mature Woodlands | 32mm | Fairly Rare |
| Nuthatch | Year Round | All Areas | 32mm | Common |
| Starling | Year Round | All Areas | 45mm | Common |
| Wren | Year Round | All Areas | Open Face | Common |
| Blackbird | Year Round | All Areas | Open Face | Common |
| Song Thrush | Year Round | All Areas | Open Face | Common |
| Kestrel | Year Round | All Areas | Large Open-Face | Less Common |
| Swift | Summer | All Areas | 80mm | Common |
| Hawfinch | Winter | Small Patches of Southern England | 32mm | Rare |
| Lesser Redpoll | Year Round in Northern UK and Winter in Southern England | All Areas | 25mm | Rare |
Different types of birds can be seen in different areas, as the table above illustrates. To attract those rarer breeds of bird, you'll be almost entirely reliant on luck providing your bird box is correctly built. Now, you may encounter some birds different to the list above over the years as different migration and weather patterns change over time, but the table above is a great guide to what you may encounter in your new bird sanctuary.
How to Build Your Own Bird Box
So, you've researched the type of birds you'd like to see gracing your garden, and now you need to build the nest box itself. We're going to show you how to build the most used bird box which will be suited to the majority of birds and will be a good base for when you come to build different style boxes in the future.
Firstly, we're going to break down what tools, materials and safety equipment you're going to need for this project.
As always, safety first! So, ensure you have a robust and tidy workspace to build your bird box and make sure you have all the room you need. Next, make sure you have safety goggles for when you're sawing and some protective gloves to avoid any accidents!
Tool-wise, you're going to need the following:
- Nails – Standard wood nails are perfect
- Drill
- Hammer
- Pencil
- Flat Wood Bit either 25mm, 28mm, 32mm, 45mm – This will be for making the entrance hole, so make sure you select the right size!
- Tape Measure
- Rubber Strip
- Builders Square
- Handsaw or Mitre Saw (depending on what you have available)
- Thin Drill Bit
For materials, you'll just need one long plank of either Oak, Beech or the cheaper Plywood, measuring 180mm wide, 15mm thick and 1,580mm long. The cost of the wood will vary depending on the quality you decide upon. Plywood will cost around £15 for the plank whereas Oak is a little more costly but durable. The tools required aren't very specialist and if you don't already have them, try and ask around to see if friends or family can lend you theirs. If not, DIY stores will have them in stock at budget prices due to how common they are.
Of course, as we mentioned earlier, the customisation elements are pretty much endless when building a bird box. So, if you want to paint it a different colour or buy little tiles for the roof, you are completely free to do so!
So, you've got your tools, materials and safety equipment. Now all that's left is to build the box. Here's our 10-step guide to building a bird box:
Step 1
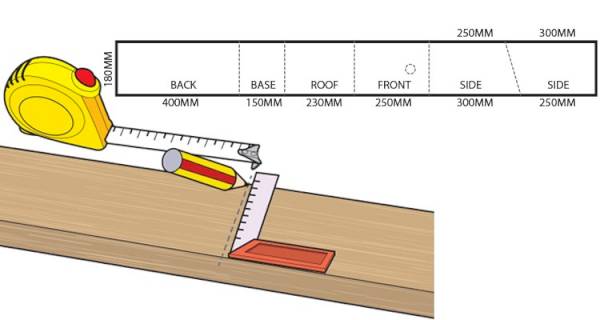
Start by using your pencil, tape measure and building square to section off your plank of timber like the diagram shown below. Make sure you label each section clearly.
Step 2
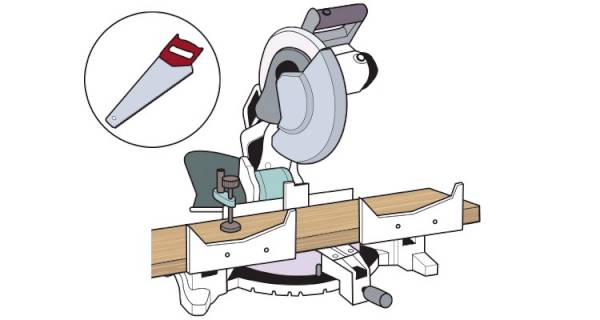
The next step is to use your Mitre saw or handsaw to cut out each section. Do your best to keep your cutting as neat as possible.
Step 3
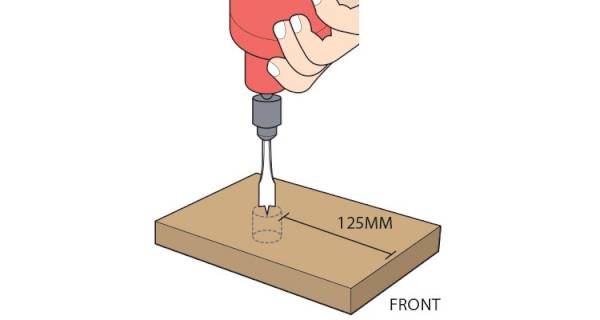
On the section marked ‘Front', use your flat wood bit to drill out the entrance hole. Make sure this is at least 125mm from the bottom. Another key point here is to leave the edges rough, this will help future baby birds get out.
Step 4

On the section marked ‘Base', drill some small holes into the section which will act as drainage holes for any rainwater.
Step 5
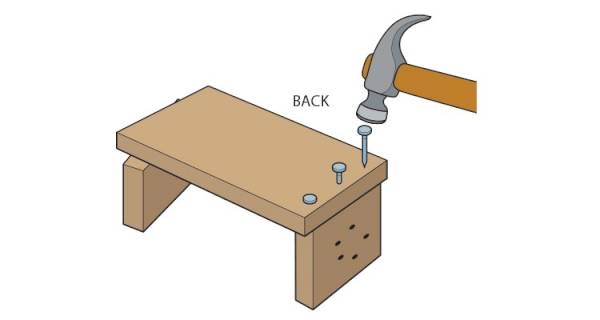
Using other sections as support, nail the ‘Back' section to the ‘Base' section, using the hammer and wood nails. Use as many nails as you need to ensure sturdiness leave about 1-2cm between nails.
Step 6
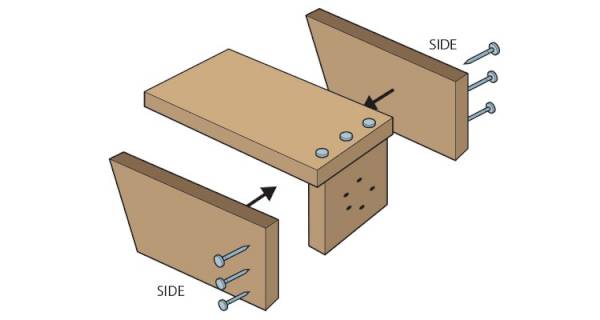
Now attach the ‘Sides' to the ‘Back' in the same way.
Step 7
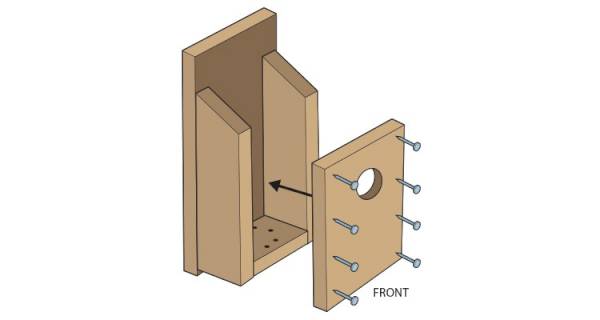
Now attach the ‘Base', followed by the ‘Front' section.
Step 8
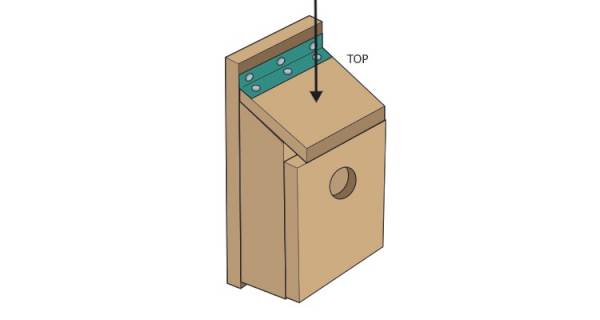
Again, using the hammer and nails, attach the rubber strip to the roof section and then secure this to the top of the ‘Back' section on your nearly complete bird box.
Step 9
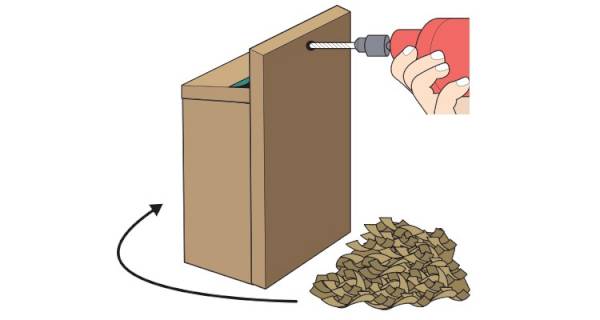
Drill a hole through the top of the ‘Back' section to be used later for installing the box outside. At this stage, you can add some bedding to the box if you wish in the form of wood shavings.
Step 10
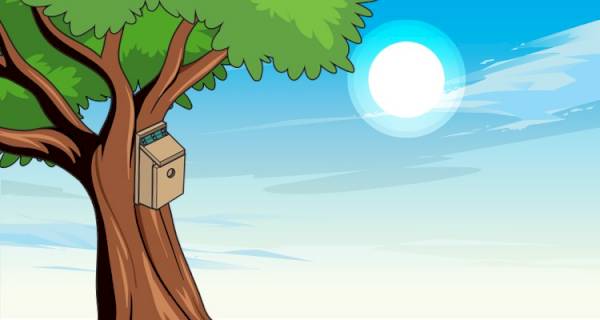
With your bird box built, you can now install it outside by screwing it to any tree or structure out of direct sunlight and at least 2.5m from the ground.
Bird Box Variations and Placements
The 10-step guide above is for a standard bird box, but that guide can be adapted for other bird boxes. For example, if you wanted an open-faced bird box for a Robin or a Wren, you could follow the same guide but remove a section of the ‘Front' section.
Building bird boxes are a great way of getting to grips with DIY and once you're confident enough, you'll be creating your way to build the perfect nesting box.
A pretty general rule for bird box placement is described in the 10-step guide. However, there are some other things to consider. Above all, your bird box should be a place for wildlife to live in safety and comfort, so ensure that any cats or other predators can't easily gain access. Birds also don't like houses that are too exposed, so do your best to keep them in trees or close to bushes to provide some cover.
A really important point is to keep the box away from direct sunlight, especially when there are eggs in the box, you want to keep the nest nice and cool. A good rule here is to install the box facing south.
You can put up your bird box any time of the year, especially if you're aiming to attract a species that is active all year round. However, early Autumn or Winter are the best times to install a bird box. This is because some birds will start looking for places to nest as early as January, and they will first want to investigate potential homes in the months before. The Great and Blue Tits will often spend more than a month investigating a single site before committing to it.
Putting up your bird box in time for the winter will also provide the birds with a warm, safe place to see out the harsh weather safely and comfortably. If you keep an eye out at dusk, you may just see the odd appearance of a Tit or Wren hunkering down for the night inside your bird box.
Bird Watching
Once you have your new nesting box in place, it's time to start reaping the benefits from your project. Of course, birds won't appear instantly, but over time your box will grow in popularity and will soon be lavished with birds of all colours, sizes and kinds. The first tip we can give you is to be patient. Spend time sitting inside by a window with clear sight to your box, or if you leave a good amount of distance between you and the box, you can sit outside.
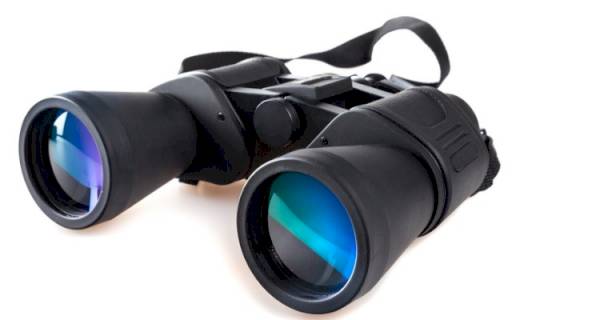
For birds to visit your nest box, they must feel safe to do so, meaning it's incredibly important to avoid visiting the box repeatedly and allow it to become part of nature. A pair of binoculars will be a great tool to have at your disposal, especially for appreciating the beauty of those smaller birds as they begin to investigate your new habitat. Binoculars will also help you distinguish what birds are visiting and, with that in mind, it's a good idea to keep a notebook and a book of British birds for identifying who your visitors are and how rare they are to come by. You can pick up a great pair of binoculars for around the £20 mark which will more than do the job for use in your garden or you can spend a little more for even better visibility.
A notebook of your observations is a great way of keeping records of what birds visited during which times of the year, what type of feed they ate and much more useful information. You can also upload your observations to bird charities to help them learn more about the movements of birds and track their numbers. You can get hold of a pocketbook detailing all the different birds in Britain with detailed information from a wide variety of suppliers for under £10.
You may read or hear about people installing bird box cameras into the nests to keep a better record or see the birds in their natural state. Basically, the camera is installed on the inside of the box, with a power cable and/or AV cable trailing from the camera to a power source and/or video source. As with most things, bird box cameras can be as cheap or as expensive as you want them to be, with prices ranging from £20 for a wired camera through to £220 for a Wi-Fi enabled camera with a recording device. Below is a quick guide to the different types of camera and their benefits to help you make a decision on whether they are right for you.
- Wired Bird Box Camera – £20-£60.
A wired camera is the cheapest option and is a great way to try out a bird box camera before committing to a higher-priced and featured model. The price will depend on the camera quality, with Full HD picture priced in the top end. Every camera needs a power cable trailing from the back of the box to a shed or outside power socket, but a wired camera will also need a cable trailing to the back of a television.
- Wireless Bird Box Camera – From £60+.
The wireless camera will give you one less problem in regard to an AV cable, which is replaced with a small receiver box with an antenna. This receiver box will allow you to pick up the video signal within a certain distance, usually around 25-30m, without the need for any cables. There are still some drawbacks as you'll still need a power cable and any obstructions in your garden such as trees or walls will disrupt the video signal.
- Wi-Fi Bird Box Camera – From £130+.
The most expensive bird box camera currently on the market is a Wi-Fi camera. With this camera, all you require is a power cable, and the camera is connected to your home Wi-Fi network where you can use an app to view the live video. Of course, if you have a large garden and your Wi-Fi signal doesn't reach your bird box, you will have no connectivity, and you would have to explore options to extend your Wi-Fi signal further. But if you have a good connection in your garden, this is by far the easiest way to monitor birds inside your bird box.
There are many cameras on the market from various different suppliers, and a lot of them also offer upgrades and extra technology to increase your monitoring efforts even more. You can run a wire from your bird box to a digital recording device, for example, that way you can keep video of hatchings and nesting's forever, something which is very popular in the bird watching community.
Why Are Birds Not Visiting My Box?
Firstly, consider what type of box you have. If you're disappointed to not see any Starlings, think about whether your box is suitable for a starling. However, if you're not seeing any activity at all, there are some steps you can take to entice more birds into your new habitat.
To start with put some bird feeders and food around the area of your bird box. Again, different birds will eat different feed which we will elaborate on a little further on in this guide, but the addition of food can be incredibly effective in increasing activity.
As we mentioned earlier, the bird box and its location are extremely important. For example, a Robin will only use an open-faced box, not one with a hole in it, so if you want to see more Robin's, change up your design. Similarly, birds like cover and protection, so if you're lacking shrubbery and trees around your box, adding some of that could be a great asset. Remembering to keep it out of direct sunlight and at an ample height for the birds you're trying to attract.
Think about the time of year you're in and when you installed the box. There's never a bad time to install a bird box, but if you're starting in the Springtime, a lot of birds have already found their nesting place, and you may just need to be patient and wait for them to re-emerge and begin to look for pastures new.
Cleaning and Emptying Your Bird Box
It is recommended that you clean your bird box once birds have stopped using it in September for necessary repairs and for the removal of unhatched or abandoned eggs. You should bear in mind that legally you are only allowed to do this between September and January (August-January in Scotland).
It's extremely important to thoroughly clean the nest box after the birds have vacated to rid the box of parasites and fleas lying in wait for the next intake of hatchlings. These parasites can cause these hatchlings many problems most likely resulting in disease and death. Of course, there may also be the remains of dead birds and eggs in the box too, so it must be removed and cleaned correctly.
Here's our 4-step guide to cleaning a bird box
Step 1
If your box has a liftable lid, like the box we explained how to build earlier in the guide, simply lift that. If not, use a small screwdriver to remove the roof or the front, whichever is easiest.
Step 2
Empty and dispose of the contents. Don't be alarmed if you find some small carcasses or similar. It's very common for some baby birds to die immediately after hatching.
Step 3
Using hot water only, wipe and scrub away at the box until it's completely clean. Do not under any circumstance use any pesticides or flea treatments due to their toxicity.
Step 4
Allow the box to dry completely and then reassemble and reinstall as necessary, ready for the next birds to use.
Protecting Birds and Wildlife in Your Area
Installing a well-maintained and built bird box is a wonderful way to have a positive impact on the birds in your area. However, there are steps you can take to help them in other ways and in general. Here are a few ways in which you can do just that.
- Cats – Cats are household pets and don't need to hunt for their food, yet their instincts tell them to hunt birds and other small wildlife. Some people consider a small bell on a cat's collar to be an adequate compromise, but in truth, it does little to protect a family of birds inside a birdhouse. So, by keeping cats indoors, the local wildlife will be a lot safer.
- Windows – This may sound like a silly one, but windows can mirror the outdoors and can result in birds flying into them at high speed and killing them. By hanging things on your windows like decals, suncatchers etc, you can avoid this problem pretty easily.
- Feed – Feeding birds doesn't have to be done in the form of a box, table or even feeder. Birds are foragers after all, and some loose seed strewn across your grass or yard will be quickly found by the birds in your area.
- Plastic Bags and Other Plastic – This is a fairly well-documented problem with wildlife, but many plastics that are disposed of incorrectly turn out to be great problems for birds and wildlife. Help combat this by cutting up these plastics with scissors before disposing of them in your bin. That way, if any do blow away, they will be harmless.
Bird Feeding Guide
When laying down feed for birds to eat, it's important to know what is and isn't safe for them to be eating. For example, some cheaper feeds include beans or split peas which are only safe to be eaten dry by bigger species of birds, not small ones that are likely to be visiting your habitat.
Small seeds, like millet, will attract house sparrows, finches, dunnocks, and collared doves. Flaked maize always proves popular with blackbirds. For tits and greenfinch, you'll want a mix with sunflower seeds and peanuts. A good general feed is pinhead oatmeal which will be eaten by all birds, regardless of size.

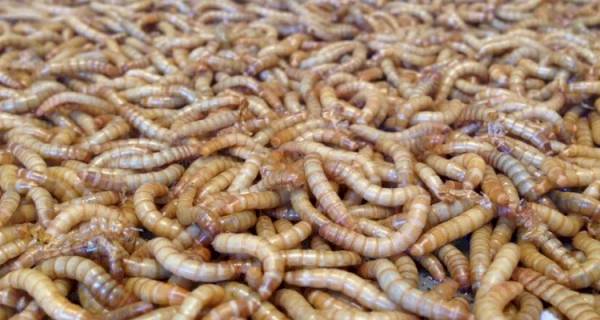
Black sunflower seeds are a great feed for birds due to their high oil content, and the same goes for Nyjer seeds which also contain a high oil and fat content, providing birds with much-needed energy. Bear in mind to always use natural seeds and nuts and never roasted or salted due to the toxic nature of salt. If you really want to give your birds a good meal, mealworms will prove very popular with pied wagtails and robins, but mealworms are significantly more expensive than dry seeds or nuts.
You can also make DIY feeders and feed cakes. For this you can use half a coconut shell or something similar, mixing things like suet with seeds and nuts and stuffing the shell with it. You can then hang this off a tree of the fence and let birds eat it from there. Be wary though, these things can rot quite quickly in the summer and give off a rancid smell.
The price of bird feed rarely fluctuates, seeds and peanuts will cost around £13-£15 per 4kg, which is a lot of good feed from a reputable supplier. Dried mealworms will cost around £22 per kg, and live ones will cost a little less at around £20 per kg.
A good practice is to always buy from reputable stores that specialise in bird feed and have a good knowledge of birds.
FAQs
Q: Should I put any nesting in my bird box?
A: It's not usually a good idea to add anything into the bird box as the birds will most likely remove it anyway, in favour of what they have collected. Birds know their preferred habitat more than anyone and are experts in finding the right material they need.
Q: Can I watch my bird box on my phone?
A: Yes! More expensive cameras often come with apps included that will allow you to check in on your flying friends any time. Whether it's from your office or from your bed. The additional features for cameras are quite advanced nowadays.
Q: Can I have multiple bird boxes close together?
A: Homing multiple bird boxes in your garden is great but be wary how close together they are. Too much activity or disturbance can cause some birds to abandon their nest. It's also important to ensure the boxes don't face each other, which can confuse the birds as to which house is theirs. Different species of birds can also be quite territorial, so will not appreciate being close to another colony. To be safe, avoid boxes facing one another and keep them well apart.
Q: Can I put indoor lights in my box, so the camera is clearer?
A: You can buy a bird box camera that illuminates during the day to improve the camera visibility; however, it has a sensor that will switch it off during the night to not disturb the nesting birds.
Q: If I'm worried about a bird's welfare, can I call anyone?
A: Yes, you can call the RSPCA for any genuine welfare concerns via their website rspca.org.uk.